All posts by anarchyjim

Photoshop’s Generative Fill Isn’t Great, But It Works Well at Fixing Other GenAI Images

One problem with generative AI is that it’s difficult to get exactly what you want. You can often get something that’s good enough but more often than not, you get 90% of the way to what you want and getting the AI to make the correct changes to get to a 100% is daunting.

(which is why I’m a little skeptical about GenAI for video. For generic B-roll stuff, sure maybe, but wrangling the correct prompts for a 30 second video that needs to be exactly this or that is going to be difficult to say the least. It’s hard enough for a single still image.)

Photoshop’s Generative AI (called Generative Fill) is pretty subpar when compared to some of the more cutting edge ones (DALL-E, Stability AI, etc) for creating images from scratch. However, what it does pretty well is extending images. i.e. If you’ve got an image that you want wider or more head room than it was originally shot with.

OR… if you’ve created something with another AI tool, like DALL-E, as I’ve done here. DALL-E gave me more or less what I wanted but without much of a tail. I spent another 20 minutes or so trying to get DALL-E to give me this fish with a tail before giving up. It really wanted to redo the entire image. So it got frustrating.

This is where Photoshop’s GenAI turned out to be useful. To be fair, they market it as more of a way to extend/improve existing images than creating stuff from scratch. It can create from scratch but the results often aren’t great. But when it comes to extending images, there’s a big advantage to being in Photoshop… selections!

You can make the canvas wider, select the empty area to the side and type in ‘extend image’. Boom.

Now of course it gave me some other variations that didn’t work at all, but doesn’t matter. It gave me a great variation that did work.

Also, prompting something like ‘extend image with skeleton of an angler fish’ didn’t work. It was the simpler prompt ‘extend image’ that did the trick.

(Prompts are weird and a whole art unto themselves. Figuring out what the AI is going to respond to takes a LOT of trial and error. And then you still need to get it to do what you want.)

I then selected the other side and it created that easily.

You can see slight seams where the image was extend. When having Photoshop create the extensions, I tried both selecting the area by itself and selecting a little of the original image (including feathering it). It didn’t really make much difference. You got slightly different imagery but the seams tended to show up no matter what.

The tail was the worst problem however. There was an obvious change in style from the original to the Photoshop extension.

So I selected just that bit and ran Content Aware Fill a few times to cover up the seam. And that worked reasonably well despite CA Fill not being AI. It’s just sampling from other parts of the image.

Selecting the seam and running Generative Fill (prompt: ‘remove seam’) on it created three variations. Two of the three didn’t work but the third one arguably looks better than CA Fill. But they’re both pretty good. So just realize CA Fill can help touch up slight imperfections as well.

Getting DALLE, Midjourney or whatever to give you exactly what you want can be difficult. If you get most of the way there, but are having trouble prompting those tools to fill in the details, Photoshop’s Generative Fill may be able to touch things up or extend the image more easily.

Here’s the final image:

Only Beauty Box 5.x Supports Metal GPUs and Apple Silicon

Beauty Box 5.0 and higher supports Metal and Apple Silicon (M1, M2, etc.). This includes the upcoming Beauty Box 6.

However, Beauty Box 4.0 does not support Metal GPU rendering on Macintosh. It uses the older OpenCL technology for GPU processing. (on Windows, 4.0 works fine)

Premiere Pro/After Effects 2022 and later dropped support for OpenCL rendering, and only supports Metal on the M/Silicon chips and Intel Macs. This means Beauty Box 4.0 does not support GPU rendering in the current Intel builds of After Effects or Premiere. It doesn’t work at all on Silicon Macs.

If you’re experiencing slow rendering in Adobe products on a Mac with Beauty Box 4.0 or it’s not showing up at all, that’s probably why.

So if you have 4.0 and have an Intel Mac, you’ll probably want to upgrade to 5.0.

If you have a M/Silicon Mac you’ll need to upgrade. 5.0 was released before the Silicon chips and that’s the only version of Beauty Box that’s been re-written for those chips.

On Windows, Beauty Box 4.0 should still work fine. Both OpenCL and CUDA (for Nvidia) are still supported by Premiere and After Effects.

If you’re experiencing slow render times in 5.0 on Intel, double check that Hardware rendering is set to Metal. (on Apple Silicon Macs, it is always set to Metal and you can’t change it)

In both Premiere and After Effects go to File>Project Settings>General to change

If this is not why you’re having a problem with Beauty Box, try these articles or contact support:

Reasons Plugins Might Not Show in the Effects Menu

Use GPU can be turned off in the plugin or the Beauty Box ‘About’ dialog.

Here’s why your plugins aren’t showing in the host application

Not seeing your plugins in the host app is likely easier to fix than you think! When the installation process is completed properly, all Digital Anarchy plugins will show inside the Digital Anarchy folder located in your Video Effects folder, ready to be dragged and dropped into your timeline. 

However, compatibility issues, corrupted installations, and having multiple versions installed could be preventing the plugin from connecting to the host app and appearing as an option in your effects folder. Here are the main reasons your plugin might not be showing in After Effects, Premiere Pro, FCP, Resolve or Avid – and how to quickly fix them. 

PS: If you are in Premiere and saw the plugin disappear after downloading their latest update or after a crash caused by a Digital Anarchy plugin, scroll down to “4” and check if the plugin is not hidden before trying other things! The option to disable plugins in the Video Effects Manager was always a thing in After Effects, but recently added to Premiere Pro.  

  1. Installation did not complete properly

The most common cause for plugins not showing in the host app is problems in the installation process. For the installation to complete successfully, all host apps must be closed before running the installer. So if the plugin – or the entire Digital Anarchy folder –  is not showing up please make sure all apps are closed and re-run the installer. 

You can also check if the plugins were installed in the correct folder. We recommend not making any changes to the file paths set or used by the installer, but even if no changes are made, files could have been misplaced due to system permissions in both Windows and MAC systems.  

Windows: For each folder in the path, right-click and select Properties > Security and make sure the designated user doesn’t have any restrictions.

 Premiere – C:\Program Files\Adobe\Common\Plug-ins\7.0\MediaCore\Digital Anarchy

       AVID – C:\Program Files\Avid\AVX2_Plug-Ins\Digital Anarchy

       Resolve – C:\Program Files\Common Files\OFX\Plugins\Digital Anarchy

MAC – For each folder in the path, right-click and select “Get Info” > Sharing & Permissions and make sure the designated user is set to “Read & Write”.

  Premiere – Macintosh HD/Library/Application Support/Adobe/Common/Plug-ins/7.0/MediaCore

       FCP – /Applications/Digital Anarchy

       AVID – Macintosh HD/Library/Application Support/Avid/AVX2_Plug-ins/Digital Anarchy

       Resolve – Macintosh HD/Library/OFX/Plugins/Digital Anarchy

2. Incompatible Version

Always make sure that you have the latest version installed. All of the latest versions are available under “Demos” at https://digitalanarchy.com. Most of the time you may just have a slightly older version installed and that can be the reason for it not appearing in your host application or for any other issues.

Attention Mac users! Older plugin versions like Beauty Box 4.0 and Flicker Free 1.0 are not compatible with the new Apple M-series chip machines. If you have an older version of a plugin that was purchased a while back, buying an upgrade may be required. Check our store for upgrade prices: https://store.digitalanarchy.com/24-upgrades

Required paid upgrades are rare, but do happen sometimes since our plugins are license-based and not a subscription. More recent purchases (2019 and later, depending on the plugin upgrade release date) are eligible to receive a free upgrade. If you are not sure your purchase qualifies, please email our sales team at sales@nulldigitalanarchy.com.

After upgrading your serial number, make sure all apps are closed, download and run the most recent installer for the plugin. All installers are available under “Demos” at https://digitalanarchy.com

Incompatibility issues are also frequent in the latest version of FCP. If that’s what you are using it is likely you will need to run the latest version of our plugins. Check with our sales and tech support teams if you have questions!

3. Update didn’t uninstall the previous version

If the plugin does not show after you install an update/upgrade,  please make sure that the uninstaller properly removed the previous version from your machine. Some host apps will warn you if there are two versions of the same plugin installed but that is not always the case. 

The uninstallers are included in all installer downloads available on our website. For Windows, the uninstaller will first run automatically when you run the installer, if it detects that there is already an installed version. For Mac, the uninstaller can be found in the same folder as the installer and can be run manually, apart from the installer, if previous versions are not removed automatically. Make sure to close all apps before running the uninstaller and/or a new installer. 

4. Plugin is disabled in Premiere or After Effects

If you are using Premiere or After Effects, make sure the plugin is not set to be disabled in the effects preferences. 

In After Effects: Go to “Effect”. 

 Click on “Manage effect” and make sure the plugin is enabled

In Premiere Pro: Click on the “Sandwich” menu close to “Effect Controls”. 

Click on  “Video Effects  Menu” and make sure the plugin is enabled. 

If you are still having problems please send us an email at cs@nulldigitalanarchy.com!

Free NAB 2024 Exhibits Pass, Come See Beauty Box 6.0

NAB is three months away! We have a booth right next to Adobe in South Hall Lower, SL7043, so we’ll be easy to find.

If you haven’t registered yet, you can use this code for a free exhibits pass: NS9892

Go here to register for NAB: https://registration.experientevent.com/ShowNAB241/

We’ve got a new version of Beauty Box, our AI based digital makeup and retouching plugin, coming soon! It’ll be released before NAB, but we’ll definitely be showing that off. The big new feature uses AI to whiten teeth. We’ve always used AI in other ways in Beauty Box, but this is a much more sophisticated version. We’ve put a lot of work into it and we’re pretty excited about it.

There will also be a couple other announcements/release around April, so stayed tune for that. If you haven’t chatted with us lately, come by the booth and say hello. You can learn about all the new stuff. Including Data Storyteller which we released a few months ago and won a Best of NAB 2023 from Videomaker!

Shooting Music Videos: challenges and tips from musicians!

Imagens: Bespoken, Sonamo, Bloody Beetroots, Margarita Monet (Edge of Paradise).

We will be walking the NAMM (Natl. Assoc. of Music Merchants) show floor next month and have been digging out great examples of how Flicker Free and Beauty Box can often save music videos without breaking the bank. There are so many amazing content creators out there using our plugins to fix unavoidable flicker and retouch skin tones distorted by low light! From teasers of ‘Musique Concrete” projects (check out Bespoken!) to heavy metal bands creating parallel universes: they can all benefit from some quick and easy post-production plugins. And that’s because…recording music videos is challenging.

Venues are usually low-lighting environments, and musicians are often not only performing but also shooting the performance. Setting up the lights and tripods, making sure the sound is clear, framing the shot, assuring the camera is still going while they play, and more. So, as we talked to our customers about NAMM – and how they have been using our plugins to “fix it in post” – we made a list of the most common challenges musicians face shooting their videos (according to them!) and added some suggestions (also coming from them!) on how to avoid the issues:

1 – Embrace low lighting (and fix it in post !):  ok, ok… so maybe you don’t WANT to fix it in post if you can avoid it, but the point is, sometimes you get what the lighting gods give you and all you can do is fix it later. So do everything you can to avoid dark shots and noise grain (reduce shutter speed! Maybe use manual mode for more control over white balance, aperture, shutter speed, and ISO), but don’t get caught up if the shot exposure is not perfect. One of our clients saw his hands turn blue while filming a teaser for a music video project and used Beauty Box in post-production to fix it! Bloody Beetroots experienced severe strobing caused by LED lights in this music video featuring Tommy Lee (of Motley Crue fame) and Flicker Free saved the day. Margarita Monet, from Edge of Paradise, says that sometimes the band “might have this great shot, but one of our faces looks shiny, or the light is not completely flattering. Beauty Box can fix those issues and allow us to use the shot we want!”. 

2 – Find an unobstructed view ahead of time: scouting the location is key! Make sure you have enough time to look around the venue, see where columns and tables are placed. You have an audience! So also consider them when choosing your camera placement. You want them in the shot, but you want the band to be there as well! Sonamo lead singer Giuseppe Pinto highlights he “learned to anticipate where the audience is likely to gather and place cameras accordingly for unobstructed, engaging angles. In post-production, using digital zoom and 360-degree footage helps add dynamism to the videos” (and maybe minimize the band being covered by the audiences on important moments). One way of working around crowded spaces is to shoot high-res footage, like 4K. This will allow for more flexibility in the editing since you can crop or zoom in later. For example, if the crowd is low in the frame, you now have two shots: one closeup of the band, and another with the band/audience. Or possibly have two cameras, one for the band close-up and another for the band/audience shot.

3 – Is there enough room around that tripod? : no matter where you place the camera, make sure it is safe. Bumping on cameras and knocking things out is not only problematic when you have exciting, dancing, partying audiences. Musician Johnnyrandom recently mentioned to us that he is usually filming himself as he plays, and that can be very tricky even in controlled environments. “There can be a lot of juggling between musical performance, framing a shot, lighting it correctly, and managing the time required to get enough footage to edit. When things get macro, it’s common to bump into tripods, lenses, and lights midperformance”, he says. So, take the time to place everything correctly. 

4 – Equipment is not everything: music videos can be expensive and time-consuming. If you don’t have the budget and need to stick with a DIY, one-man band approach… shoot your video anyway, the best way you can. Giuseppe Pinto (Sonamo) says “the key is not to get too caught up in equipment. While quality cameras are important, the essence of a moment and the emotion it conveys are paramount. It’s more about capturing the spirit of the performance than the technical perfection of the shot”. Johnnyrandom, composer of Bespoken, shot this amazing teaser on his own and edited it with the help of his friends.

5 – Record the audio separately: because music videos require (surprise!) good audio… consider using a dedicated audio recorder with a directional mic to capture sound and add it to the video later. This may capture better audio than the camera and you can place it further away from the audience (it’s small, and doesn’t need a tripod). If your camera is near the audience, you may pick up loud claps, talking, screaming, etc. In more professional environments you can record audio straight from the sound board.

Experiencing other challenges we have not listed while filming your music videos? Let us know by leaving a comment or emailing cs@nulldigitalanarchy.com! We will keep updating this blog post to include more tips.  

Data Storyteller: chart and map visualizations for Premiere Pro, After Effects and FCP

NAB Update: Data Storyteller wins Videomaker’s Best of NAB 2023 award! It was great going to NAB and getting validation from Videomaker and many of the folks that came by the booth that there is definitely a need for better data visualization tools for video production. Please sign up for the beta and let us know what you think!


I’ve had a fascination with data visualizations for a while. When done right they can get be both beautiful and incredibly informative. And with the world awash in data, big and small, there’s a lot of stories that can be told by looking at data.

Data Storyteller is a plugin for Adobe After Effects, Premiere Pro and Apple Final Cut (Resolve is coming!) that hopes to make this easier for video production. We’re about to go into beta with it, so if you’re interested in joining the beta, reach out to:
beta@nulldigitalanarchy.com

We realize that individual video editors don’t need to do this kind of work all the time, but it does come up. And for some of you it comes up a lot! So there needs to be a better way of creating visualization, be it a simple bar chart or a Bubble chart showing years of data, than trying to shoehorn Excel charts into video.

The focus will be to try to make it as easy as possible to create cool visualizations. There will be various templates to start with as well as a Wizard to guide the initial creation. Of course, often the hard part with data viz is selecting the data to visualize. So that part you’ll have to figure out. :-) But once you do, hopefully we can make the animation part relatively easy.

1.0 will support Bar, Line, Scatter/Bubble charts as well as maps for US and the world. All of these can be linked to simple CSV or Excel files for basic animations or you can create more complex animations using larger data sets or even multiple data sets (e.g. 25 files with 25 years of the same data). We have plans for more chart types but those are the initial charts. The backend for Data Storyteller is D3.js so there are many chart types we could do in the future.

We’re still a month or two away from release, but we want to get it into the hands of those interested in doing this type of work. So if you want to get the beta when it’s available, please reach out to beta@nulldigitalanarchy.com

Our team of anarchists will be at NAB 2023, booth #N1316 (North Hall) demoing the beta of DataStoryteller – So you can check out the two new plugins and the types of animated charts and map visualizations that can be created. 

Best,
Jim Tierney
Chief Executive Anarchist

Here are the Key features DataStoryteller offers:

  • Support for Simple or Complex Data: Imported CSV or Excel files can be simple spreadsheets or more complex, with multiple sheets or large data sets.

  • Built-in Spreadsheet: A built-in spreadsheet allows users to see and select all of the data or select specific cells, rows, and columns that they wish to visualize.

  • Multi-file Animation: One of the strengths of Data Storyteller is the ability to upload multiple data sets. For example, multiple years of census data can be uploaded and then animated year by year, creating complex visualizations that tell a story with much more depth than a simple bar chart. 

  • Range/Filter Animation: Editors can choose to slowly reveal or hide data by animating the spreadsheet selection or filtering values that are higher or lower than a user defined threshold.  By using keyframes that determine when and where each new data point appears, it is possible to create animations that animate specific data for more impact. 

  • Multiple Dimensions: Another strength is support for data with many attributes. For example, in our Census data, for different cities you might want to show Age, Income, Crime level, and Cost of Housing. Any of these can be used to control X position, Y position and Size and Color of the resulting data point. All of which can be animated over time.
  • Preset Templates: A wide variety of templates help users get started on creating beautiful data visualizations.
  • Vector Charts: The charts are all vector based graphics, so can be rendered at any size, including HD, 4K, 8K, 12K or higher.

DataStoryteller charts and maps  can be setup from scratch or by using a template. Setting up a basic chart works much like creating graphics in Excel or Apple Numbers, with the advantage of all features being tightly integrated with the video editing platform. The integration with After Effects, Final Cut and Premiere Pro makes it easy to apply changes and show the animations in the video editing application, without the need to export/import files back and forth.

Digital Anarchy NAB Plans and Free NAB 2023 Exhibits Pass Code

NAB is around the corner and it seems to be getting back to normal-ish. At least, my read on the buzz around it is that folks are a lot less tentative about it than last year. The show floor seems mostly full, so a lot more companies than last year will be there. It was great to see folks in person last year, so hopefully we’ll see more of you this year.

BUT! I’d really like to hear from all of you! So, as we’ve done the last couple years, we’d appreciate it if you’d let us know if you’re going to NAB or not. The survey is short… 3 required questions and some other questions/comments you can fill out if you’re so inclined. But only three are required, so it should take you about 30 seconds. We’ll pick two people from the folks that responded to win a plugin of their choice… to give you a bit of incentive to fill it out.

Anyways, fill out the survey and let us know if we’ll be seeing you in person or just following us online! Survey link: https://survey.zohopublic.com/zs/HcCzVI

We’ll be there in booth N1217 (next to Avid) showing off at least one new plugin and maybe even two new plugins! We’re doing the usual plugin mafia thing with Revision Effects and Left Angle.

If you’d like to join and need a free Exhibits Pass, the code is: LV98226 Register at www.nabshow.com

The Different Ways Customers Use Beauty Box

I was interviewed for an article in the Telegraph about retouching in film/TV. The final article sort of missed the point, as non-industry publications often do, that it’s hard to make humans look good with bright video lights, cameras, and all the things that production involves. (they spun it as an ‘A-list vanity’ thing) But it did get me thinking about how different users deal with that production problem when using Beauty Box. (Link to the article is at the bottom of the post)

I do find it interesting talking to different customers who are using Beauty Box for different purposes. It’s used on an extremely wide range of productions from low budget wedding videos to feature films. And, of course, how it’s used on those productions varies widely as well.

Using Masks with Beauty Box Video

On the lower budget end, the editor generally applies it to the entire clip, hits Analyze Frame, dials in some settings to make the subjects look a bit better and then calls it a day. The budget isn’t there for a lot of fine beauty work (just like there wasn’t a budget for a makeup artist).

The above may be the case if the editor is pressed for time… turning around video shot earlier in the day at an event or for news, where it needs to go live the same day.

The basic settings work very well for applying a layer of digital makeup that offsets the lack of makeup, bright video lights or any of the other factors that make a subject’s skin look bad in a video. We’ve worked hard to maintain the texture of the skin so that you have a very realistic application of the smoothing algorithms.

When Beauty Box users have a bit more time/budget the workflow changes a bit. They can set up tracking masks and just retouch, say, the forehead or the cheeks. This is much more detailed beauty work and you can see some tutorials on using tracking masks here. Generally this is how Beauty Box is used for commercials, TV, etc.

As you get up into feature films, where there are definitely budgets for makeup artists, we see Beauty Box being used for makeup heavy applications. For example, in LBJ, Woody Harrelson needed to prosthetics to make him look older. As such, digital retouching was used to make those more seamless and realistic. Same goes for films in the fantasy genre, if you’ve got a bunch of elves, orcs and whatnot running about, you may have some makeup problems that need fixing. That’s generally where Beauty Box is a critical tool.

It’s cool to hear about the wide range of productions it’s used on. The idea for Beauty Box came from watching a talk given by a music video vfx artist at Motion Graphics LA in the mid-2000s. He discussed his process of going frame by frame, duplicating skin layers, etc. I figured there had to be a better way of doing that and a few years later Beauty Box was born as the first beauty plugin to take the problem seriously. (There were a couple other plugins out there that purported to do it, but they were just applying a blur to a masked area and it didn’t look realistic. Beauty Box not only smooths the skin but tries to keep the original skin texture giving a much more realistic look)

So to see it used on feature films, episodics, reality and so much more is one of the amazing things about making these tools.

lol… of course, customers will tell us about this stuff privately, but getting folks to give us permission to talk publicly about specific shows/films is tough. If you’re doing something cool with Beauty Box and are willing to let us talk it up, please shoot me an email! (jim@nulldigitalanarchy.com)

And P.S…. We’re hard at work on Beauty Box 6.0, using A.I. and some other advanced tech, so look for that coming shortly. (And we give free upgrades to folks that let us say nice things about their Beauty Box work, so…. :-)

Here’s a link to the Telegraph article. fyi… it’s behind a paywall and if you sign up for the free trial, you’ll need to CALL them in the UK to cancel. You’ve been warned. :-) The article is not as skewed as the headline suggests, but it does largely miss the point that this is a video production problem as much as (or more so) a vanity thing.

https://www.telegraph.co.uk/films/0/digital-de-ageing-hollywood-lying-us-secret-side-special-effects/

Skin Detail Smoothing and 4K

Beauty Box’s settings are resolution dependent. This means the same settings you have for HD may not work for 4K. On a basic level, it’s similar to applying a blur. A Gaussian Blur of 1.0 might be too much for a low res, 640×480 image, but might be almost unnoticeable on a 4K image.

Also, the ‘right’ settings may depending on the framing of the shot. Is the footage a tight close up where the talent’s face fills most of the frame? Or is it pulled back to show three or four actors? The settings that are ideal for one of those examples, probably won’t be ideal for the other one.

The default settings for Beauty Box are really designed for HD. And even for HD they may be a bit heavy, depending on the footage.

Often they aren’t the ideal settings for 4K (or 12K or whatever).

So in this post we’ll talk about what to do if you have 4K footage and aren’t getting the look you want.

Mainly I want to focus on Skin Detail Smoothing, as I think that plays a bigger role than most people think. AND you can set it negative!

Skin Detail Smoothing

As you might expect from the name, this attempts to smooth out smaller features of the skin: pores and other small textures. It provides sort of a second level of smoothing on top of the overall skin smoothing. You generally want this set to a lower value than the Smoothing Amount parameter.

If it’s set too high relative to Smoothing Amount, you can end up with the skin looking somewhat blurry and blotchy. This is due to Skin Detail Smoothing working on smaller areas of the skin. So instead of the overall smoothing, you get a very localized blur which can look blotchy.

So, first off: Set Skin Detail Smoothing to a lower value than Smoothing Amount. (usually: there are no hard and fast rules with this. It’s going to depend on your footage. But most of the time that’s a very good rule of thumb.

Negative Skin Detail Smoothing

With 4k and higher resolutions it’s sometimes helpful to have a slightly negative value for Skin Detail Smoothing. Like -5 or -10. The smoothing algorithms occasionally add too much softness and a slightly negative value brings back some of the skin texture.

In the example, the area around her nose gets a bit soft and using a negative value, IMO, gives it a better look. The adjustment is pretty subtle but it does have an effect. You may have to download the full res images and compare them in Photoshop to truly see the difference. (click on the thumbnails below to see the full res images)

This definitely isn’t the case for all 4K footage and, as always, you’ll need to dial in the exact settings that work for your footage. But it’s important to know that Skin Detail Smoothing can be set negative and sometimes that’s beneficial.

Of course, I want to emphasize SLIGHTLY negative. Our Ugly Box free plugin makes use of negative Skin Detail Smoothing in a way that won’t make your footage look better. If you set it to -400… it’s good for Halloween but usually your clients won’t like you very much.

Getting rid of the Digital Anarchy demo watermark

You’ve purchased one of our plugins and still see the watermark on your footage? Let’s fix that!

In some cases, especially with Final Cut Pro, when you enter your serial number the demo watermark doesn’t disappear. This is almost always caused by the host app caching the render with the watermark. Sometimes the host app doesn’t recognize you entering your serial number as something that would affect the render. So… it doesn’t re-render anything… and you have a licensed plugin and you still see the watermark.

This is most common in Final Cut Pro. In fact, it almost always happens. So we’ll tackle FCP first.

Final Cut Pro

In FCP, as mentioned, if the demo watermark lines are still there after activating the plug-in, it’s due to a cached render. The easiest way to fix this is to change any parameter. For example, in Flicker Free change Threshold from 20 to 19. FCP knows you made a change and will re-render the screen without the watermark. Usually, a small change like this won’t affect the look of the plugin. (For Flicker Free use Threshold, for Beauty Box use Skin Smoothing, etc)

You can also clear this by selecting your project in the Browser window in FCP, then go to File > Delete Generated Project files, check “Delete Render Files”, and click OK. This will remove the watermark from every frame in that project. The downside is that it clears _all_ the cached files including ones not affected by the watermark. This isn’t a problem, but it may slow FCP down for a few minutes while it re-renders everything.

Premiere

In Premiere, if you still see the watermark after entering the serial number, first click on a different frame on the timeline. Registering the plug-in doesn’t always cause the video preview to update, so moving the playhead after registering will cause the watermark to disappear.

If that doesn’t do it, you can delete the render files for that sequence by clicking the Sequence menu at the top of Premiere, selecting Delete Render Files, and clicking OK.

After Effects

After Effects does re-load the current frame after entering the serial number, so it should do a good job removing the watermark without you having to do anything else. You can delete the cached preview if necessary by clicking Edit at the top of After Effects and selecting Purge > Image Cache Memory.
Resolve

Resolve gives you a few options when deleting the render files. Click Playback at the top of Resolve, select Delete Render Cache, and then choose All to delete all of the render files for that project, or choose Selected Clips to delete the render files for the clips you have selected on the timeline (make sure to actually select the clips before doing this). Either way will delete any remaining watermarked frames.

All host apps: Make sure the plug-in is registered

If you see the watermark lines, it’s possible the plug-in is not actually registered on that computer, or that the license was deactivated so it could be used on a different computer if you’re using it on more than one. If you’re upgrading to a new release (Beauty Box 4 to Beauty Box 5 or FLicker Free 1 to FLicker Free 2, you’ll be asked to enter your new serial number for that version.
Check the registration status by clicking the Register or Setup button in the plug-in controls, in the location below:

If the plug-in is registered, you’ll see the registration info window. This means the plug-in is registered:

If it isn’t registered, you can click Authorize and then enter your Name (you can enter anything), Organization (you can enter anything or leave this blank), and serial number.
If you have any questions or are running into any issues activating a plug-in after following these steps, send us an email at cs@nulldigitalanarchy.com

Transcriptive tools for Documentary Filmmaking

Interview-based productions were already one of the main use cases for AI transcriptions when we first released Transcriptive. Having all content converted into text meant the footage was searchable, and the ability to create captions allowed video editors to comply with accessibility and broadcasting requirements. What we didn’t know was how much documentary production workflows would play a role in the plugin development: we added the ability to transcribe not only sequences, but also entire clips, comments and strikethrough can now be added to transcripts, Transcriptive.com lets production teams collaborate outside of Premiere if need be. PowerSearch became such an essential tool to find content in a project that we included it with Transcriptive Rough Cutter, and the ability to use transcript text to cut video made a product that started as an AI transcription tool become a pretty complete suite of products with different workflow options – very different from everything we had done so far. 

This week we received an email from a  client who has been  using Transcriptive since the beginning. He was asking if we could save him some time from learning all the new additions to the plugin – there are many indeed! –  and highlight a few essential “new features” that focus on interview-based productions. So here we are, sharing our favorite new features with you all. Read on and learn more about them!

  1. Clip Mode: we added the ability to transcribe clips a while back, but some people have been so used to transcribing sequences that they do not realize turning “Clip Mode” on can be a game changer when there’s a high volume of interview footage to sort through. By transcribing the whole clip you can have all content – not only the cuts on your timeline – searchable, and use the clip to enter soundbites into the timeline straight from the transcript. Clip mode also  lets you create or import transcripts for individual media files (as well as multicam clips). These transcripts are attached to the files and will load whenever you open that clip in the Source Monitor, which makes it easy to search for specific quotes and add them to a sequence.

  1. Offline Alignment: some productions still prefer to use human transcripts, especially if their interviews have very specific jargon or scientific terms. Using transcripts generated outside of Transcriptive also becomes a necessity if the interviews hold private information  and privacy is a concern. Transcriptive does require internet connection to create new transcripts, but offline alignment makes it possible to import existing transcripts to either a clip or sequence. It is only available for English, but the alignment is free of cost,  analyzes the text and audio, and syncs them up word for word. If you have a lot of transcripts to align you can use Batch Alignment to submit them all at once. Import all of the transcripts, select those clips and sequences in the Project panel, and select Batch Project to queue up all the alignments at once. An important note: when aligning transcripts offline you’re free to use Premiere for other things while these process. Just make sure to do not close Premier until the offline alignments are finished.

  1. PowerSearch: our “Google like” plugin is still the best way out there to find content in your Premiere project, and Transcriptive Rough Cutter users no longer need to pay extra to use it. Your Transcriptive serial number now also activates PowerSearch. The panel is more efficient than using the search box in Transcriptive because it searches the transcripts in your entire project all at once, displaying a list of results for each clip and sequence where your search term appears. Clicking on one of these results opens that clip or sequence in the Program Monitor or Source Monitor and jumps to the location of that line. This makes it easy to find specific dialogue anywhere in the project. If you’re using markers to label your clips/sequences, PowerSarch can search marker text as well.

  1. Rough Cut:  the option to use shortcuts to enter soundbites into a sequence, straight from the transcript text, is one of our newest – and most powerful – additions to Transcriptive. Set an in (Ctrl+i) and an out point (Ctrl+o) in the transcript, select the sequence and press Ctrl+Comma (Windows) or Ctrl+8 (Mac) to insert the select. That’s it! Keep adding selections from different clips to to quickly assemble a rough cut. Also, if you strikethrough (using the Strikethrough button next to a paragraph in the transcript) or delete text, you can click the Create Rough Cut button to generate a new sequence with all of the deleted areas removed. This is an easy way to cut down, for example, an hour long interview into a shorter sequence using just the transcript text. This new sequence will have a transcript synced with those edits that you can export, search, or index with PowerSearch. 

Transcriptive.com is also an amazing addition to Transcriptive although not specially important to documentary productions.  Learn more about our web app here: https://digitalanarchy.com/transcribe-video/app/features.html

Have a favorite feature you love, but was not mentioned here? Let us know which one! We would love to hear from you: cs@nulldigitalanarchy.com

Beauty Box 5.0 Tips to Speed Up Video Skin Retouching

Beauty Box 5.0 can retouch skin while maintaining real-time playback on 1080p footage on most machines, and real-time playback or close to it on 4k footage on faster machines. Render speed does depend on a lot of factors, like the GPU speed of your computer, the resolution of the footage, having other effects applied, and the host application you’re using. Here are some things you can check to make sure you’re getting the best performance out of Beauty Box.

  1. Make sure the plugin is using the GPU to render

The most important factor for better speed is to have Beauty Box use your machine’s GPU to render. In the plugin effect controls, there will be a “Use GPU” checkbox at the bottom – make sure this is checked, and that it isn’t grayed out.


This box should be checked, and not grayed out like in the image on the right

If “Use GPU” is grayed out, here’s how to re-enable it:

Go to this location:

         Windows: Documents\Digital Anarchy

          Mac: Users\Shared\Digital Anarchy

And find one of these files:

  • DA_OpenCL_Devices.txt
  • DA_CUDA_Devices.txt
  • DA_Metal_Devices.txt

Open the file. You should see something like the screenshot below. If Enabled = Off, change the text to say Enabled = On, then save the file. Restart your editing application and now the checkbox should be active.

Open the file. You should see something like the screenshot below. If Enabled = Off, change the text to say Enabled = On, then save the file. Restart your editing application and now the checkbox should be active.


If Enabled = Off (left), edit the text to say “On” (right)

Having “Use GPU” disabled by default is most common when installing Beauty Box for the first time, but also may happen after updating your computer or host application. If Beauty Box seems to be causing slow playback in your projects, check that file to make sure Beauty Box is actually using the GPU.

  1. Apply Beauty Box before other effects

If you are color correcting your video or using other effects on the same footage Beauty Box will be applied, remember that the order that effects are applied can have an impact on render speed. We generally recommend applying Beauty Box first, before other effects and color correction. In some rare cases, Beauty Box will perform better as the last effect applied – if it’s working slower than usual at the top, drag it to the bottom of the effects list, below your other effects. But usually having it applied first will make rendering faster. 


Beauty Box applied first (left), and Beauty Box dragged below other Effects (right)

  1. Know what works best for the host app you are editing on:

Premiere and FCP are faster than After Effects at this point in most of our tests (as of AE and Premiere 2022, and FCP 10.6.3), although this can change over time as different applications add new features and optimizations. Here are a few applications-specific tips:

Premiere Pro: Make sure the renderer is set to Use the GPU. Go to File > Project Settings > General. 

In the General tab, under Video Rendering and Playback, set the Renderer dropdown to Mercury Playback Engine GPU Acceleration (CUDA/OpenCL/Metal). (CUDA) is for Nvidia GPUs, (OpenCL) is for AMD GPUs, and (Metal) is for Apple GPUs. IF this is set to Mercury Playback Engine Software Only, your project won’t use the GPU to render, and Beauty Box will render  more slowly – you generally will only want to use Software Only with Beauty Box if you’re running into an error with one of the GPU Acceleration options.

After Effects: The same Premiere information above applies here as well. After Effects also has an option called “Enable Multi-Frame Rendering” in Edit > Preferences > Memory & Performance. You can use Beauty Box with this setting on, but it will be slightly slower in the current version of AE (2022). We do expect Multi-Frame Rendering to improve in future versions of AE, so it’s worth testing the speed of it on vs off in your projects, especially in future versions of AE.

Final Cut Pro: If FCP is performing slowly while using Beauty Box, turn off Background Rendering in the Preferences > Playback menu, and turn off Skimming either by clicking the Skimming button below the Viewer, clicking it in View > Skimming, or pressing S.

Resolve: We recommend applying Beauty Box in either Edit or Color modes. It works in Fusion, but will render more slowly.

In combination with the automated masking and skin tone analysis capabilities, the tips we listed above can help video editors speed up the post-production skin retouching process considerably! But if you’re looking for advanced tutorials, you can learn how to create manual masks to retouch specific skin areas, isolate and track moving subjects, and more at https://digitalanarchy.com/beautyVID/tutes.html

Testing A.I. Transcript Accuracy (most recent test)

Periodically we do tests of various AI services to see if we should be using something on the backend of Transcriptive-A.I. We’re more interested in having the most accurate A.I. than we are with sticking with a particular service (or trying to develop our own). The different services have different costs, which is why Transcriptive Premium costs a bit more. Gives us more flexibility in deciding which service to use.

This latest test will give you a good sense of how the different services compare, particularly in relation to Adobe’s transcription AI that’s built into Premiere.

The Tests

Short Analysis (i.e. TL;DR):

 For well recorded audio, all the A.I. services are excellent. There isn’t a lot of difference between the best and worst A.I… maybe one or two words per hundred words. There is a BIG drop off as audio quality gets worse and you can really see this with Adobe’s service and the regular Transcriptive-A.I. service.

A 2% difference in accuracy is not a big deal. As you start getting up around 6-7% and higher, the additional time it takes to fix errors in the transcript starts to become really significant. Every additonal 1% in accuracy means 3.5 minutes less of clean up time (for a 30 minute clip). So small improvements in accuracy can make a big difference if you (or your Assistant Editor) needs to clean up a long transcript.

So when you see an 8% difference between Adobe and Transcriptive Premium, realize it’s going to take you about 25-30 minutes longer to clean up a 30 minute Adobe transcript.

Takeaway: For high quality audio, you can use any of the services… Adobe’s free service or the .04/min TS-AI service. For audio of medium to poor quality, you’ll save yourself a lot of time by using Transcriptive-Premium. (Getting Adobe transcripts into Transcriptive requires a couple hoops to jump through, Adobe didn’t make it as easy as they could’ve, but it’s not hard. Here’s how to import Adobe transcripts into Transcriptive)

(For more info on how we test, see this blog post on testing AI accuracy)

Long Analysis

When we do these tests, we look at two graphs: 

  1. How each A.I. performed for specific clips
  2. The accuracy curve for each A.I. which shows how it did from its Best result to Worst result.

The important thing to realize when looking at the Accuracy Curves (#2 above) is that the corresponding points on each curve are usually different clips. The best clip for one A.I. may not have been the best clip for a different A.I. I find this Overall Accuracy Curve (OAC) to be more informative than the ‘clip-by-clip’ graph. A given A.I. may do particularly well or poorly on a single clip, but the OAC smooths the variation out and you get a better representation of overall performance.

Take a look at the charts for this test (the audio files used are available at the bottom of this post):


Click to zoom in on the image

Overall accuracy curve for AI Services

All of the A.I. services will fall off a cliff, accuracy-wise, as the audio quality degrades. Any result lower than about 90% accuracy is probably going to be better done by a human. Certainly anything below 80%. At 80% it will very likely take more time to clean up the transcript than to just do it manually from scratch.

The two things I look for in the curve is where does it break below 95% and where does it break below 90%. And, of course, how that compares to the other curves. The longer the curve stays above those percentages, the more audio degradation a given A.I. can deal with. 

You’re probably thinking, well, that’s just six clips! True, but if you choose six clips with a good range of quality, from great to poor, then the curve will be roughly the same even if you had more clips. Here’s the full test with about 30 clips:

Accuracy of Adobe vs. Transcriptive, full test results

While the curves look a little different (the regular TS A.I. looks better in this graph), mostly it follows the pattern of the six clip OAC. And the ‘cliffs’ become more apparent… Where a given level of audio causes AI performance to drop to a lower tier. Most of the AIs will stay at a certain accuracy for a while, then drop down, hold there for a bit, drop down again, etc. until the audio degrades so much that the AI basically fails.

Here are the actual test results:

TS A.I. Adobe Speechmatics TS Premium
Interview 97.2% 97.2% 97.8% 100.0%
Art 97.6% 97.2% 99.5% 97.6%
NYU 91.1% 88.6% 95.1% 97.6%
LSD 92.3% 96.9% 98.0% 97.4%
Jung 89.1% 93.9% 96.1% 96.1%
Zoom 85.5% 80.7% 89.8% 92.8%
Remember: Every additonal 1% in accuracy means 3.5 minutes less of clean up time (for a 30 minute clip).

So that’s the basics of testing different A.I.s! Here are the clips we used for the smaller test to give you an idea of what’s meant by ‘High Quality’ or ‘Poor Quality’. The more jargon, background noise, accents, soft speaking, etc there is in a clip, the harder it’ll be for the A.I. to produce good results. And you can hear that below. You’ll notice that all the clips are 1 to 1.5 minutes long. We’ve found that as long as the clip is representative of the whole clip it’s taken from, you don’t get any additional info from the whole clip. An hour long clip will product similar results to one minute, as long as that one minute has the same speakers, jargon, background noise, etc.

Any questions or feedback, please leave a note in the Comments section! (or email us at cs@nulldigitalanarchy.com)


‘Art’ test clip


‘Interview’ test clip


‘Jung’ test clip


‘NYU’ test clip


‘LSD’ test clip


‘Zoom’ test clip

Transcribing Multiple Audio Channels with Transcriptive for Premiere Pro

Setting Transcriptive to  “Clip Mode” to transcribe your video and audio files in Premiere Pro is the best option when the goal is to use transcripts to find sound bites and assemble rough cuts throughout the editing process. Transcribing in “Clip Mode” means everything in your clip is converted into searchable text, the transcribed text is attached to the original clip instead of the sequence, and you can pull sound bites from the text anytime – for any sequence – without having to transcribe bits and pieces for each sequence. However, using “Clip Mode” has some limitations when your video or audio clips have multiple audio channels.  


Transcriptive allows users to load videos and audio multichannel clips.

When you transcribe a clip, Transcriptive exports that clip’s audio through Media Encoder. For clips with stereo or a single mono audio channel, this is no problem. But if you have multiple audio channels, Premiere only allows Transcriptive to export the top channel (channel 1), and, unfortunately, right-clicking a clip and opening the “Modify > Audio Channels” to re-assign the channels doesn’t help. If some of your recorded audio is on a different channel, it won’t be transcribed. And if channel 1 is empty, Transcriptive will return a blank transcript.


Audio that is not placed on “channel 1” will not be transcribed. If channel 1 has no audio, Transcriptive will return an empty transcript.

Fortunately, there is a pretty easy workaround. Transcribing a sequence gives us a lot more control over what audio we’re exporting. When you submit a sequence to be transcribed, Transcriptive mixes down all of the unmuted audio channels. This means you can mute unwanted audio and transcribe everything else. If your sequence has channels you don’t want to be transcribed – scratch audio, music, etc – you can mute them before submitting the sequence to Transcriptive. You can also set in and out points in the sequence to control what area you’re transcribing (in and out points are another thing we aren’t able to read in Clip Mode, so only use them when transcribing a sequence).

To transcribe a clip with multiple audio channels:

  1. Create a new sequence with that clip
  2. Mute any unwanted audio channels in the sequence, and set your in and out point
  3. Turn off Clip Mode and transcribe the sequence.


Transcribe window will show the cost of the sequence transcription, show speech engine options, and more.

Once transcribing is done, switch “Clip Mode” back on and select your clip in the project panel. The transcript will load attached to the original clip, and now you can delete the sequence. This is what your transcript will look like with “Clip Mode” on:


Every word in the transcript has a time code. Edit the transcripts, search sound bites, create rough cuts by editing the text, and export captions.

In Transcriptive 3.0, you can Batch Transcribe sequences as well as clips. So while creating a sequence for each clip with multiple audio channels is an extra step, you can still transcribe those sequences all at once – select them in your Project panel in Premiere, click the top left menu in Transcriptive, and select Batch Project. Once transcribing is done, repeat step 4 above to attach each transcript to the clip. Here’s a Batch Transcription tutorial to watch for more info.

We’re hoping future versions of Premiere will give us more control over what we can do in Clip Mode, and allow us to handle in/out points and multiple audio channels better. For now, the sequence workaround is the best way to get around these limitations.

If you have any questions about Transcriptive Rough Cutter or want a two-week trial license, send us an email at cs@nulldigitalanarchy.com

Removing flicker from concert videos (or anything with stage lights)

LED lights are everywhere and nowhere moreso than concerts or other performances. Since they are a common source of flicker when shot with a video camera, it’s something we get asked about fairly regularly.

Other types of stage lights can also be problematic (especially in slow motion), but LED lights are the more common culprit. You can see this clearly in this footage of a band. It’s a slow motion clip shot with an iPhone… which will shoot a few seconds of regular speed video before switching to slo-mo. So the first five seconds are regular speed and the next five are slo-mo:

To remove the flicker we’re using our plugin Flicker Free, which supports After Effects, Premiere, Final Cut Pro, Resolve, and Avid. You can learn more about it and download the trial version here.

The regular lights are fine, but there are some LED lights (ones with the multiple lights in a hexagon) that are flickering. This happens in both the regular speed and slow motion video portions of the video. You’ll notice, of course, the flickering is slower in the slo-mo portion. (mixed frame rates can sometimes be a problem as well but not in this case)

Usually this is something Flicker Free can fix pretty easily and does so in this case, but there are a few variables that are present in this video that can sometimes complicate things. It’s a handheld shot (shaky), there are multiple lights, and there are performers (who, luckily, aren’t moving much).

Handheld shot: The camera is moving erratically. This can be a problem for Flicker Free and it’s something the Motion Compensation checkbox was specifically designed to deal with (in addition to the Detect Motion settings). However, in this case, the camera isn’t moving quickly which is where this really becomes a problem. So we can get away with only having Detect Motion on. Also… with stage performances there is also often a lot of movement of the performers. Not a problem here, but if there is a lot of performer movement, it’s likely you’ll really need to turn Motion Compensation on.

Motion Compensation increases the render time, so if you don’t need to turn it on, then it’s best not to. But some footage will only be fixable with it on, so if the default settings aren’t working, turn on Motion Compensation.

As is often the case the default settings, the preset Rolling Bands, works great. This is very common with LED lights as they produce a certain type of flicker that the preset/default works very well on.

Multiple Lights: It’s possible to have multiple lights in the scene that flicker, and do so at different rates. Flicker Free can usually handle this scenario, but sometimes you need to apply two instances of Flicker Free. If you do this, it’s highly recommended not to use Motion Compensation and either turn Detect Motion off or set it to Fast. If you have Motion Compensation on and use two instances of FF, you’ll get exponentially longer render times and you might run out of memory on the GPU causing a crash.

Slow Motion: Slo-mo footage can really slow the flickering down, requiring you to max out Time Radius. Again, this is a setting that can increase render times, so lower values are better if you can get away with them and it fixes the flicker.

This clip was fairly easy. Only one light was an LED light and flickering, So the default settings worked great. If the default settings don’t work there are a few other presets to try: Stage Lights, Projection Screen, etc. But, even if those don’t work right off the bat, hopefully this gives you some tips on how to fix even the most challenging videos of performances.

How to use Flicker Free 2.0 presets to save time deflickering your video

Flicker Free 2.0 can solve a wide variety of flicker issues, and the presets available in the plugin are good starting points for finding the right settings to deflicker your footage. No matter what type of flickering you are dealing with – from rolling bands caused by out of sync cameras to time-lapse strobing – selecting a preset from the dropdown menu at the top of  the Flicker Free effect controls allows you to automatically change the rest of the settings (Time Radius, Sensitivity, etc) so you quickly try several different configurations. Once you find one that looks good, you can tweak the settings from there to make the flicker removal more efficient and minimize any blurring, ghosting or “shadow” effects caused by the preset settings. 

The presets themselves are named after common types of flicker and divided into “Faster” and “Slower” categories to make it easier for video editors to choose a starting point, but you can start with any preset really. It’s possible that a “Rolling Bands” set of settings will work better on slow motion footage than a “Slow Motion” preset, so try cycling through different options even if the name of the preset does not seem to match the type of flicker you see on your footage. 

With most types of flicker you can follow those steps:

1. Choose a Faster preset to reduce rendering times: these presets aren’t using Flicker Free’s Motion Compensation or advanced Detect Motion options. Some common issues don’t need these, and choosing a “Slow” preset will only add to your rendering times. So in most cases you’ll want to try the “Faster” presets first.

2. Increase Time Radius and lower Sensitivity: if you still see flicker after applying one of the faster presets, try increasing the Time Radius and lowering the Sensitivity. These two settings have the greatest impact on how Flicker Free detects and removes flicker – higher Time Radius analyzes more frames, and lower Sensitivity is better at targeting flicker like rolling bandsor flashing in a specific part of the frame.

3. Play with Slower presets: if the flicker is removed but you see motion blur, try applying a slower preset. They will take longer to render, but use Motion Compensation and Advanced Motion Detection to better identify moving objects/subjects, camera movement and high/low contrast areas. 

For example, if you have a clip with horizontal rolling bands, try the Slow “Rolling Bands” (default) and “Rolling Bands 2” presets. Use whichever one looks better as your starting point. If that doesn’t fix the flicker, the next step is to add more flicker removal by either increasing the Time Radius (to a maximum of 10) and/or decreasing the Sensitivity (try the 3-10 range). Changing individual settings will change the preset dropdown to “Custom”.

If those presets remove the flicker but add motion blur to the shot, select the slower “Rolling Bands – Motion” or “Rolling Bands – Motion 2”  presets. These presets have the Motion Compensation option turned on, which analyzes moving objects to remove motion blur. You can adjust the Time Radius and Sensitivity settings here as well to increase the flicker removal.

Working with presets will save you tons of time when getting started with Flicker Free. They are just starting points, but can often fix problems with minimal or no adjustments. They also give you an idea of how different setting combinations look, so you can start to customize individual settings to fix more difficult cases of flicker. 

For a more in-depth explanation of what each individual Flicker Free settings does, you can check out this video:
https://www.youtube.com/watch?v=fKoz5VnF5rE

And this video has more info on how to use the Detect Motion and Motion Compensation settings:
https://www.youtube.com/watch?v=IlbRcp8sWKo

Also, if you have a clip you’re having trouble with, you can send us a sample of the origins footage at cs@nulldigitalaanrchy.com and we can test Flicker Free 2.0 on it to see if we can find settings that work.

Editing Captions faster in Transcriptive

Captioning all your videos will make your content accessible to a wider audience and improve SEO, making them easier to discover when searching for content online. We have been working on making sure all our Youtube content is captioned, and Transcriptive has been instrumental in this process. It lets us create AI transcripts that can then be edited alongside the video, which makes it much easier to find and edit mistakes on the transcripts. 

However, even with all the AI technology behind our high-accuracy Transcriptive AI Premium speech engine, automated transcripts still have mistakes. Editing the text so they are 100% accurate can still be a time-consuming process. Here are some quick tips we found to be super helpful while editing AI transcripts in Transcriptive so they can be ready for captioning and subtitling much faster: 

Use the Glossary

The Glossary lets you prevent the AI from transcribing specific words and phrases incorrectly.. Enter proper names, jargon, medical terms, etc in the Glossary field before submitting the media for transcription  and the AI will try to include them in the transcript. For example, when I’m editing captions for a Transcriptive tutorial, I know the AI isn’t going to use the term “Transcriptive” (it usually comes back as “transcript of”). When I add “Transcriptive” to the Glossary, it comes back as “Transcriptive”, saving me an edit each time it comes up.

You can enter terms separated by commas, and then click “Create” to create a glossary list for that transcribing job. You do need to enter a new glossary for each job – it doesn’t remember your previous glossary entries – but you can save a list of terms in a text file and then paste them in. Here’s example of what I was pasting into the glossary field when captioning Transcriptive tutorial videos:

Transcriptive, Digital Anarchy, Premiere, Media Encoder, Speechmatics, Power Search, Rough Cutter, Batch Project, transcript, strikethrough

These terms come up a lot, and entering them when transcribing saves dozens of edits when editing the text.


Enter words in the Glossary field before submitting the media for transcription

Line Splitting and Auto-Punctuation

The transcribing AI is often good at identifying most of the words in a clip or sequence correctly, but can struggle to understand where sentences begin and end. A quick way to add a sentence break is to double click a word and press Enter – this will create a new paragraph starting with that word, automatically capitalize it, and automatically add a period to the end of the previous word. You can also use the Ctrl + left/right arrow (Command + left/right arrow on Mac) to move to the word you want to start the new paragraph with, and then press Enter.

Adding a period, question mark, or exclamation point to the end of a word will also automatically capitalize the next word to make adding new sentence breaks faster. Double-click or use Ctrl (Win) or Command (Mac) + left/right arrow to select the last word in the new sentence, then press right arrow to move the cursor to the end of that word, then type a period, question mark, or exclamation point to add that punctuation and automatically capitalize the next word.

To remove punctuation and merge two sentences, select a word with punctuation using double-click or Ctrl/Command + arrow, then press the right arrow to move the cursor to the end of the word, then delete the punctuation, then Ctrl/Command + right arrow to move to the next word and press the down arrow to make it lower-case – now the two sentences are one.


Sentence breaks and punctuation makes should match start/end of sentences

Change Playback Speed and Navigate the Transcript with Keyboard Shortcuts

The keyboard shortcuts and buttons at the bottom of Transcriptive are extremely useful:

-The playback speed button toggles between 1x, 1.5x, and 2x playback speed. This is especially helpful for transcripts that don’t need many corrections, or that have a very slow speaker.

Ctrl+space starts or stops playback. You can also single-click or double-click a word during playback to jump to that word and automatically pause playback to make and edit.

-The keyboard shortcuts for previous/next word, previous/next sentence, and previous/next paragraph are often the fastest way to move the cursor to where you want to make an edit. Use these to move the highlight to a word, then start typing to replace it with the correct word.

Ctrl + Delete/Backspace deletes the selected word, and moves the highlight to the word before it. You can use this shortcut several times in a row to delete several words in a row.

Up or down arrow will change capitalization of the highlighted word. You can use this keyboard shortcut even if you single click a word to move the typing cursor to it to quickly capitalize proper nouns

-And of course, Ctrl+z to undo a change and Ctrl+Shift+z to redo a change.


Use shortcuts and playback buttons to navigate the text

Hopefully these tips help speed up the editing process. If you have any questions about Transcriptive, send us an email at cs@nulldigitalanarchy.com.

NAB 2022: We’re going! Here’s a Free Guest Code Pass if you’re going too!

[ Updated NAB 2023 page is here: https://digitalanarchy.com/blog/trade-shows/nab-2023-exhibits-pass-code/, But we’ll be in booth N1217 and the 2023 code is LV98226 ]

Well, it, appears NAB is actually on for sure this time! We will have a booth there (N4806), we’ll be showing off some new products as well as the usual suspects: Beauty Box, Flicker Free, Transcriptive Rough Cutter, PowerSearch and more.

AND… Are you going? If you’ve got 30 seconds, please take this very short survey. Just be nice to know who else is going (or not): https://survey.zohopublic.com/zs/eVD7PA

Of course, if you are heading to Vegas, here’s the Guest Code for a free pass: LV98226 You can Register here:
https://amplify.nabshow.com/nab-show-sign-up/

We are looking forward to seeing everyone, giving out some t-shirts and having a drink with y’all! I have a feeling that parties are going to be more of a thing this year than they have been in a while.

As mentioned, we’ll be in booth N4806. Doing a sort of mini-Plugin Pavilion with Revision Effects and Left Angle in 4807 and 4808. We’re in the front of North Hall (weird!) as South Hall is no more. Physically it’s going to be a somewhat smaller show just due to less real estate. But it seems there’s a good amount of companies showing up to Exhibit.

Transcriptive OnBoarding: Where to Find Everything

Welcome to Transcriptive Rough Cutter! This page/video will give you an overview of the UI, so you know where to find everything! The five minute video above will give the quickest explanation. But for those that prefer reading, skip past the video and all the info is below it. Happy Transcribing! (and so much more :-)

We’re going to go over the different areas of Transcriptive Rough Cutter, so you know where to find stuff, but we’ll leave deeper explanations for other tutorials. So let’s get started.

Transcriptive Rough Cutter, Editing video with text and searching your entire Premiere project

The first thing to know is the Clip Mode switch. If this is on. Then Transcriptive is going to be looking at the project panel and as you select different clips, it’s going to show the transcript for that clip. If you have this turned off, it will be in sequence mode and the transcript will be for whichever sequence is currently active. So as we switch to different sequences, it will load the transcript for that sequence.

Transcriptive Rough Cutter Top Navigation and Features

Next up is getting the transcript itself. Now, if you already have a transcript in text format, you can click on the import dialog and you can import the transcript and the variety of different ways. But if you need to get the transcript, then you click on Transcribe.

Getting a transcript with Transcriptive

And this will allow you to select which speech service to go with. Alignment is also here. So if you’ve imported a text based transcript that does not have timecode, alignment will analyze the audio and add timecode to your imported text file. Now you can also select the language. Glossary allows you to type in names or terminology that the A.I. might not necessarily know, and they can definitely improve accuracy. If you have a lot of terms that are maybe unusual. So Transcribe dialogue is incredibly important.

The Auto Load button that’s next to Transcribe tells Transcriptive Rough Cutter to automatically load the transcript for whatever you click on. So if I’m down in the project panel and clicking on different clips, Transcriptive will load the transcript for those clips. If you want to lock it to just one clip/sequence, say you’re using a sequence and you always want to see the transcript for that sequence… turn on Sequence Mode (Clip Mode = Off) and no matter what we do this transcript will be shown if Auto Load = Off. So as I move to different sequences or clips, the transcript for the sequence that was shown when we turned Auto Load off, is now always shown.

Editing with text in

And of course, you can edit text. it works similar to a word processor, except every word has timecode. You can just click on words and start typing away. Because every word has timecode, as you click on different words, it’s going to move to different points on the Sequence/Clip timeline. You can also change speakers by clicking on the speakers and selecting from the dropdown menu. On the right hand side, you’ll see three icons. This is where you add Comments or Delete entire blocks of text or Strike Through the text for use with the Rough Cut feature.

And that brings us to the main menu where you can Manage Speakers. You can click on that. It will allow you to add speakers, change the name of speakers, and all that will then be reflected in the dropdown you see in the Text Edit window.

Sync Transcript to Sequence Edit is an important item. If you edit your sequence and delete stuff, it will become out of sync with the transcript. The transcript will have stuff that’s no longer in your sequence. If you select Sync Transcript To Sequence Edit, Transcriptive will go through your sequence and rebuild the transcript to match what you’ve edited out.

You can also Batch Files. Which is very important if you have lots of clips that you want to get transcribed. Batch is a very easy way of processing as many clips as you want at the same time. There are multiple ways you can do it, Batch Project will transcribe anything selected in the Project panel and with Batch Files/Folder, you select files from the operating system. (kind of like importing files into Premiere) If you need to do a lot of transcribing this is a VERY important feature.

At the bottom of the Transcriptive Rough Cutter panel you have the ability to Export Files like a text file of the entire transcript. And… There’s the Rough Cut button, which is a key feature of Transcriptive Rough Cutter. It will take a transcript that you have edited and build a sequence based on that transcript. So if you delete text, it will delete that portion of the clip or sequence from the new Rough Cut. So this is a feature that requires a bit of explaining, so I definitely encourage you to check out the in depth tutorial on Rough Cut.

You also have the ability to search. Search is one of the most powerful features of Transcriptive Rough Cutter, along with Power Search, which is the other panel that ships with transcript. Here you can search the entire transcript that’s in the Transcriptive Rough Cutter Panel. You can also replace words, but the real power comes from Power Search, which can search the entire project. So if you’re looking for something and you’re not quite sure what transcript or clip it’s from. You can type in the term and get a bunch of search results, much like any other search engine. And when you click on those results, it’s going to open up that clip and jump right to where that happens. So we can click on these other ones, it’ll work for sequences as well. And then when you load that up, that transcript will appear in Transcriptive Rough Cutter. And since there’s nothing else like this anywhere in Premiere itself, this is a really powerful way of making use of your transcripts.

If you’d like to share the transcript with another Transcriptive Premiere user or even if Transcriptive.com user, you can come up here to this T icon. And that’s where you can start sharing the sequence or clip with another user. And then you have your job management list, which is all of the jobs that you’ve had done. You can reload them if you need to.

And last but not least, is the account menu. Here you can buy additional minutes, you can get to your account settings. And most importantly, this will take you to your dashboard and that will show you all your charges, all your invoices, upcoming subscription payments, pretty much everything involving your account. So that’s pretty much the onboarding tutorial. That’s the basics.

Like I said, we have lots of other tutorials that go in depth into all of these features, but just want to give you a kind of brief overview of where everything is at and where to find everything. So hopefully you enjoyed that. And like I said, definitely check out the other tutorials and you’ll be up and running.

The Rule of Thirds in Practice

Most of us have heard of the rule of thirds. And probably for most readers of this blog it’s second nature by now. But for those somewhat new to photo/videography or if you just want to see how someone else uses/breaks the rules, I figured a serendipitous photoshoot recently would be a good example.

What is the Rule of Thirds? It’s splitting an image into three parts vertically and horizontally. This can help you create a more pleasing image composition. And like all rules, it’s meant to be bent and broken. Let’s talk about how to use it.

Sometimes you use the rule of thirds while you’re shooting. If you’re doing a portrait, you can pose your model, frame her in camera and take the shot.

Personally, I tend to be more of a wildlife photographer. Birds and whales don’t usually pose for you… you’re just trying to take the shot as fast as f’ing possible while you have the chance! You can crop the photo later to make it fit the rule of thirds (or not).

Recently I was sitting on the balcony of my house and a hawk decided to perch himself right in front of me on a neighbors house. So, grabbed the camera for an impromptu photoshoot:

Those are the cropped ‘rule of third’ shots. Here are the original shots (which are cool in their own way by showing more of the environment):

Let’s talk about why I cropped them the way I did. First off, look at the cropped images. Did you notice that I’m trying to tell a small story with how they’re cropped? (or, at least, framing things so there’s some context to the sequence of images)

Let’s take a look at the first image. One of the things that makes the Rule of Third compelling is that asymmetrical compositions generally look better. But not always! Here we have the ‘hero’ shot of our hawk. I’m introducing him and, as such, he’s pretty much in the center of the frame.

In the next picture, he turns his head to look at something. Now he’s off center and edging towards left and down. We’re creating space off to the right side of the image. Where is he looking? What is he looking at? I want the viewer to be as curious about that as the hawk is. So I want to add space in the image so you can follow his gaze. 

Now he’s preparing to take off! His wings are up and he’s getting ready to fly. I want to add even more space to the right and above him. So I crop the image so he’s split down the middle by the first third line. Because his wings are raised, he’s centered vertically, but he’s still weighted towards the lower third. Hopefully your eye is drawn to where he might be going.

Lift Off! His wings come down and he levitates in preparation to fly. Again, I want the greenery in the shot, so he’s a little lower in the frame than is ideal, but it works. He’s about to take off so having a lot of space up and in the direction he’s going to be flying is all good. (I love this shot… birds of prey are just so amazing) However, usually you don’t want your subject quite so close to the edge. I think it’s a great shot, but you could definitely make the case there’s too much space in the rest of the image. If the trees were closer, I would’ve cropped it differently, but to get them in the image, I had to stretch it a bit towards the upper, right corner. With wildlife you don’t always get to pick your shot!

And he’s off! And… so is this image. Why is this not a great composition? The hawk really should be centered more vertically. He’s a little low in the frame. To correct it, I’d at least move where the wing bends into the upper third.

Bonus tip: the glaring issue with all these photos… well, you can see it hopefully. It’s something easily fixed with Photoshop’s Content Aware Fill. And if you can’t see the problem, perhaps it’s absence will give you a clue:

So hopefully that’s a good intro on how to use the rule of thirds. It’s really about drawing the eye in the direction the subject is looking or heading towards. And, of course, it’s not a hard and fast ‘rule’. Just one way to think about composing your images.

Transcription Accuracy: Adobe Sensei vs Transcriptive A.I.

Speechmatics, one of the A.I. engines we support, recently released a new speech model which promised much higher accuracy. Transcriptive Rough Cutter now supports that if you choose the Speechmatics option. Also with Premiere able to generate transcripts with Adobe Sensei, we get a lot of questions about how it compares to Transcriptive Rough Cutter. 

So we figured it was a good time to do a test of the various A.I. speech engines! (Actually we do this pretty regularly, but only occasionally post the results when we feel there’s something newsworthy about them)

You can read about the A.I. testing methodology in this post if you’re interested or want to run your own tests. But, in short, Word Error Rate is what we pay most attention to. It’s simply:

NumberOfWordsMissed / NumberOfWordsInTranscript

where NumberOfWordsMissed = the number of words in the corrected transcript that the A.I. failed to recognize. If instead of  the word ‘Everything’ the A.I. produced ‘Even ifrits sing’, it still missed just one word. In the reverse situation, it would count as three missed words.

We also track punctuation errors, but those can be somewhat subjective, so we put less weight on that.

What’s the big deal between 88% and 93% Accuracy?

Every 1% of additional accuracy means roughly 15% less incorrect words. A 30 minute video has, give or take, about 3000 words. So with Speechmatics you’d expect to have, on average, 210 missed words (7% error rate) and with Adobe Sensei you’d have 360 missed words (12% error rate). Every 10 words adds about 1:15 to the clean up time. So it’ll take about 18 minutes more to clean up that 30 minute transcript if you’re using Adobe Sensei.

Every additonal 1% in accuracy means 3.5 minutes less of clean up time (for a 30 minute clip). So small improvements in accuracy can make a big difference if you (or your Assistant Editor) needs to clean up a long transcript.

Of course, the above are averages. If you have a really bad recording with lots of words that are difficult to make out, it’ll take longer to clean up than a clip with great audio and you’re just fixing words that are clear to you but the A.I. got wrong. But the above numbers do give you some sense of what the accuracy value means back in the real world.

The Test Results!

All the A.I.s are great at handling well-recorded audio. If the talent is professionally mic’d and they speak well, you should get 95% or better accuracy. It’s when the audio quality drops off that Transcriptive and Speechmatics really shine (and why we include them in Transcriptive Rough Cutter). And I 100% encourage you to run your own tests with your own audio. Again, this post outlines exactly how we test and you can easily do it yourself.

Speechmatics New is the clear winner, with a couple first place finishes, no last place finishes, and at 93.3% rate overall (you can find the spreadsheet with results and the audio files further down the post). One caveat… Speechmatics takes about 5x as long to process. So a 30 minute video will take about 3 minutes with Transcriptive A.I. and 15-20 minutes with Speechmatics. If you select Speechmatics in Transcriptive, you’re getting the new A.I. model.

Adobe Sensei is the least accurate with two last place finishes and no first places, for a 88.3% accuracy overall. Google, which is another A.I. service we evaluate but currently don’t use, is all over the place. Overall, it’s 80.6%, but if you remove the worst and best examples, it’s a more pedestrian 90.3%. No idea why it failed so badly on the Bill clip, but it’s a trainwreck. The Bible clip is from a public domain reading of the bible, which I’m guessing was part of Google’s training corpus. You rarely see that kind of accuracy unless the A.I. was trained on it. Anyways, this inconsistency is why we don’t use it in Transcriptive.

Here are the clips we used for this test:

Bill Clip

Zoom clip

Bible clip

Scifi clip

Flower clip

Here’s the spreadsheet of the results (SM = Speechmatics, Green means best performance, Orange means worst). Again, mostly we’re focused on the Word Accuracy. Punctuation is a secondary consideration:

How do We Test Speech-to-Text Services for Accuracy?

Transcriptive-A.I. doesn’t use a single A.I. services on the backend. We don’t have our own A.I., so like most companies that offer transcription we use one of the big companies (Google, Watson, Speechmatics, etc).

We initially started off with Speechmatics as the ‘high quality’ option. And they’re still very good (as you’ll see shortly), but not always. However, since we had so many users that liked them, we still give you the option to use them if you want.

However, we’ve now added Transcriptive-A.I. This uses whatever A.I. services we think is best. It might use Speechmatics, but it might also use one of a dozen other services we test.

Since we encourage users to test Transcriptive-A.I. against any service out there, I’ll give you some insight on how we test the different services and choose which to use behind the scenes.

Usually we take 5-10 audio clips of varying quality that are about one minute long. Some very well recorded, some really poorly recorded and some in between. The goal is to see which A.I. works best overall and which might work better is certain circumstances.

When grading the results, I save out a plain text file with no timecode, speakers or whatever. I’m only concerned about word accuracy and, to a lesser degree, punctuation accuracy. Word accuracy is the most important thing. (IMO) For this purpose, Word 2010 has an awesome Compare function to see the difference between the Master transcript (human corrected) and the A.I. transcript. Newer versions of Word might be better for comparing legal documents, but Word 2010 is the best for comparing A.I. accuracy.

Also, let’s talk about the rules for grading the results. You can define what an ‘error’ is however you want. But you have to be consistent about how you apply the definition. Applying them consistently matters more than the rules themselves. So here are the rules I use:

1) Every word in the Master transcript that is missed counts as one error. So ‘a reed where’ for ‘everywhere’ is just one error, but ‘everywhere’ for ‘every hair’ is two errors.
2) ah, uh, um are ignored. Some ASRs include them, some don’t. I’ll let ‘a’ go, but if an ‘uh’ should be ‘an’ it’s an error.
3) Commas are 1/2 error and full stops (period, ?) are also 1/2 error but there’s an argument for making them a full error.
4) If words are correct but the ASR tries to separate/merge them (e.g. ‘you’re’ to ‘you are’, ‘got to’ to ‘gotta’, ‘because’ to ’cause) it does not count as an error.

That’s it! We then add up the errors, divide that by the number of words that are in the clip, and that’s the error rate!

Upgraded to FCP 10.6? Please Update Your Plugins.

Apple just launched Final Cut Pro 10.6 which has some cool new features, like Face Tracking. Unfortunately they also introduced a bug or two. One of which prevents our plugins from registering. So… we updated all our plugins to work around the issue. Please go here: https://digitalanarchy.com/demos/psd_mac.html

And you can download the updated version of any plugin you own. You only need to do this if you’re doing a fresh install of the plugins. Updating FCP should not cause the problem. But if you’re re-installing the plugin, then you might need the updated version.

The issue is that the Yellow Question Mark at the top of the Inspector, doesn’t open a dialog when it’s clicked. It should open up our registration dialog (or about box) as shown here:

Registration dialog for Beauty Box or any Digital Anarchy plugin

So if you’re clicking on the Question Mark to register and nothing happens… Please update your plugins!

These are free updates if you own the most recent version of the plugin.

If you own an older version and don’t want to upgrade, the licensing dialog DOES work in Motion. It’s only an FCP problem. So if you have Motion, you can apply the plugin there and register it.

Adobe Transcripts and Captions & Transcriptive: Differences and How to Use Them Together

Adobe just released a big new Premiere update that includes their Speech-to-Text service. We’ve had a lot of questions about whether this kills Transcriptive or not (it doesn’t… check out the new Transcriptive Rough Cutter!). So I thought I’d take a moment to talk about some of the differences, similarities, and how to use them together.

The Adobe system is basically what we did for Transcriptive 1.0 in 2017. So Transcriptive Rough Cutter has really evolved into an editing and collaboration tool, not just something you use to get transcripts.

The Adobe solution is really geared towards captions. That’s the problem they were trying to solve and you can see this in the fact you can only transcribe sequences. And only one at a time. So if you want captions for your final edit, it’s awesome. If you want to transcribe all your footage so you can search it, pull out selects, etc… it doesn’t do that.

So, in some ways the Transcriptive suite (Transcriptive Rough Cutter, PowerSearch, TS Web App) is more integrated than Adobe’s own service. Allowing you to transcribe clips and sequences, and then search, share, or assemble rough cuts with those transcripts. There are a lot of ways using text in the editing process can make life a lot easier for an editor, beyond just creating captions.

Sequences Only

Adobe's Text panel for transcribing sequences

The Adobe transcription service only works for Sequences. It’s really designed for use with the new Caption system they introduced earlier this year.

Transcriptive can transcribe media and sequences, giving the user a lot more flexibility. One example: they can transcribe media first, use that to find soundbites or information in the clips and build a sequence off that. As they edit the sequence, add media, or make changes they can regenerate the transcript without any additional cost. The transcripts are attached to the media… so Transcriptive just looks for which portions of the clips are in the sequence and grabs the transcript for that portion.

Automatic Rough Cut

Rough Cut: There are two ways of assembling a ‘rough cut’ with Transcriptive Rough Cutter. What we’re calling Selects, which is basically what I mention above in the ‘Sequences Only’ paragraph: Search for a soundbite, you set In/Out points in the transcript of the clip with that soundbite, and insert that portion of the video into a sequence.

Then there’s the Rough Cut feature, where Transcriptive RC will take a transcript that you edit and assemble a sequence automatically: creating edits where you’ve deleted or struckthrough text and removing the video that corresponds to those text edits. This is not something Adobe can do or has made any indication they will do, so far anyways.

Editing with text in Premiere Pro and Transcriptive Rough Cutter

Collaboration with The Transcriptive Web App

One key difference is the ability to send transcripts to someone that does not have Premiere. They can edit those transcripts in a web browser and add comments, and then send it all back to you. They can even delete portions of the text and you can use the Rough Cut feature to assemble a sequence based on that.

Searching Your Premiere Project

PowerSearch: This separate panel (but included with TS) lets you search every piece of media in your Premiere project that has a transcript in metadata or in clip/sequence markers. Premiere is pretty lacking in the Search department and PowerSearch gives you a search engine for Premiere. It only works for media/sequences transcribed by Transcriptive. Adobe, in their infinite wisdom, made their transcript format proprietary and we can’t read it. So unless you export it out of Premiere and then import it into Transcriptive, PowerSearch can’t read the text unfortunately.

Easier to Export Captions

Transcriptive RC let’s you output SRT, VTT, SCC, MCC, SMPTE, or STL just by clicking Export. You can then use these in any other program. With Adobe you can only export SRT, and even that takes multiple steps. (you can get other file formats when you export the rendered movie, but you have to render the timeline to have it generate those.)

I assume Adobe is trying to make it difficult to use the free Adobe transcripts anywhere other than Premiere, but I think it’s a bit shortsighted. You can’t even get the caption file if you render out audio… you have to render a movie. Of course, the workaround is just to turn off all the video tracks and render out black frames. So it’s not that hard to get the captions files, you just have to jump through some hoops.

Sharing Adobe Transcripts with Transcriptive Rough Cutter and Vice Versa

I’ve already written a blog post specifically about showing how to use Adobe Transcripts with Transcriptive. But, in short… You can use Adobe transcripts in Transcriptive by exporting the transcript as plain text and using Transcriptive’s Alignnment feature to sync the text up to the clip or sequence. Every word will have timecode just as if you’d transcribed it in Transcriptive. (this is a free feature)

AND… If you get your transcript in Transcriptive Rough Cutter, it’s easy to import it into the Adobe Caption system… just Export a caption file format Premiere supports out of Transcriptive RC and import it into Premiere. As mentioned, you can Export SRT, VTT, MCC, SCC, SMPTE, and STL.

Two A.I. Services

Transcriptive Rough Cutter gives you two A.I. services to choose from, allowing you use whatever works best for your audio. It is also usually more accurate than Adobe’s service, especially on poor quality audio. That said, the Adobe A.I. is good as well, but on a long transcript, even a percentage point or two of accuracy will add up to saving a significant amount of time cleaning up the transcript.

Using Adobe Premiere Pro Transcripts and Captions with Transcriptive (updated for Premiere 2022)

In this post we’ll go over how to use transcripts from Premiere’s Text panel with Transcriptive. This could be easier if Adobe exported the transcript with all the timecode data. We’ve asked them to do this but it will probably mean more coming from users. So please feel free to request that from them. Currently it’s not hard, but does require a couple more steps than it should.

Anyways, once you export the Adobe transcript, you’ll use Transcriptive’s Alignment feature to convert it! Easy and free.

Also, if you’re trying to get captions out of Transcriptive and into Premiere, you can do that with any version of Premiere. Since this is easy, just Export out of Transcriptive and Import in Premiere, I’ll cover it last.

Getting Transcripts from Adobe Sensei (Premiere’s Text panel) into Transcriptive

You can use either SRTs or Plain Text files to get the transcript into Transcriptive. Usually once the transcript is in Transcriptive you’ll want to run Alignment on it (which is free). This will sync the text up to the audio and give you per-word timecode. If you do this, exporting as a plain text file is better as you’ll be able to keep the speakers. (Adobe SRT export doesn’t support speakers)

However, SRTs have more frequent timestamps so if Alignment doesn’t work or you want to skip that step, SRTs are better. However, the per-word timecode may not be perfect as Transcriptive will need to interpolate between timestamps.

One advantage of SRTs is you can use Transcriptive Adobe Importer which will import the SRT and automatically align it. Making it a bit easier. But it’s not that big of a deal to manually run alignment. This does not support Text files.

Getting the transcript in Premiere

1. Open up the Text panel from the Window menu.

2. You should see three options, one of which is Transcribe Sequence

You can only transcribe sequences with Adobe’s service. If you want to transcribe individual clips, you’ll still need to use Transcriptive. (or get transcripts by dropping each one into a different sequence)

3. With your sequence selected, click the Transcribe Sequence button and Premiere will process it and return the transcript! (This can take a few minutes)

Exporting a Text File in Premiere 2022

Once the transcript is back, go to the menu in the upper, right corner and select Export to Text File. In Premiere 2022 you can do this with either Transcript or Captions selected. In 2021, this only works from Captions. (Export Transcript saves to a proprietary Adobe format that is not readable by third party plugins, so it has to be a Text File. )

Exporting a Text File in Premiere 2021

Step 1: In Premiere 2021, once the transcript is back, you need to turn it into captions. You can not export it from the Transcript tab as in Premiere 2022. So click the Caption button to convert the transcript into captions.

Step 2: Premiere will create the captions. From the Caption tab, you can export as SRT or Plain Text. Select ‘Export to text file’ and save the file.

Exporting SRTs in Premiere 2022 and 2021

It is basically the same as the steps above for exporting a Text file in Premiere 2021. In both 2022 and 2021 you need to turn the transcript into captions and then Export to SRT File from the Caption menu. (so in Step 2 above, do that instead of Export to Text File)

Note that in Premiere 2022 the ‘create captions’ button is the closed caption icon.

Back in Transcriptive Rough Cutter

1. Going back to Transcriptive, we can now import the Plain Text file. With your sequence or clip selected, click Transcriptive’s Import button and select the Plain Text file.

The settings in Import don’t really matter that much, unless you have Speakers. Since we’re going to use Alignment to get the per-word accurate timecode, the Import timecode settings are mostly moot.

That should bring the text into Transcriptive.

2. Click on the Transcribe Button. When the Transcribe dialog appears, select Alignment from the ‘Transcribe With’ dropdown. This is done offline and it’s free for English! There is an option to align using the A.I. services. However, those are not free. But if you want to align languages other than English that’s the only option currently.

3. Click OK… and Transcriptive will start processing the text and audio of the sequence, adding accurate timecode to the text, just as if you’d transcribed it from scratch!

So that’s how you get the Adobe transcription into Transcriptive!

(If Adobe had just added a feature to export the transcript with the timecode it already had in the Text panel… none of the above would be necessary. But here we are. So you should put in a feature request for that!)

Again, Adobe’s transcription service only works for sequences. So if you have a bunch of clips or media you want to transcribe, the easiest way is to use our Batch Transcribe function. And while Transcriptive’s transcription isn’t free, it’s only .04/min ($2.40/hr). However, as mentioned, you can drop each clip into a sequence and transcribe them individually that way. Once you’ve done that, you can use our Batch Alignment feature to get all the transcripts into Transcriptive!

Getting Captions from Transcriptive into Premiere’s Caption System

This is an easy one. You can export a variety of different caption formats from Transcriptive: SRT, MCC, SCC, EBL, SMPTE, and more.

1. Click the Export button in Transcriptive. From there you can select the caption format you want to use. SRT and SCC are the common ones.

2. Back in Premiere, Import the caption file into your project. Premiere will automatically recognize it as a caption file. When you drop it onto your sequence, it’ll automatically load into the Caption tab of Premiere’s Text panel.

Easy peasy. That’s all there is to it!

How to get Transcriptive.com for $8/mo or $96/year

Our web app makes most of the Transcriptive for Premiere Pro Panel functionalities available online, allowing users to transcribe, edit, export captions or text files, add comments, strikethrough text, and share transcripts with editors. It was designed to make cross-team collaboration a quick and easy process, and Transcriptive Premiere panel owners pay less to access all its features.

So if you own Transcriptive for Premiere Pro, watch the video to learn how to link your panel license to your web app account and pay $8/month or $96/year! Or follow the instructions the step-by-step instructions  below: 

  1. Open Transcriptive for Premiere Pro.

2. In the Serial Number setup window, log into your Transcriptive.com account.  If your panel is already registered, go to the sandwich menu on the upper left corner, click on “License”, and choose “Deactivate”. You can then log into your Transcriptive.com account.

3. The window will then ask for your serial number. Enter your serial number and click “Register”. This will link the account to the serial number and automatically apply the discount. 

4. Head to https://app.transcriptive.com and log in.

5. Click on “Subscription” on the left side menu and choose Producer Monthly ($19) or Producer annual ($160).  Transcriptive will charge $8/mo or $96/year instead of $19 and $160. The discounted prices will show on your Invoice. 

Subscriptions cost $19/month and $160/year for Transcriptive.com only users so make sure the account is linked and you are receiving the discount! 

Transcriptive for Premiere Pro users do not need to sign up for a paid subscription if they don’t intend to edit and export transcripts or add comments and strikethrough, online. A Free limited subscription is available. 

Questions? Send an email to sales@nulldigitalanarchy.com.

Transcriptive Keyboard Shortcuts

Keyboard Shortcuts are a huge part of Transcriptive and can make working in it much faster/easier. These are for Transcriptive 2.x/3.x. If you’re still using 1.x, please check the manual.

Ctrl + Space: Play / Stop

Undo: Ctrl + Z (Mac and PC)
Redo: Ctrl + Shift + Z

MAC USERS: Mac OS assigns Cmd+Z to the application (Premiere) and we can’t change that.

Editing text:

Ctrl + Left Arrow – Previous Word  |  Ctrl + Right Arrow – Next Word

Merging/Splitting Lines/Paragraphs:
Ctrl + Shift + Up OR [Delete]: Merge Line/paragraph with line above.
Ctrl + Shift + Down OR [Enter}: Split Line/paragraph into two lines.
(These behave slightly differently. ‘Control+Shift+up’ will merge the two lines together no matter where the cursor is. If you’re trying to combine a bunch of lines together, this is very fast. [Delete] uses the cursor position, which has to be at the beginning of the line to merge the lines together.)

Up or Down Arrow: Change Capitalization

Ctrl + Backspace: Delete Word | Ctrl + Delete: Delete Word

Ctrl + Up: Previous Speaker | Ctrl + Down: Next Speaker

Editing Video (Clip Mode only):

Control + i: Set In Point in Source panel
Control + o: Set Out Point in Source panel
Control + , (comma): Insert video segment into active sequence (this does the same thing as , (comma) in the Source panel)
Control + u : Clear In & Out Points (necessary for sharing)

Converting an SRT (or VTT) Caption File to Plain Text File for Free

This is a quick blog post showing you how to use the free Transcriptive trial version to convert any SRT caption file into a text file without timecode or line numbers (which SRTs have). You can do this on Transcriptive.com or if you have Premiere, you can use Transcriptive for Premiere Pro.

This can occur because you have a caption file (SRT or VTT) but don’t have access to the original transcript. SRT files tend to look like this:

1
00:00:02,299 –> 00:00:09,100
The quick brown fox

2
00:00:09,100 –> 00:00:17,200
hit the gas pedal and

And you might want normal human readable text so someone can read the dialog, without the line numbers and timecode. So this post will show you how to do that with Transcriptive for free!

We are, of course, in the business of selling software. So we’d prefer you bought Transcriptive BUT if you’re just looking to convert an SRT (or any caption file) to a text file, the free trial does that well and you’re welcome to use it. (btw, we also have some free plugins for After Effects, Premiere, FCP, and Resolve HERE. We like selling stuff, but we also like making fun or useful free plugins)

Getting The Free Trial License

As mentioned, this works for the Premiere panel or Transcriptive.com, but I’ll be using screenshots from the panel. So if you’re using Transcriptive.com it may look a little bit different.

You do need to create a Transcriptive account, which is free. When the panel first pops up, click the Trial button to start the registration process:

Click the Trial button to start the registration process
You then need to create your account, if you don’t have one. (If you’re using Transcriptive.com, this will look different. You’ll need to manually select the ‘free’ account option.)

Transcriptive Account Creation
Importing the SRT

Once you register the free trial license, you’ll need to import the SRT. If you’re on Transcriptive.com, you’ll need to upload something (could be 10sec of black video, doesn’t matter what, but there has to be some media). If you’re in Premiere, you’ll need to create a Sequence first, make sure Clip Mode is Off (see below) and then you can click IMPORT.

Importing an SRT into Premiere
Once you click Import, you can select SRT from the dropdown. You’ll need to select the SRT file using the file browser (click the circled area below). Then click the Import button at the bottom.

You can ignore all the other options in the SRT Import Window. Since you’re going to be converting this to a plain text file without timecode, none of the other stuff matters.

SRT Import options in Transcriptive

After clicking Import, the Transcriptive panel will look something like this. The text from the SRT file along with all the timecode, speakers, etc:

An editable transcript in Transcriptive


Exporting The Plain Text File

Alright… so how do we extract just the text? Easy! Click the Export button in the lower, left corner. In the dialog that gets displayed, select Plain Text:
Exporting a plain text file in Premiere Pro

The important thing here is to turn OFF ‘Display Timecode’ and ‘Include Speakers’. This will strip out any extra data that’s in the SRT and leave you with just the text. (After you hit the Export button)

That’s it!

Ok, well, since caption files tend to have lines that are 32 characters long you might have a text file that looks like this:

The quick brown fox
hit the gas pedal and

If you want that to look normal, you’ll need to bring it into Word or something and replace the Paragraphs with a Space like this:

replace

And that will give you:

The quick brown fox hit the gas pedal and

And now you have human readable text from an SRT file! A few steps, but pretty easy. Obviously there are lots of other things you can do with SRTs in Transcriptive, but converting the SRT to a plain text file is one that can be done with the free trial. As mentioned, this also works with VTT files as well.

So grab the free trial of Transcriptive here and you can do it yourself! You can also request an unrestricted trial by emailing cs@nulldigitalanarchy.com. While this SRT to Plain Text functionality works fine, there are some other limitations if you’re testing out the plugins for transcripts or editing the text.

Tom Cruise and The Deepfake End of The World

Any time I hear people freaking out about A.I., for good or bad, I’m skeptical. So much that happens in the world of A.I. is hype that the technology may never live up to, much less live up to it now, that you have to take it with a grain of salt.

So it goes with the great Tom Cruise deepfake.

It took a good VFX artist two months to turn footage of a Tom Cruise impersonator into the videos that people are freaking out about. The Verge has a good article on it.

This is an awesome demo reel for the VFX artist involved. It’s very well done.

But it doesn’t make an awesome case for the technology disrupting the world as we know it. It needed raw footage of someone that looked and acted like Cruise. It then took months to clean up the results of the A.I. modifying the Cruise look-a-like.

(It does make an interesting case for the tech to be used in VFX, but that’s something different)

This isn’t a ‘one-click’ or even a ‘whole-bunch-of-clicks’ technology. It’s a ‘shit-ton-of-work’ technology and given they had the footage of the Cruise look-a-like you can make an argument that it could’ve been done in less time with traditional rotoscoping and compositing.

Anyways, the fear and consternation has gotten ahead of itself. We’ve had the ability to put people in photos they weren’t in for a long time. We’ve figured out how to deal with it. (not to mention, it’s STILL very difficult to cut someone out of one picture and put them in another one without it being detectable… and Photoshop is, what, 30 years old now?)

It’s good to consider the implications but we’re a long, long way from anyone being able to do this to any video.

Why do we have the lowest transcription costs?

We occasionally get questions from customers asking why we charge .04/min ($2.40/hr) for transcription (if you pre-pay), when some competitors charge .25/min or even .50/min. Is it lower accuracy? Are you selling our data?

No and no. Ok, but why?

Transcriptive and PowerSearch work best when all your media has transcripts attached to it. Our goal is to make Transcriptive as useful as possible. We hope the less you have to think about the cost of the transcripts, the more media you’ll transcribe… resulting in making Transcriptive and PowerSearch that much more powerful.

The Transcriptive-AI service is equal to, or better, than what other services are using. We’re not tied to one A.I. and we’re constantly evaluating the different A.I. services. We use whatever we think is currently state-of-the-art.  Since we do such a high volume we get good pricing from all the services, so it doesn’t really matter which one we use.

Do we make a ton of money on transcribing? No.

The services that charge .25/min (or whatever) are probably making a fair amount of money on transcribing. We’re all paying about .02/min or less. Give or take, that’s the wholesale/volume price.

If you’re getting your transcripts for free… those transcripts are probably being used for training, especially if the service is keeping track of the edits you make (e.g. YouTube, Otter, etc.). Transcriptive is not sending your edits back to the A.I. service. That’s the important bit if you’re going to train the A.I. Without the corrected version, the A.I. doesn’t know what it got wrong and can’t learn from it.

So, for us, it all comes down to making Transcriptive.com, the Transcriptive Premiere Pro panel, and PowerSearch as useful as possible. To do so, we want the most accurate transcripts and we want them to be as low cost as possible. We know y’all have a LOT of footage. We’d rather reduce the barriers to you transcribing all of it.

So… if you’re wondering how we can justify charging .04/min for transcripts, that’s the reason. It enables all the other cool features of Transcriptive and PowerSearch. Hopefully that’s a win for everyone.

Changes between Transcriptive 2.x and 1.x

We often get asked what the differences are between Transcriptive 2.0 and 1.0. So here is the full list of new features! As always there are a lot of other bug fixes and behind the scenes changes that aren’t going to be apparent to our customers. So this is just a list of features you’ll encounter while using Transcriptive.

NEW FEATURES IN TRANSCRIPTIVE 2.0

Works with clips or sequences: You no longer have to have clips in sequences to get them transcribed. Clips can be transcribed and edited just by selecting them in the Project panel. This opens up many different workflows and is something the new caption system in Premiere can’t do. Watch the tutorial on transcribing clips in Premiere

Clip Mode with IN/OUT pointsA clip selected in the Project panel. Setting In/Out points in TS!

Editing with Text: Clip Mode enables you to search through clips to find sound bites. You can then set IN/OUT points in the transcript and insert them into your edit. This is a powerful way of compiling rough cuts without having to scrub through footage. Watch the Tutorial on editing video using a transcript!

Collaborate by Sharing/Send/receive to Transcriptive.com: Collaborate on creating a paper edit by sharing the transcript with your team and editor. Send transcripts or videos from Premiere to Transcriptive.com, letting a client, AE, or producer edit them in a web browser or add Comments or strike-through text. The transcript can then be sent back to the video editor in Premiere to continue working with it. Watch the tutorial on collaborating in Premiere using Transcriptive.com! There’s also this blog post on collaborative workflows.

Now includes PowerSearch for free! Transcriptive can only search one transcript at a time. With PowerSearch, you can search every clip and sequence in your project! It’s a search engine for Premiere. Search for text and get search results like Google. Click on a result and it jumps to exactly where the dialog is in that clip or sequence. Watch the tutorials on PowerSearch, the search engine for Premiere.

PowerSearch- A search engine for Premiere Pro
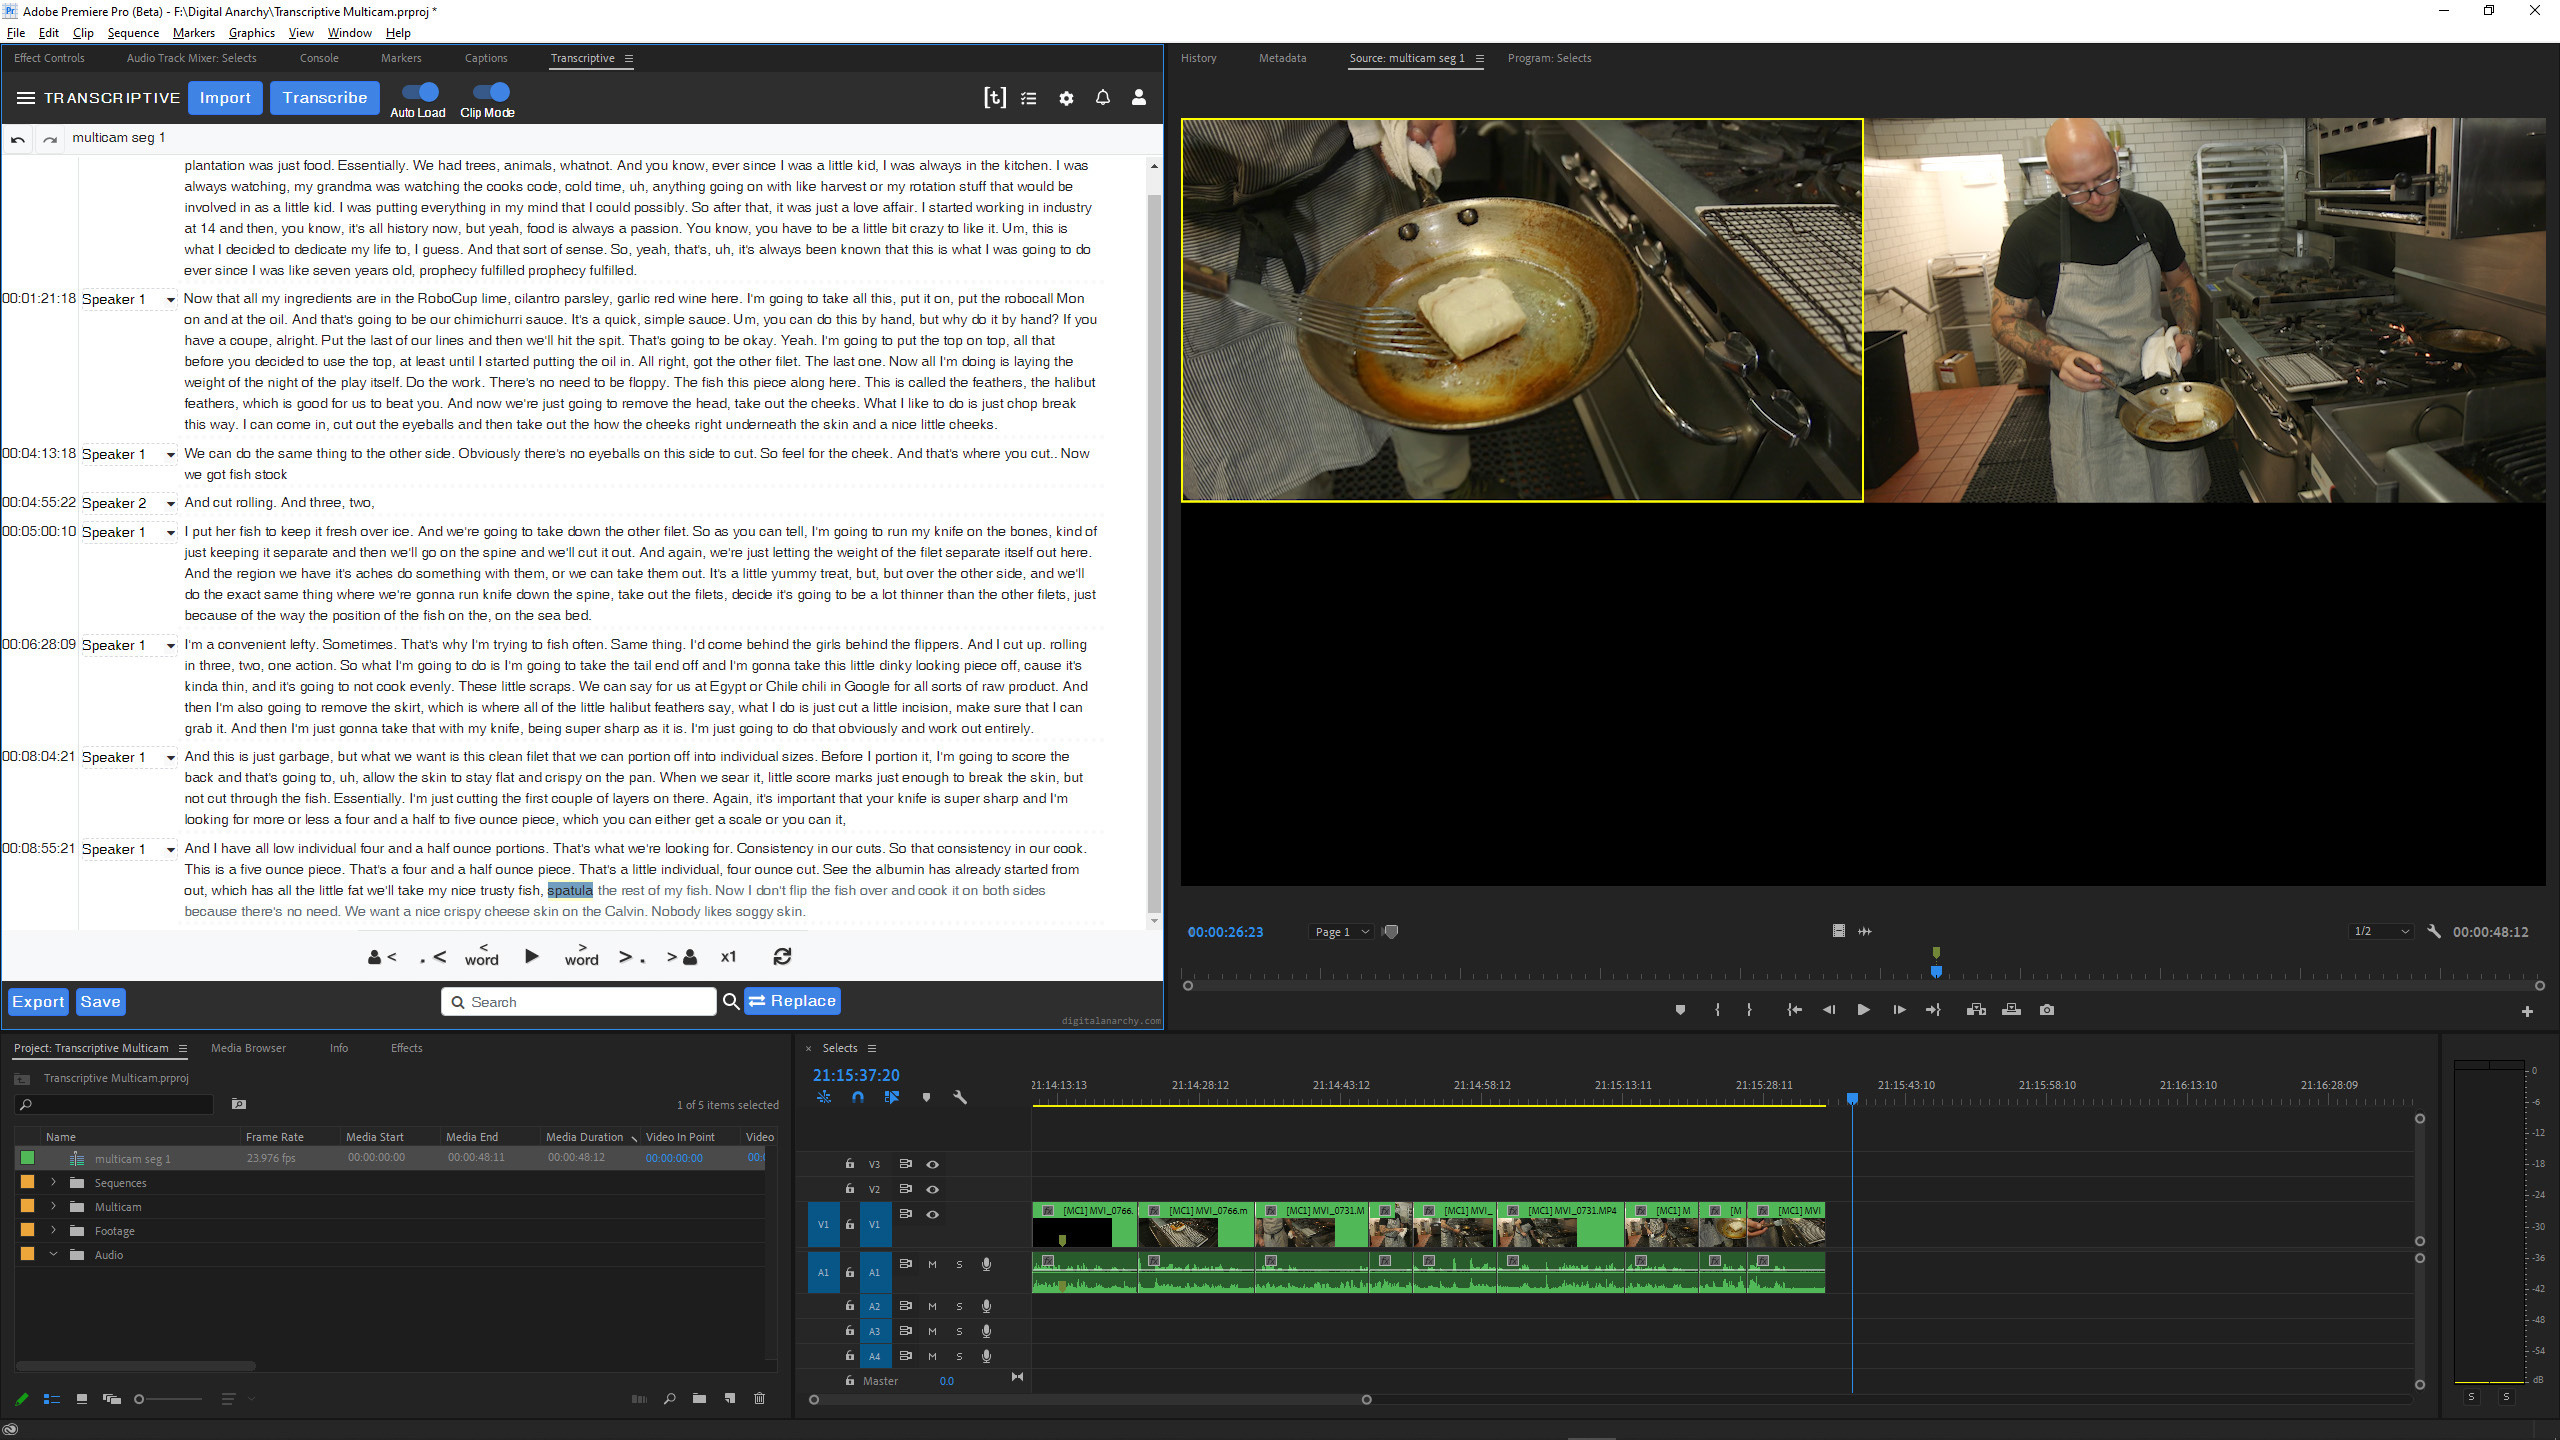
Search results in Premiere! Click to jump to that point in the media.


Reduced cost
: As low as .04/min. by prepaying minutes you can get the cost down to .04/min! Why is it so inexpensive? Is it worse than the other services that charge .25 or .50/min? No! We’re just as good or better (don’t take my word, run your own comparisons). Transcriptive only works if you’ve transcribed your footage. By keeping the cost of minutes low, hopefully we make it an easy decision to transcribe all your footage and make Transcriptive as useful as possible!

Ability to add comments/notes at any point in the transcript. The new Comments feature lets you add a note to any line of dialog. Incredibly useful if you’re working with someone else and need to share information. It’s also great if you want to make notes for yourself as you’re going through footage.

Add comments to your transcript
Strikethrough text
: Allows you to strikethrough text to indicate dialog that should be removed. Of course, you can just delete it but if you’re working with someone and you want them to see what you’ve flagged for deletion OR if you’re just unsure if you want to definitely delete it, strikethrough is an excellent way of identifying that text.

Glossary: Unlimited glossary for increasing the A.I. accuracy. This allows you to enter in proper names, company names, jargon and other difficult words to help the A.I. choose the right one. Here’s a blog post explaining how to use this for custom vocabulary. I used an MLB draft video to illustrate how the glossary can help. And another blog post on WHY the A.I. needs help.

More ‘word processor’ like text editor: A.I. isn’t perfect, even though it’s pretty close in many cases (usually 96-99% accurate with good audio). However, you can correct any mistake you find with the new  text editor! It’s quick and easy to use because it works just like a word processor built into Premiere. Watch the tutorial on editing text in Transcriptive!

Align English transcripts for free: If you already have a script, you can sync the text to your audio track at no cost. You’ll get all the benefits of the A.I. (per word timing, searchability, etc) without the cost. It’s a free way of making use of transcripts you already have. Watch the tutorial on syncing transcripts in Premiere!

Adjust timing for words: If you’re editing text and correcting any errors the A.I. might have made it can result in the new words having timecode that doesn’t quite sync with the spoken dialog. This new feature lets you adjust the timecode for any word so it’s precisely aligned with the spoken word.

Ability to save the transcript to any audio or video file: In TS 1.0 the transcript always got saved to the video file. Now you can save it to any file. This is very helpful if you’ve recorded the audio separately and want the transcript linked to that file.

More options for exporting markers: You can set the duration of markers and control what text appears in them.

Profanity filter: **** out words that might be a bit much for tender ears.

More speaker management options: Getting speaker names correct can be critical. There are now more options to control how this feature works.

Additional languages: Transcriptive now supports over 30 languages!

Checks for duplicate transcripts: Reduces the likelihood a clip/sequence will get transcribed twice unnecessarily. Sometimes users will accidentally transcribe the same clip twice. This helps prevent that and save you money!

Lock to prevent editing: This allows other people to view the transcript in Premiere or on Transcriptive.com and prevent them from accidentally making changes.

Sync Transcript to Sequence: Often you’ll get the transcript before you make any edits. As you start cutting and moving things around, the transcript will no longer match the edit. This is a one-click way of regenerating the transcript to match the edit.

Streamlined payment/account workflow: Access multiple speech engines with one account. Choose the one most accurate for your footage.

A.I. Speech-to-Text: How to make sure your data isn’t being used for training

We get a fair number of questions from Transcriptive users that are concerned the A.I. is going to use their data for training.

First off, in the Transcriptive preferences, if you select ‘Delete transcription jobs from server’ your data is deleted immediately. This will delete everything from the A.I. service’s servers and from the Digital Anarchy servers. So that’s an easy way of making sure your data isn’t kept around and used for anything.

However, generally speaking, the A.I. services don’t get more accurate with user submitted data. Partially because they aren’t getting the ‘positive’ or corrected transcript.

When you edit your transcript we aren’t sending the corrections back to the A.I. (some services are doing this… e.g. if you correct YouTube’s captions, you’re training their A.I.)

So the audio by itself isn’t that useful. What the A.I. needs to learn is the audio file, the original transcript AND the corrected transcript. So even if you don’t have the preference checked, it’s unlikely your audio file will be used for training.

This is great if you’re concerned about security BUT it’s less great if you really WANT the A.I. to learn. For example, I don’t know how many videos I’ve submitted over the last 3 years saying ‘Digital Anarchy’. And still to this day I get: Dugal Accusatorial (seriously), Digital Ariki, and other weird stuff. A.I. is great when it works, but sometimes… it definitely does not work. And people want to put this into self-driving cars? Crazy talk right there.

 If you want to help the A.I. out, you can use the Speech-to-Text Glossary (click the link for a tutorial). This still won’t train the A.I., but if the A.I. is uncertain about a word, it’ll help it select the right one.

How does the glossary work? The A.I. analyzes a word sound and then comes up with possible words for that sound. Each word gets a ‘confidence score’. The one with the highest score is the one you see in your transcript. In the case above, ‘Ariki’ might have had a confidence of .6 (out 0 to 1, so .6 is pretty low) and ‘Anarchy’ might have been .53. So my transcript showed Ariki. But if I’d put Anarchy into the Glossary, then the A.I. would have seen the low confidence score for Ariki and checked if the alternatives matched any glossary terms.

So the Glossary can be very useful with proper names and the like.

But, as mentioned, nothing you do in Transcriptive is training the A.I. The only thing we’re doing with your data is storing it and we’re not even doing that if you tell us not to.

It’s possible that we will add the option in the future to submit training data to help train the A.I. But that’ll be a specific feature and you’ll need to intentionally upload that data.

Dumb A.I., Dumb Anarchist: Using the Transcriptive Glossary

We’ve been working on Transcriptive for like 3 years now. In that time, the A.I. has heard my voice saying ‘Digital Anarchy’ umpteen million times. So, you would think it would easily get that right by now. As the below transcript from our SRT Importing tutorial shows… not so much. (Dugal Accusatorial? Seriously?)

ALSO, you would think that by now I would have a list of terms that I would copy/paste into Transcriptive’s Glossary field every time I get a transcript for a tutorial. The glossary helps the A.I. determine what  ‘vocal sounds’ should be when it translates those sounds into words. Uh, yeah… not so much.

So… don’t be like AnarchyJim. If you have words you know the A.I. probably won’t get: company names, industry jargon, difficult proper names (cool blog post on applying player names to an MLB video here), etc., then use Transcriptive’s glossary (in the Transcribe dialog). It does work. (and somebody should mention that to the guy that designed the product. Oy.)

Use the Glossary field in the Transcribe dialog!Overall the A.I. is really accurate and does usually get ‘Digital Anarchy’ correct. So I get lazy about using the glossary. It is a really useful thing…

A.I. Glossary in Transcriptive

Importing an SRT into Premiere Pro 2020 & 2021

(The above video covers all this as well, but for those who’d rather read, than watch a video… here ya go!)

Getting an SRT file into Premiere is easy!

But, then it gets not so easy getting it to display correctly.

This is mostly fixed in the new caption system that Premiere 2021 has. We’ll go over that in a minute, but first let’s talk about how it works in Premiere Pro 2020. (if you only care about 2021, then jump ahead)

Premiere Pro 2020 SRT Import

1: Like you would import any other file, go to File>Import or Command/Control+I.

2: Select the SRT file you want.

3: It’ll appear in your Project panel.

4: You can drag it onto your timeline as you would any other file.

Now the fun starts.

Enable Captions from the Tool menu
5: From the Tools menu in the Program panel (the wrench icon), make sure Closed Captions are enabled.

5b: Go into Settings and select Open Captions

6: The captions should now display in your Program panel.

7: In many cases, SRT files start off being displayed very small.

You're gonna need bigger captionsThose bigger captions sure look good!

8: USUALLY the easiest way to fix this is to go to the Caption panel and change the point size. You do this by Right+Clicking on any caption and ‘Select All’. (this is the only way you can select all the captions)

Select all the captions

8b: With all the captions selected, you can then change the Size for all of them. (or change any other attribute for that matter)

9: The other problem that occurs is that Premiere will bring in an SRT file with a 720×486 resoltion. Not helpful for a 1080p project. In the lower left corner of the Caption panel you’ll see Import Settings. Click that to make sure it matches your Project settings.

Import settings for captions

Other Fun Tricks: SRTs with Non-Zero Start Times

If your video has an opening without any dialog, your SRT file will usually start with a timecode other than Zero. However, Premiere doesn’t recognize SRTs with non-zero start times. It assumes ALL SRT files start at zero. If yours does not, as in the example below, you will have to move it to match the start of the dialog.

You don’t have to do this with SRTs from Transcriptive. Since we know you’re likely using it in Premiere, we add some padding to the beginning to import it correctly.

Premiere doesn't align the captions wtih the audioIf your captions start at 05:00, Premiere puts them at 00:00

Importing an SRT file in Premiere 2021: The New Caption System!

(as of this writing, I’m using the beta. You can download the beta by going to the Beta section of Creative Cloud.)

0: If you’re using the beta, you need to enable this feature from the Beta menu. Click it on it and ‘Enable New Captions’.

1: Like you would import any other file, go to File>Import or Command/Control+I.

2: Select the SRT file you want.

3: It’ll appear in your Project panel.

4: You can drag it onto your timeline as you would any other file… BUT

This is where things get different!

4b: Premiere 2021 adds it to a new caption track above the normal timeline. You do need to tell Premiere you want to treat them as Open Captions (or you can select a different option as well)

4c: And Lo! It comes in properly sized! Very exciting.

5: There is no longer a Caption panel. If you want to edit the text of the captions, you need to select the new Text panel (Windows>Text). There you can edit the text, add new captions, etc.

6: To change the look/style of the captions you now need to use the Essential Graphics panel. There you can change the font, size, and other attributes.

Overall it’s a much better captions workflow. So far, from what I’ve seen it works pretty well. But I haven’t used it much. As of this writing it’s still in beta and regardless there may be some quirks that show up with heavier use. But for now it looks quite good.

Using Transcriptive with multiple serial numbers and one account

If you work with a team to deliver high quality videos then you know how important it is to keep everything organized between editors, assistant editors, producers, and everyone else involved in a project. With basically everyone working remotely, the need to keep all data under one account seemed like a big priority for our clients. So Transcriptive for Premiere Pro now allows users to log in to one account in order to share prepaid minutes balances, have access to the same projects on Transcriptive.com, track transcribed jobs to avoid duplicates, and access every invoice in one place. 

The licensing for Transcriptive for Premiere Pro has not changed: each license purchased equals one serial number that can be installed on two computers. However, multiple editors can now share the same account and pre-paid minutes if no serial number is attached to the Transcriptive account. It sounds confusing, but it’s a simple process. After the Transcriptive licenses are purchased and the team account is created, you can share the login info with whoever is going to be using Transcriptive. All you need to do is to make sure your team members follow the steps below.

  1. Download Transcriptive for Premiere Pro: 

Mac: https://digitalanarchy.com/demos/psd_mac.html#d11

PC: https://digitalanarchy.com/demos/psd_win.html#d11

  1. Open Premiere Pro>Extensions>Transcriptive
  1. Choose the option to  “Click here to register using just your serial number” in the Serial number setup window and enter the unrestricted trial serial number.

1

  1. Go to Profile the menu on the upper right corner of the panel and use the Transcriptive account credentials to connect the panel to the account created on https://app.transcriptive.com

2

Following steps 3 and 4 each time Transcriptive is setup will authorize the full version of our Premiere Pro plugin without requiring users to create multiple accounts. This means all editors will be able to use one set of pre-paid minutes packages, assistant editors can quickly access the transcripts in Premiere and Transcriptive.com without having to request editors share them between accounts and producers have fewer invoices to track each month. 

It’s important to keep in mind that having everyone logged into the same account also means they all have access to the account information, including the credit card information and transcripts. If this is a big concern for you, please keep in mind it is not the only way to use Transcriptive, as transcripts can still be shared between accounts. See this video to learn more! However, using the same account within a team is still the best way to centralize all the info related to Transcriptive. 

If you are ready to give this setup a try but have not yet purchased a Transcriptive for Premiere Pro license, please send an email to cs@nulldigitalanarchy.com


Apple Silicon Plugins for Final Cut Pro

We have the initial beta builds of native Silicon versions of Flicker Free and Beauty Box for FCP. FCP is the only released app that is currently Universal and supports Silicon plugins. Samurai Sharpen will be released for FCP/Silicon soon.

Builds for other host apps will be released once they release their Silicon versions. The plan right now is to get the FCP versions solid and that’ll make it more likely the builds for other apps will work out of the gate. Also, I don’t love releasing beta plugins for a beta host app (e.g. Resolve).

Overall they seem in pretty good shape. One caveat is that Analyze Frame doesn’t work in Beauty Box, so you need to manually select the Light and Dark Colors with the color picker. This is not ideal, as it’s not exactly the same thing as using Analyze Frame. But it’s what we’ve got right now. It’s actually more of a problem with FCP’s new FxPlug 4 API, so it won’t be fixed until the next release of FCP.

On that note, I’ll mention that there’s a lot of new stuff going on with the Apple builds. FCP announced the new API, which is completely different from FxPlug 3, so it’s required a lot of re-working. Eventually the FxPlug 3 plugins will stop working in FCP, so you’ll need the FxPlug 4 builds sooner or later. We’re also finally porting the GPU code to Metal. So look for new builds that incorporate all that for both Silicon and Intel very soon. Apple is keeping us pretty busy.

If you have any problems please send bug reports to: cs@nulldigitalanarchy.com

Here are the Apple Silicon builds:

https://digitalanarchy.com/beta/flickerfree_21-667_FX4.dmg  (Flicker Free 2.1 Beta)
https://digitalanarchy.com/beta/beautybox_43-337_FX4.dmg  (Beauty Box 4.3 Beta)

Transcriptive and the new Adobe Captions

As you’ve probably heard, Adobe announced a new caption system a few weeks ago. We’ve been fielding a bunch of questions about it and how it affects Transcriptive, so I figured I’d let y’all know what our take on it is, given what we know.

Overall it seems like a great improvement to how Premiere handles captions. Adobe is pretty focused on captions. So that’s mainly what the new system is designed to deal with and it looks impressive. While there is some overlap with Transcriptive in regards to editing the transcript/captions, as far as we can tell there isn’t really anything to help you edit video. And there’s a lot of functionality in Transcriptive that’s designed to help you do that. As such, we’re focused on enhancing those features and adding to that part of the product.

Also, it also looks like it’s only going to work with sequences. It _seems_ that when they add the speech-to-text (it’s not available in the beta yet), it’s mostly designed for generating captions for the final edit.

However, being able to transcribe clips and use the transcript to search the clip in the Source panel is one powerful feature that Transcriptive will allow you to do. You can even set in/out points in Transcriptive and then drop that cut into your main sequence.

The ability to send the transcript to a client/AE that doesn’t have Premiere and let them edit it in a web browser is another.

With Transcriptive’s Conform feature, you can take the edited transcript and use it as a Paper Cut. Conform will build a sequence with all the edits.

Along with a bunch of other smaller features, like the ability to add Comments to the transcript.

So… we feel there will still be a lot of value even once the caption system is released. If we didn’t… we would’ve stopped development on it. But we’re still adding features to it… v2.5.1, which lets you add Comments to the transcript, is coming out this week sometime (Dec. 10th, give or take).

One thing we do know, is that the caption system will only import/export caption files (i.e. SRT, SCC, etc). From our perspective, this is not a smart design. It’s one of my annoyances with the current caption system. Transcriptive users have to export a caption file and re-import that into Premiere. It’s not a good workflow, especially when we should just be able to save captions directly to your timeline. Adobe is telling us it’s going to be the same klugy workflow.

So if that doesn’t sound great to you, you can go to the Adobe site and leave a comment asking for JSON import/export. (URL: https://tinyurl.com/y4hofqoa) Perhaps if they hear from enough people, they’ll add that.

Why would that help us (and you)? When we get a transcript back from the A.I., it’s a rich-data text file (JSON format). It has a lot of information about the words in it. Caption formats are data poor. It’s kind of like comparing a JPEG to a RAW file. You usually lose a lot of information when you save as a caption format (as you do with a JPEG).

It’ll make it much easier for us and other developers to move data back and forth between the caption system and other tools. For example: If you want someone to make corrections to the Adobe transcript outside of Premiere (on Transcriptive.com for example :-), it’s easier to keep the per-word timecode and metadata with a JSON file.

Historically Adobe has had products that were very open. It’s why they have such a robust plugin/third-party ecosystem. So we’re hopeful they continue that by making it easy to access high resolution data from within the caption system or anywhere else data/metadata is being generated.

It’s great Adobe is adding a better caption workflow or speech-to-text. The main reason Transcriptive isn’t more caption-centric is we knew Adobe was going to upgrade that sooner or later. But the lack of easy import/export is a bummer. It really doesn’t help us (or any developer) extend the caption system or help Premiere users that want to use another product in conjunction with the system. As mentioned, it’s still beta, so we’ll see what happens. Hopefully they make it a bit more flexible and open.

Cheers,
Jim Tierney
Chief Executive Anarchist

Why we charge upgrade fees

Most of the updates we release are free for users that have purchased the most recent version of the plugin. However, because we are not subscription based (we still do that old fashioned perpetual license thing), if you don’t own the latest version of the plugin… you have to upgrade to it.

It requires a TON of work to keep software working with all the changes Apple, Adobe, Nvidia and everyone else keeps making. Most of this work we do for free because they’re small incremental changes. Every time you see Beauty Box v4.0.1 or 4.0.7 or 4.2.4 (the current one)… you can assume a lot of work went into that and you don’t have to pay anything. However, eventually the changes add up or Apple (most of the time it’s Apple) does some crazy thing that means we need to rewrite large portions of the plug-in. In either case, we rev the version number (i.e. 4.x to 5.0) and an upgrade is required.

We do not go back and ‘fix’ older versions of the software. We only update the most recent one. Such is the downside of Perpetual licenses. You can use that license forever, but if your host app or OS changes and that change breaks the version of the plugin you have… you need to upgrade to get a fix.

If one of your clients comes to you with a video you did for them in HD, and says ‘hey, I need this in 4K’. Would you redo the video for free? Probably not. They have a perpetual license for the HD version. It doesn’t entitle them to new versions of the video forever.

We want to support our customers. The reason we develop this stuff is because it’s awesome to see the cool things you all do with what we throw out there. If we didn’t have to do any work to maintain the software, we wouldn’t charge upgrade fees. Unfortunately, it is a lot of work. We want to support you, but if we go out of business, that’s probably not going to benefit either of us.

Apple may say it only takes two hours to recompile for Silicon and that may be true. But to go from that to a stable plugin that can be used in a professional environment and support different host apps and graphics cards and all that… it’s more like two months or more.

So, that’s why we charge upgrade fees. You’re paying for all the coding, design, and testing that goes into creating a professional product that you can rely on. Not too mention the San Francisco based support team to help you out with all of it. We’re here to help you be successful. The flipside is we need to do what’s necessary to make sure we’re successful ourselves.

Flicker Free 2.0: Up to 1500% faster!

We’re extremely excited about the speed improvements we’ve enhanced Flicker Free 2.0 with! Yes, we have actually seen 1500% performance increase with 4K footage, but on average across all resolutions and computers it’s usually 300-400% increase. Still pretty good and 4K is more like 700-800% on average.

You can see our performance benchmarks in this Google Doc. And download the benchmark projects for Premiere Pro (700mb) and for Final Cut Pro to run your own tests! (However, you need to run the FF1 sequences with FF1 and the FF2 (FF1 settings) with FF2. If you just turn off the GPU in FF2 you won’t get the same results (they’ll be slower than they would be in FF1)

However, it’s pretty dependent on your computer and what video editing app you’re using. We’ve been disappointed by MacBook Pros across the board. They’re just really under powered for the price. If you’re running a MacBook, we highly recommend getting an external GPU enclosure and putting in a high end AMD card. We’d recommend Nvidia as we do on Windows, but… Apple. Oh well.

It’s possible once we implement Metal (Apple’s technology to replace OpenCL) we’ll see some additional improvements. That’s coming in a free update shortly. In fact, because After Effects/Mac only supports Metal, Flicker Free isn’t accelerated at all in AE. It does great in Premiere which does support OpenCL. (Adobe’s GPU support is really lacking, and frustrating, across their video apps, but that’s a topic for another blog post)

Some notes about the Benchmark Google Doc:

  • It’s only Premiere and FCP
  • Not every computer ran every test. We changed the benchmark and didn’t have access to every machine to render the additional sequences.
  • Windows generally saw more improvement than Mac.
  • FCP saw some really significant gains. It’s much faster/efficient to get multiple frames in FCP using the GPU than the CPU. 1.0 was really slow in FCP.
  • The important bit is at the right edge of the spreadsheet where you see the percentages.
  • We’d love to see you run the benchmarks on your computer and please send us the results. If you do, please send results to cs@nulldigitalanarchy.com. However, you need to run the FF1 sequences with FF1 and the FF2 (FF1 settings) with FF2. If you just turn off the GPU in FF2 you won’t get the same results (they’ll be slower than they would be in FF1).
  • After Effects isn’t in the benchmark because AE/Mac doesn’t support OpenCL for GPU acceleration.
  • Davinci Resolve and Avid are coming soon!

Fixing Flicker in Videos with Lots of Motion – Fast Moving Cameras or Subjects

One of the things Flicker Free 1.0 doesn’t do well is deal with moving cameras or fast moving subjects. This tends to result in a lot of ghosting… echos from other frames Flicker Free is analyzing as it tries to remove the flicker (no people aren’t going to stop talking to you on dating apps because you’re using FF). You can see this in the below video as sort of a motion blur or trails.

Flicker Free 2.0 does a MUCH better job of handling this situation. We’re using optical flow algorithms (what’s used for retiming footage) as well as a better motion detection algorithm to isolate areas of motion while we deflicker the rest of the frame. You can see the results side-by-side below:

Better handling of fast motion, called Motion Compensation, is one of the big new features of 2.0. While the whole plugin is GPU accelerated, Motion Compensation will slow things down significantly. So if you don’t need it, it’s best to leave it off. But when you need it… you really need it and the extra render time is worth the wait. Especially if it’s critical footage and it’s either wait for the render or re-shoot (which might not be so easy if it’s  a wedding or sports event!).
We’re getting ready to release 2.0 in the next week or so, so just a bit of tease of some of the amazing new tech we’ve rolled into it!

Multicam Sequences and Merged Clips support is coming to Transcriptive

multicam_fish_2

Using Transcriptive with multicam sources is something we’ve wanted to implement for a while now. If you are a multicam fan and have been using Transcriptive for Premiere Pro, you know there isn’t a straightforward solution to transcribe Multicam source sequences. But Adobe is adding a way for panels to access multicam sequences correctly. So Transcriptive  finally has multicam support!

When we launched Transcriptive 2.0, which gave users the ability to transcribe Clips as well as Sequences, we started thinking that maybe if Transcriptive could treat multicam sources as clips instead of sequences it would be possible to transcribe them using Clip Mode.

Multicam is an odd duck. Technically they’re sequences, but Premiere treats them as clips. Sometimes. It’s a strange implementation which made it impossible for Transcriptive to know what they were. Adobe has made some changes with the newest Premiere Pro build. It’s currently the public beta but should be released soon (14.3.2 when it comes out).  The upcoming release of Transcriptive 2.5, which is in BETA, already supports these changes. 

Multicam sources can now be transcribed in Clip Mode, allowing users to click on a multicam source in the project window and use the transcript and find the sections they want to add to a sequence. Merged clips seem to work the same way, and can also be transcribed in Clip Mode. The transcript will be saved to that merged clip in that project, and the transcript will load when you open that merged clip with Clip Mode on. Here’s a step-by-step of what we are testing:

  1. Create a multicam or merged clip
  2. Use Transcriptive to transcribe it in Clip Mode
  3. Use the transcript to add in and out points and insert those sections into a sequence. 

It’s a very simple and standard workflow with some caveats. One thing to keep in mind is that, with a multicam clip, you will want to use the Insert command in the source Monitor (,) and not in Transcriptive (Ctrl+,). This is because  we don’t currently have the ability to detect the active camera when inserting from Transcriptive. If a multicam clip is inserted from Transcriptive, you won’t be able to change the camera in the sequence with Multicam View. So you can add in and out points in either Transcriptive or the Source Monitor, but make sure you insert any sound bites from the Source Monitor and not from the Transcriptive panel. 

Another thing to keep in mind is that, if you are using the Transcriptive web app to share transcripts with team members, the multicam functionalities you find in Premiere Pro won’t be available on the web. You can share a Multicam Clip to the web app the same way you share any other clips. However, sharing the clip will use a default camera, and not the active camera. If you want to choose a specific camera to show on the Transcriptive web app, drop the multicam clip into a sequence and share the sequence, so that you can set what camera is uploaded. More on sharing Multicam Sequences to Transcriptive.com to come! 

Multicam and Merged clips support are likely to be included in our next Transcriptive 2.5 release. Stay tuned! Questions? Email cs@nulldigitalaanarchy.com.

Improving Accuracy of A.I. Transcripts with Custom Vocabulary

The Glossary feature in Transcriptive is one way of increasing the accuracy of the transcripts generated by artificial intelligence services. The A.I. services can struggle with names of people or companies and it’s a big of mixed bag with technical terms or industry jargon. If you have a video with names/words you think the A.I. will have a tough time with, you can enter them into the Glossary field to help the A.I. along.

For example, I grabbed this video of MLB’s top 30 draft picks in 2018:

Obviously a lot names that need to be accurate and since we know what they are, we can enter them into the Glossary.

Transcriptive's Glossary to add custom vocabulary

As the A.I. creates the transcript, words that sound similar to the names will usually be replaced with the Glossary terms. As always, the A.I. analyzes the sentence structure and makes a call on whether the word it initially came up with fits better in the sentence. So if the Glossary term is ‘Bohm’ and the sentence is ‘I was using a boom microphone’, it probably won’t replace the word. However if the sentence is ‘The pick is Alex boom’, it will replace it. As the word ‘boom’ makes no sense in that sentence.

Here are the resulting transcripts as text files: Using the Glossary and Normal without Glossary

Here’s a short sample to give you an idea of the difference. Again, all we did was add in the last names to the Glossary (Mize, Bart, Bohm):

With the Glossary:

The Detroit Tigers select Casey Mize, a right handed pitcher. From Auburn University in Auburn, Alabama. With the second selection of the 2018 MLB draft, the San Francisco Giants select Joey Bart a catcher. A catcher from Georgia Tech in Atlanta, Georgia, with the third selection of a 2018 MLB draft. The Philadelphia Phillies select Alec Bohm, third baseman

Without the Glossary:

The Detroit Tigers select Casey Mys, a right handed pitcher. From Auburn University in Auburn, Alabama. With the second selection of the 2018 MLB draft, the San Francisco Giants select Joey Bahrke, a catcher. A catcher from Georgia Tech in Atlanta, Georgia, with the third selection of a 2018 MLB draft. The Philadelphia Phillies select Alec Bomb. A third baseman

As you can see it corrected the names it should have. If you have names or words that are repeated often in your video, the Glossary can really save you a lot of time fixing the transcript after you get it back. It can really improve the accuracy, so I recommend testing it out for yourself!

It’s also worth trying both Speechmatics and Transcriptive-A.I. Both are improved by the glossary, however Speechmatics seems to be a bit better with glossary words. Since Transcriptive-A.I. has a bit better accuracy normally, you’ll have to run a test or two to see which will work best for your video footage.

If you have any questions, feel free to hit us up at cs@nulldigitalanarchy.com!

PowerSearch is now bundled with Transcriptive 2.0! Here’s why you should try them together.

WayneTS2

Since we announced the bundle between Transcriptive and PowerSearch a few months back, our team has been working even harder to improve the plugin so users can make the most of having transcripts and search engine capabilities inside Premiere Pro. This means we are releasing Transcriptive 2.0.5, which fixes some critical bugs reported, and PowerSearch 2.0: a much faster and efficient version of our metadata search tool.

Having accurate transcripts available in Premiere is already a big help on speeding up video production workflows, especially while working remotely. (See this previous post about Transcriptive’s sharing capabilities for remote collaboration!) But we truly believe, and have been hearing this from clients as well, that having all the content in your video editing project – especially transcripts! – converted into searchable metadata makes it much easier to find content if you have large amounts of footage, markers, sequences, and media files. And this is why the PowerSearch and Transcriptive combo makes it much easier to find soundbites, different takes of a script, or pinpoint any time a name or place is mentioned.

PowerSearch 1.0 was decently fast but could be slow on larger projects. Our next release makes use of a powerful SQL database to make PowerSearch an order of magnitude faster. The key to PowerSearch is that it indexes an entire Premiere Pro project, much like Google indexes websites, to optimize search performance.  An index of hundreds of videos that used to take 10-12 hours to create is now indexed in less than an hour and the same database makes searching all that data significantly faster. Another advantage is the ability to use common search symbols, such as minus signs and quotes, for more precise, accurate searching. For editors with hundreds of hours of video, this can help narrow down searches from hundreds of results to a few dozen.

PowerSearch still returns search results like any search engine. Showing you the search term, the words around it, what clip/sequence/marker it’s in, and the timecode. Clicking on the result will open the clip or sequence and jump straight to the correct timecode in the Source or Program panel.

PowerSearch 2.0 can still be purchased separately and help your production even if you are getting transcripts from a different source or just want to search markers. However, it is now bundled with Transcriptive and you can get both for $149 while PowerSearch costs $99 on its own. So if you haven’t tried using PowerSearch and Trabscriptive together, give it a try! We are constantly working on Transcriptive to add more capabilities, reduce transcription costs, and improve the sharing options now available in the panel. Features like Clip Mode and the new Text Editor go beyond just transcribing media and sequences, and combining it with a much faster PowerSearch makes finding content much faster.

Transcriptive 2.0 users can use their Transcriptive license to activate PowerSearch. Trial licenses for both Transcriptive and PowerSearch are available here and our team would be happy to help if you need support figuring out a workflow for you and your team. Send any questions, concerns, or feedback to cs@nulldigitalanarchy.com! We would love to hear from you. 

Flicker Free 2.0 Beta!

It’s been a long time coming, so we’re pretty excited to announce that Flicker Free 2.0 is in beta! The beta serial number is good until June 30th and will make the plugin fully functional with no watermark. Please contact cs@nulldigitalanarchy.com to get added to the beta list and get the serial number.

There are a lot of cool improvements, but the main one is GPU support. On Windows, on average it’s about 350% faster vs. Flicker Free 1.0 with the same settings, but often it’s 500% or more. On Mac, it’s more complicated. Older machines see a bigger increase than newer ones, primarily because they support OpenCL better. Apple is doing what it can to kill OpenCL, so newer machines, which are AMD only, suffer because of it. We are working on a Metal port and that’ll be a free upgrade for 2.0, but it won’t be in the initial release. So on Mac you’re more likely to see a 200% or so increase over FF 1.0. Once the Metal port is finished we expect performance similar to what we’re seeing on Windows. Although, on both platforms it varies a bit depending on your CPU, graphic card, and what you’re trying to render. 

The other big improvement is better motion detection, that uses optical flow algorithms. For shots with a moving camera or a lot of movement in the video, this makes a big difference. The downside is that this is relatively slow. However, if you’re trying to salvage a shot you can’t go and reshoot (e.g. a wedding), it will fix footage that was previously unfixable.

A great example of this is in the footage below. It’s a handheld shot with rolling bands. The camera is moving around Callie, our Director of IT Obsolescence, and this is something that gives 1.0 serious problems. I show the original, what FF 1.0 could do, and what the new FF 2.0 algorithms are capable of. It does a pretty impressive job.

You can download the Premiere project and footage of Callie here: 

https://digitalanarchy.com/beta/beta-project.zip (it helps to have both FF 1.0 and FF 2.0 to see the before/after) 


Beta ReadMe with info about the parameters:

https://digitalanarchy.com/beta/flickerfree_readme.zip

A couple important things to note… 1) if you’re on Mac, make sure the Mercury Engine is set to OpenCL. We don’t support Metal yet. We’re working on it but for now the Mercury Engine HAS to be set to OpenCL. 2) Unfortunately, Better AND Faster wasn’t doable. So if you want Faster, use the settings for 1.0. This is probably what you’ll usually want. For footage with a lot of motion (e.g. handheld camera), that’s where the 2.0 improvements will really make a difference, but it’s slower. See the ReadMe for more details (I know… nobody reads the ReadMe. But it’s not much longer than this email… you should read it!).


Here’s a benchmark Premiere Pro project that we’d like you to run. It helps to also have Flicker Free 1.0 installed if you have it. If not, just render the FF 2.0 sequences. Please queue everything up in Media Encoder and render everything when you’re not using the machine for something else. Please send the results (just copy the media encoder log for the renders: File>Show Log), what graphics card you have, and what processer/speed you have to beta@nulldigitalanarchy.com.

Benchmark project with footage (if you’ve already downloaded this, please re-download it as the project has changed):

https://digitalanarchy.com/beta/FF2-Benchmark.zip (~650mb)


Please send any bug reports or questions to cs@nulldigitalanarchy.com

It’s been a long time coming, so we’re pretty excited about this release! Thanks for any help you can give!

Cheers,

Jim Tierney
Chief Executive Anarchist
Digital Anarchy

Why we charge crossgrade fees

It’s a lot of work supporting different host apps. Every company has a different API (application programming interface) and they usually work very differently from each other. So development takes a lot of time, as does testing, as does making sure our support staff knows each host app well enough to troubleshoot and help you with any problems.

Our goal with all our software is to provide a product that 1) does what it claims to do as well or better than anything else available, 2) is reasonably bug free and 3) completely supported if you call in with a problem (yes, you can still call us and, no, you won’t be routed to an Indian call center). All of that is expensive. But we pride ourselves on great products with great support at a reasonable cost. By having crossgrades we can do all of the above, since you’re not paying for things you don’t need.

If you create a video for a client in HD and then they tell you they want the video in a vertical format for mobile, do you do it for free? Probably not. While clients might think you just need to re-render it, you know that because you need to make the video compelling in the new format, make sure all text is readable, and countless other small things… it requires a fair amount of work.

That’s the way it is with developing for multiple APIs. So the crossgrade fee covers those costs. And since all of our plugins are perpetual licenses, you don’t have to pay a subscription fee forever to keep using our products.

If we didn’t charge crossgrade fees, we’d include the costs of development for all applications in the initial price of the plugin (which is what some companies do). This way you only pay for what you need. Most customers only use one host application, so this results in a lower initial cost. Only users that require multiple hosts have to pay for them.

And  we don’t actually charge per applications. For example, After Effects and Premiere use the same API, so if you buy one of our plugins for Adobe, it works in both.

The crossgrades come as a surprise to some customers, but there really are good reasons for them. I wanted you all to understand what they are and how much work goes into our products.

Transcriptive and 14.x: Why New World Needs to be Off

Update: For Premiere 14.3.2 and above New World is working pretty well at this point.  Adobe has fixed various bugs with it and things are working as they better.

However, we’re still recommending people keep it off if they can. On long transcripts ( over 90 minutes or so) New World usually does cause performance problems. But if having it off causes any problems, you can turn it on and Transcriptive should work fine. It just might be a little slow on long transcripts.

Original Post:

There are a variety of problems with Adobe’s new Javascript engine (dubbed New World) that’s part of 14.0.2 and above. Transcriptive 2.0 will now automatically turn it off and you’ll need to restart Premiere. Transcriptive 2.0 will not work otherwise.

If you’re using Transcriptive v1.5.2, please see this blog post for instructions on turning it off manually.

For the most part Transcriptive, our plugin for transcribing in Premiere, is written in Javascript. This relies on Premiere’s ability to process and run that code. In Premiere 14.0.x, Adobe has quietly replaced the very old Extendscript interpreter with a more modern Javascript engine (It’s called ‘NewWorld’ in Adobe parlance and you can read more about it and some of the tech-y details on the Adobe Developer Blog). On the whole, this is a good thing.

However, for any plugin using Javascript, it’s a big, big deal. And, unfortunately, it’s a big, big deal for Transcriptive. There are a number of problems with it that, as of 14.1, break both old and new versions of Transcriptive.

As with most new systems, Adobe fixes a bunch of stuff and breaks a few new things. So we’re hoping over the next couple months they work all the kinks out and it all sorts itself out.

There is no downside to turning New World off at this point. Both the old and new Javascript engines are in Premiere, so it’s not a big deal as of now. Eventually they will remove the old one, but we’re not expecting that to happen any time soon.

As always, we will keep you updated.

Fwiw, here’s what you’ll see in Transcriptive if you open it with New World turned on:

Premiere needs to be restarted in order to use TranscriptiveThat message can only be closed by restarting Premiere. If New World is on, Transcriptive isn’t usable. So you _must_ restart.

What we’re doing in the background is setting a flag to off. You can see this by pulling up the Debug Console in Premiere. Use Command+F12 (mac) or Control+F12 (windows) to bring up the console and choose Debug Database from the hamburger menu.

You’ll see this:

New World flag set to OffIf you want to turn it back on at some point, this is where you’ll find it. However, as mentioned, there’s no disadvantage to having it off and if you have it on, Transcriptive won’t run.

If you have any questions, please reach out to us at cs@nulldigitalanarchy.com.

Transcriptive as a collaboration tool for remote worflows

This past two weeks Social Media channels have been flooded with video production crews sharing their remote editing stations and workflows. As everybody struggles to adapt and stay productive we’re hoping the Transcriptive web app, which has a new beta version, can help you with some of your challenges.

New Transcriptive.com Beta Version

We just updated https://app.transcriptive.com with a new version. It’s still in beta, so it’s still free to use. It’s a pretty huge upgrade from the previous beta. With a new text editor and sharing capabilities. Users can also upload a media file, transcribe, manage speakers, edit, search and export transcripts without having to access Premiere Pro.

But the real strength is the ability to collaborate and share transcripts with Premiere users and other web users.

How’s Transcriptive going to help keep everyone in sync when they’re working remotely?

The web app was designed from the beginning to help editors work remotely with clients or producers. Transcripts can be easily edited and shared between Premiere Pro and a web browser or between two web users. 

This means  producers, clients, assistant editors, and interns can easily review and clean up transcripts on the web and send them to the Premiere editor. They can also identify the timecode of video segments that are important or have problems. All this can be done in a web browser and then shared.

If you are a video editor and have been transcribing in Premiere Pro, sending the transcripts and media to Transcriptive.com is quick and makes it easy for team members to access the footage and the transcribed text.

Premiere To A Web Browser

Click on the [ t ] menu in Premiere Pro, link to a web project, and then you can upload the transcript, video, or both. Team members can then log into the Transcriptive.com account and view it all! 

TMenu

Web users are able to edit the transcripts, watch the uploaded clips, see the timecode on the transcript, export the transcript as a Word Document, plain text, captions, and subtitle files, etc.  Other features like adding comments or highlighting text are coming soon.

From The Web To Premiere

Once web user is done editing or reviewing the transcript, the editor can pull it back into Premiere. Again, go to the [ t ] menu, and select ‘Download From Your Web Project’. This will download the transcript from Transcriptive.com and load it for the linked video.

DownloadTranscript
Web users can also transcribe videos they upload and share them with other web users. The transcripts can then be downloaded by an editor working in Premiere. Usually it’s a bit easier to start the video upload process from Premiere, but it is possible to do everything from Transcriptive.com.

It’s a powerful way of collaborating with remote users, letting you share videos, transcripts and timecode. Round tripping from Premiere to the web and back again, quickly and easily. Exactly what you need for keeping projects going right now.

Curious to try our BETA web App but still have questions on how it works? Send an email to carla@nulldigitalanarchy.com. And if you have tried the App we would love to hear your feedback!

Transcriptive: Here’s how to transcribe using your Speechmatics credits for now.

If you’ve been using Speechmatics credits to transcribe in Transcriptive, our transcription plugin for Premiere Pro, then you noticed that accessing your credits in Transcriptive 2.0.2 and later is not an option anymore. Speechmatics is discontinuing the API that we used to support their service in Transcriptive, which means your Speechmatics credentials can no longer be validated inside of the Transcriptive panel.

We know a lot of users still have Speechmatics credits and have been working closely with Speechmatics so those credits can be available in your Transcriptive account as soon as possible. Hopefully in the next week or two.

In the meantime, there are a couple ways users can still transcribe with Speechmatics credits. 1) Use an older version of Transcriptive like v1.5.2 or v2.0.1. Those should still work for a bit longer but uses the older, less accurate API or 2) Upload directly on their website and export the transcript as a JSON file to be imported into Transcriptive.  It is a fairly simple process and a great temporary solution for this. Here’s a step-by-step guide:

1. Head to the Speechmatics website – To use your Speechmatics credits, head to www.speechmatics.com and login to your account. Under “What do you want to do?”, choose “Transcription” and select the language of your file. 

Speechmatics_Uploading

2. Upload your media file to the Speechmatics website – Speechmatics will give you the option to drag and drop or select your media from a folder on your computer. Choose whatever option works best for you and then click on “Upload”. After the file is uploaded, the transcription will start automatically and you can check the status of the transcription on your “Jobs” list.  
Speechmatics_Transcribing3. Download a .JSON file –  After the transcription is finished (refresh the page if the status doesn’t change automatically!), click on the Actions icon to access the transcript. You will then have the option to export the transcript as a .JSON file

Speechmatics_JSON

4. Import the .JSON file into any version of Transcriptive – Open your Transcriptive panel in Premiere. If you are usingTranscriptive 2.0,  be sure Clip Mode is turned on. Select the clip you have just transcribed on Speechmatics and click on “Import”.  If you are using an older version of Transcriptive, drop the clip into a sequence before choosing “Import”. 

Transcriptive_Import

You will then have the option to “Choose an Importer”. Select the JSON option and import the Speechmatics file saved on your computer. The transcript will be synced with the clip automatically at no additional charge.

Transcriptive_Json

One important thing to know is that, although Transcriptive v1.x still have Speechmatics as an option and it still works, we would still recommend following the steps above to transcribe with Speechmatics credits. The option available in these versions of the panel is an older version of their API and less accurate than the new version. So we recommend you transcribe on the Speechmatics website if you want to use your Speechmatics credits now and not wait for them to be transferred.

However, we should have the transfer sorted out very soon, so keep an eye open for an email about it if you have Speechmatics credits. If the email address you use for Speechmatics is different than the one you use for Transcriptive.com, please email cs@nulldigitalanarchy.com. We want to make sure we get things synced up so the credits go to the right place!

NAB And The Coronavirus, Covid-19

This was originally posted in the Digital Anarchy newsletter, but thought it was worth reposting. One change regarding my rant below about NAB organizers… they’ve removed the bizarre claim that free registrations somehow are a proxy for attendance, BUT have now replaced it with a stat that 96% of exhibitors will be there. This is total spin and BS. Exhibitors don’t get a refund if they cancel, so they have little incentive to tell NAB they aren’t coming. For example, Digital Anarchy is probably not going, but we haven’t ‘cancelled’. There’s an outside chance we’ll send a couple people but it’s not likely. But there’s no benefit in tell NAB we’re not going. We just haven’t shipped anything or paid for any booth expenses (carpet, electricity, etc.). So, no, 96% of the exhibitors will not be at the show.

Original post:

With Adobe, Avid, AJA, Ross Video and others cancelling their presence at NAB, I think the writing is on the wall. Especially with virus cases continuing to rise exponentially (300+ on Friday, 600+ on Monday).

However, for those of you looking for a bit more info, here are the results from the NAB/Covid-19 survey I posted last week. We got about 200 responses, so it’s not a huge sample of NAB’s 90000 attendees, but should give you some insight on how folks are feeling about it. Keep in mind the vast majority of these responses came before Adobe announced their decision. (and our newsletter has a lot of Adobe users, so that might have changed some people from ‘on the fence’ to ‘No’.)

Judging from the survey, it appears attendance would be down by 25% or more. Of the folks that were still on the fence, 60% cited ‘Significant number of Exhibitors cancelling’ as a reason they’d choose not to go. So the additional cancellation announcements are a big deal.

Here’s a summary of the survey responses, so you can read what you want into the data:
NAB/Covid-19 Survey Results

Here are the comments from the ‘any other thoughts’ question. It’s interesting to see what folks think about the virus, why they aren’t or are going, and how important NAB is to them.
Respondants Comments on NAB/Covid-19

Some notes about the survey itself:

– If someone answered ‘No’ to ‘were you going to NAB before Covid-19’, then they were thanked and the survey ended. I was mostly concerned with the opinion of folks that were planning on going to the show.
– I didn’t think to include the ‘Country’ field until after sending the newsletter out. So only about of a third of respondants answered. It’s mostly US based and I’m guessing that applies to the survey overall.
– For the ‘Travel’ question, I didn’t consider folks that were driving. But it’s notable that 67% of respondants had not booked a flight. Flights are usually non-refundable, so it’s a commitment. If you book a hotel through NAB, you can cancel until 3 days before the show with no penalty… so it’s not really a commitment.

Some comments on the comments.

Why do I take issue with the way NAB is handling this? Because they’ve done almost nothing other than announce they’ll have extra hand sanitizer. What they have not done:

– Explain to exhibitors proactively what the cancellation process is and what happens if NAB cancels.
– They have not provided any guidance about what metrics they’re looking at and what would have to happen for them to cancel the show. It’s been nothing but ‘the show’s on!’ and ‘look, registrations are the same as always!’. You know, because everyone that signs up for a free exhibits pass is definitely going to show up. It’s not a good proxy for attendance. Just look at the survey results.
– They have not made any concessions to exhibitors (or attendees) that don’t want to attend due to health reasons. Despite NAB’s encouragement to not come if you’re sick… it’s just lip service. If you don’t show up, you still pay for your exhibit space. No partial refund, nothing. So exhibitors have an economic incentive to show up sick or not.

There’s an overreaction to the virus: Possibly, to some degree, but it’s not just about you. It’s true, you might be fine but who will you potentially give it to? It appears to be quite lethal to folks over 60 or people with otherwise compromised health. It’s probably good that the media has been warning about it, otherwise the numbers would be far worse than they are.

What NAB means to us: It’s clear that for many people, NAB is more about people than seeing new, shiny things. So if there are less people, it really eliminates a lot of incentive to go. So much of NAB is sitting in a grungy bar with a client or friend. That’s the heart of the show. (and seriously, does anyone really think Vegas has found God and suddenly discovered cleanliness? The phrase ‘lipstick on a pig’ comes to mind with all the talk of extra hand sanitizer.)

What To Do

At this point I think NAB should cancel. The number of virus cases are growing exponentially. Exhibitors are pulling out. Attendance is going to be down (despite NAB staff apparently being in denial), and the more exhibitors that pull out, the lower attendance is going to be.

Admittedly, it’s not quite as clear of a case as SXSW, where the whole point of the show is to go see bands in packed clubs/bars. However, a large portion of the value of NAB is the after hours parties and gatherings. Taking a quick walk around the tradeshow floor, doing a meeting or two and then quarantining yourself in your hotel room is hardly an experience worth the travel costs in most cases.

With Adobe pulling out, it’s likely we will not go. The main value of doing the show is talking to customers at the booth and the after hours events. If few people are at the show, that seriously diminishes both those activities. I can do meetings via Zoom, I don’t need to go to the show for that. It’s still possible we’ll send a couple people for the first three days… but it’s looking less and less likely. However, we’ll still have the NAB promotions going (watch this newsletter for show specials on Transcriptive, Flicker Free and more) and probably do some webinars for the stuff we were going to announce at the show. Stay tuned…

Use Transcriptive to transcribe in Premiere for only $2.40/hr (.04/min)

A lot of you have a ton of footage that you want to transcribe. One of our goals with Transcriptive has been to enable you to transcribe everything that goes into your Premiere project. To search it, to create captions, to easily see what talent is saying, etc. But if you’ve got 100 hours of footage, even at $0.12/min the costs can add up. So…

Transcriptive has a new feature that will help you cut your transcribing costs by 50%. The latest version of our Premiere Pro transcription plugin has already cut the costs of transcribing from $0.012 to $0.08. However, our new prepaid minutes’ packages goes even further… allowing users to purchase transcribing credits in bulk! You can save 50% per minute, transcribing for $2.40/hr or .04/min. This applies to both Transcriptive AI or Speechmatics. 

download

The pre-paid minutes option will reduce transcription costs to $0.04/min which can be purchased in volume for $150 or $500. For small companies and independent editors, the $150 package will make it possible to secure 62.5 hours of transcription without breaking the bank. If you and your team are transcribing large amounts of footage, going for the $500 will allow you to save even more. 

The credits are good for 24 months, so you don’t need to worry about them expiring. 

You don’t HAVE to pre-pay. You can still Pay-As-You-Go for $0.08/min. That’s still really inexpensive for transcription and if you’re happy with that, we’re happy with it too.

However, if you’re transcribing a lot of footage, pre-paying is a great way of getting costs down. It also has other benefits, you don’t need to share your credit card with co-workers and other team members. For bigger companies, production managers, directors or even an account department can be in charge of purchasing the minutes and feeding credits into the Premiere Pro Transcriptive panel so editors no longer have to worry about the charges submitted to the account holder’s credit card. 

prepay-tsonly

Buying the minutes in advance is simple!  Go to your Premiere Pro panel, click on your profile icon, choose “Pre-Pay Minutes” and select the option that better suits your needs. You can also pre-pay credits from your web app account by logging into  app.transcriptive.com, opening your “Dashboard” and clicking on “Buy Minutes”. A pop-up window will ask you to choose the pre-paid minutes package and ask for the credit card information. Confirm the purchase and your prepaid minutes will show under “Balance” on your homepage. The prepaid minutes’ balance will also be visible in your Premiere Pro panel, right next to the cost of the transcription. 

Applying purchased credits to your transcription jobs is also a quick and easy process. While submitting a clip or sequence for transcription, Transcriptive will automatically deduct the amount required to transcribe the job from your balance. If the available credit is not enough to transcribe your job, the remaining minutes will be charged to the credit card on file.

The 50% discount on prepaid minutes will only apply to transcribing, but minutes can be used to Align existing transcripts at regular cost. English transcripts can be imported into Transcriptive and aligned to your clips or sequences for free, while text in other languages will align for $0.02/min with Transcriptive AI and $0.04/min with Transcriptive Speechmatics.  

Would you like to try Transcriptive for yourself? Download a free demo at https://digitalanarchy.com/transcribe-video/transcriptive-trial.html or email sales@nulldigitalanarchy.com.

Adobe Premiere 14.0.2 and Transcriptive: What You Need to Know

Adobe has slipped in a pretty huge change into 14.0.2 and it seriously affects Transcriptive, the A.I. transcript plugin for Premiere. I’ll get into the details in a moment, but let me get into the important stuff right off the bat:

  • If you are using Premiere 14.0.2 (the latest release)
    • And own Transcriptive 2.0…
    • And own Transcriptive 1.x…
      • You can upgrade to Transcriptive 2.x
      • Or you must turn ‘NewWorld’ off (instructions are below)
      • Or keep using Premiere Pro 14.0.1

For the most part Transcriptive is written in Javascript. This relies on Premiere’s ability to process and run that code. In Premiere 14.0.2, Adobe has quietly replaced the very old Extendscript interpreter with a more modern Javascript engine (It’s called ‘NewWorld’ in Adobe parlance and you can read more about it and some of the tech-y details on the Adobe Developer Blog). On the whole, this is a good thing.

However, for any plugin using Javascript, it’s a big, big deal. And, unfortunately, it’s a big, big deal for Transcriptive. It completely breaks old versions of Transcriptive.

If you’re running Transcriptive 2.x, no problem… we just released v2.0.3 which should work fine with both old and new Javascript Interpreter/engine.

If you’re using Transcriptive 1.x, it’s still not exactly a problem but does require some hoop jumping. (and eventually ‘Old World’ will not be supported in Premiere and you’ll be forced to upgrade TS. That’s a ways off, though.)

Turning Off New World

Here are the steps to turn off ‘NewWorld’ and have Premiere revert back to using ‘Old World’:

  • Press Control + F12 or Command + F12. This will bring up Premiere’s Console.
  • From the Hamburger menu (three lines next to the word ‘Console’), select Debug Database View
  • Scroll down to ScriptLayerPPro.EnableNewWorld and uncheck the box (setting it to False).
  • Restart Premiere Pro

When Premiere restarts, NewWorld will be off and Transcriptive 1.x should work normally.

Screenshot of Premiere's Debug console
So far there are no new major bugs and relatively few minor ones that we’re aware of when using Transcriptive 2.0.3 with Premiere 14.0.2 (with NewWorld=On). There are also a LOT of other improvements in 2.0.3 that have nothing to do with this.

Adobe actually gave us a pretty good heads up on this. Of course, in true Anarchist fashion, we tested it early on (and things were fine) and then we tested it last week and things were not fine. So it’s been an interesting week and a half scrambling to make sure everything was working by the time Adobe sent 14.0.2 out into the world.

So everything seems to be working well at this point. And if they aren’t, you now know how to turn off all the new fangled stuff until we get our shit together! (but we do actually think things are in good shape)

Testing The Accuracy of Artificial Intelligence (A.I.) Services

When A.I. works, it can be amazing. BUT you can waste a lot of time and money when it doesn’t work. Garbage in, garbage out, as they say. But what is ‘garbage’ and how do you know it’s garbage? That’s one of the things, hopefully, I’ll help answer.

Why Even Bother?

It’s a bit tedious to do the testing, but being able to identify the most accurate service will save you a lot of time in the long run. Cleaning up inaccurate transcripts, metadata, or keywords is far more tedious and problematic than doing a little testing up front. So it really is time well spent.

One caveat… There’s a lot of potential ways to use A.I., and this is only going to cover Speech-to-Text because that’s what I’m most familiar with due to Transcriptive and getting A.I. transcripts in Premiere. But if you understand how to evaluate one use, you should, more or less, be able to apply your evaluation method to others. (i.e. for testing audio, you want varying audio quality among your samples. If testing images you want varying quality (low light, blurriness, etc) among your samples)

At Digital Anarchy, we’re constantly evaluating a basket of A.I. services to determine what to use on the backend of Transcriptive. So we’ve had to come up with a methodology to fairly test how accurate they are. Most of the people reading this are in a bit different situation… testing solutions from various vendors that use A.I. instead of testing the A.I. directly. However, since different vendors use different A.I. services, this methodology will still be useful for you in comparing the accuracy of the A.I. at the core of the solutions. There may be, of course, other features of a given solution that may affect your decision to go with one or the other, but at least you’ll be able to compare accuracy objectively.

Here’s an outline of our method:

  1. Always use new files that haven’t been processed before by any of the A.I. services.
  2. Keep them short. (1-2min)
  3. Choose files of varying quality.
  4. Use a human transcription service to create the ‘test master’ transcript.
    • Have someone do a second pass to correct any human errors.
  5. Create a set of rules on word/punctuation errors for what counts as an error (or 1/2 or two).
    • If you change them halfway through the test, you need to re-test everything.
  6. Apply them consistently. If something is ambiguous, create a rule for how it will be handled and alway apply it that way.
  7. Compare the results and may the best bot win.

May The Best Bot Win : Visualizing

Accuracy rates for different A.I. services

The main chart compares each engine on a specific file (i.e. File #1, File # 2, etc), using both word and punctuation accuracy. This is really what we use to determine which is best, as punctuation matters. It also shows where each A.I. has strengths and weaknesses. The second, smaller chart shows each service from best result to worst result, using only word accuracy. Every A.I. will eventually fall off a cliff in terms of accuracy. This chart shows you the ‘profile’ for each service and can be a little bit clearer way of seeing which is best overall, ignoring specific files.

First it’s important to understand how A.I. works. Machine Learning is used to ‘train’ an algorithm. Usually millions of bits of data that have been labeled by humans are used to train it. In the case of Speech-to-Text, these bits are audio files with a human transcripts. This allows the A.I. to identify which audio waveforms, the word sounds, go with which bits of text. Once the algorithm has been trained, we can then send audio files to the algorithms and it makes it’s best guess as to which word every waveform corresponds to.

A.I. algorithms are very sensitive to what they’ve been trained on. The further you get away from what they’ve been trained on, the more inaccurate they are. For example, you can’t use an English A.I. to transcribe Spanish. Likewise, if an A.I. has been trained on perfectly recorded audio with no background noise, as soon as you add in background noise it goes off the rails. In fact, the accuracy of every A.I. eventually falls off a cliff. At that point it’s more work to clean it up than to just transcribe it manually.

Always Use New Files

Any time you submit a file to an A.I. it’s possible that the A.I. learns from that file. So you really don’t want to use the same file over and over and over again. To ensure you’re getting unbiased results it’s best to use new files every time you test.

Keep The Test Files Short

First off, comparing transcripts is tedious. Short transcripts are better than long ones. Secondly, if the two minutes you select is representative of an hour long clip, that’s all you need. Transcribing and comparing the entire hour won’t tell you anything more about the accuracy. The accuracy of two minutes is usually the same as the accuracy of the hour.

Of course, if you’re interviewing many different people over that hour in different locations, with different audio quality (lots of background noise, no background noise, some with accents, etc)… two minutes won’t be representative of the entire hour.

Chose Files of Varying Quality

This is critical! You have to choose files that are representative of the files you’ll be transcribing. Test files with different levels of background noise, different speakers, different accents, different jargon… whatever issues usually occur in the dialog typically in your videos. ** This is how you’ll determine what ‘garbage’ means to the A.I. **

Use Human Transcripts for The ‘Test Master’

Send out the files to get transcribed by a person. And then have someone within your org (or you) go over them for errors. There usually are some, especially when it comes to jargon or names (turns out humans aren’t perfect either! I know… shocker.). These transcripts will be the what you compare the A.I. transcripts against, so they need to be close to perfect.  If you change something after you start testing, you need to re-test the transcripts you’ve already tested.

Create A Set of Rules And Apply Them Consistently

You need to figure out what you consider one error, a 1/2 error or two errors. In most cases it doesn’t matter exactly what you decide to do, only that you do it consistently. If a missing comma is 1/2 an error, great! But it ALWAYS has to be a 1/2 error. You can’t suddenly make it a full error just because you think it’s particularly egregious. You want to remove judgement out of the equation as much as possible. If you’re making judgement calls, it’s likely you’ll choose the A.I. that most resembles how you see the world. That may not be the best A.I. for your customers. (OMG… they used an Oxford Comma! I hate Oxford commas! That’s at least TWO errors!).

And NOW… The Moment You’ve ALL Been Waiting For…

Add up the errors, divide that by the number of words, put everything into a spreadsheet… and you’ve got your winner!

It’s a bit tedious to do the testing, but being able to identify the most accurate service will save you a lot of cleanup time in the long run. So it really is time well spent.

Hopefully this post has given you some insights into how to test whatever type of A.I. services you’re looking into using. And, of course, if you haven’t checked out Transcriptive, our A.I. transcript plugin for Premiere Pro, you need to!Thanks for reading and please feel free to ask questions in the comment section below!

How transcripts can help you to increase the reach of your Social Media videos

Video editing workstation with video camera beside monitor


Have you ever considered using Transcriptive to build an effective Search Engine Optimization (SEO) strategy and increase the reach of your Social Media videos? Having your footage transcribed right after the shooting can help you quickly scan everything for soundbites that will work for instant social media posts. You can find the terms your audience searches for the most, identify high ranked keywords in your footage, and shape the content of your video based on your audience’s behavior. 

According to vlogger and Social Media influencer Jack Blake, being aware of what your audience is doing online is a powerful tool to choose when and where to post your content, but also to decide what exactly to include in your Social Media Videos,  which tend to be short and  soundbite-like. The content of your media, titles, video descriptions and thumbnails, tags and post mentions should all be part of a strategy built based on what your audience is searching for. And this is why Blake is using Transcriptive not only to save time on editing but also to carefully curate his video content and attract new viewers.

Right after shooting his videos, the vlogger transcribes everything and exports the transcripts as rich text so he can quickly share the content with his team. After that, a Copywriter scans through the transcribed audio and identifies content that will bring traffic to the client’s website and increase ROI. “It’s amazing. I transcribe the audio in minutes, edit some small mistakes without having to leave Premiere Pro, and share the content with my team. After that, we can compare the content with our targeted keywords and choose what I should cut. The editing goes quickly and smoothly because the words are already time-stamped and my captions take no time to create. I just export the transcripts as an SRT and it is pretty much done, explains Blake.

Of course, it all starts with targeting the right keywords and that can be tricky, but there are many analytics and measurement applications offering this service nowadays. If you are just getting started in the whole keyword targeting game, the easiest and most accessible way is connecting your  In-site Search queries with Google Analytics. This will allow you to get information on how users are interacting with your website, including how much your audience searches, who is performing searches and who is not, and where they begin searching, as well where they head to afterward. Google Analytics will also allow you to find out what exactly people are typing into Google when searching for content on the web. 

For Blake, using competitors’ hashtags from Youtube has been very helpful to increase video views. “One of the differentials in my work is that I research my client’s competitors on Youtube and identify the VidIQs (Youtube keyword tags) they have been using on their videos so we can use competitive tagging in our content description and video title. This allows the content I produced for the client to show when people search for this specific hashtag on Youtube,” he explains. Blake’s team is also using Google Trends, a website that analyzes the popularity of top search queries in Google Search across various regions and languages. It’s a great tool to find out how often a search term is entered in Google’s search engine, compare it to their total search volume, and learn how search trends varied within a certain interval of time.

When asked what would be the last thing he would recommend to video makers wanting to boost their video views on Social Media, Blake had no hesitation in choosing captions. Social media feeds are often very crowded, fast-moving, and competitive. Nobody has time to open the video as full screen, turn the sound on and watch the whole thing, they often watch the videos without sound, and if the captions are not there then your message will not get through. And Transcriptive makes captioning a very easy process,” he says. 

Sometimes we just need to fix flicker it in post. And that’s ok!

image_FF_BlogPost

It’s been 5 years since we released Flicker Free, and we can for sure say flickering from artificial lights is still one of the main reasons creatives download our flicker removal plugin. From music videos and reality-based videos to episodics on major networks, small productions to feature-long films, we’ve seen strobing caused by LED and fluorescent lights. It happens all the time and we are glad our team could help fix flickering and see those productions look their best as they get distributed to the public.  

Planning a shoot so you can have control of your camera settings, light setup and color balance is still definitely the best way to film no matter what type of videos you are making. However, flickering is a difficult problem to predict and sometimes we just can’t see it happening on set. Maybe it was a light way in the background or an old fluorescent that seemed fine on the small on-set monitor but looked horrible on the 27″ monitor in the edit bay. 

Of course, in a perfect world we would take our time to shoot a few minutes of  test footage, use a full size monitor to check what the footage looks like, match the frame rate of the artificial light to the frame rate of the camera and make sure the shutter speed is a multiple/division of the AC frequency of the country we are shooting in. Making absolutely sure the image looks sharp and is free of flicker! But we all know this is often not possible. In these situations, post-production tools can save the day and there’s nothing wrong about that!

Travel videos are the perfect example of how sometimes we need to surrender to post-production plugins to have a high-quality finished video. Recently, Handcraft Creative co-owner Raymond Friesen shot beautiful images from pyramids in Egypt. He was fascinated by the scenery but only had a Sony A73 and a 16-70mm lens with him. After working on set for 5 years, with very well planned shoots, he knew the images wouldn’t be perfect but decided to film anyways. Yes, the end result was lots of flicker from older LED lights in the tombs. Nothing that Flicker Free couldn’t fix in post. Here’s a before and after clip:

Spontaneous filmmaking is certainly more likely to need post-production retouches, but we’ve also seen many examples of scripted projects that need to be rescued by Flicker Free. Filmmaker Emmanuel Tenenbaum talked to us about two instances where his large experience with short films was not able to stop LED flicker from showing up on his footage. He purchased the plugin a few years ago for “I’m happy to see you”, and used it again to be able to finish and distribute Two Dollars (Deux Dollars), a comedy selected in 85 festivals around the world, winner of 8 awards, broadcasted on a dozen TV channels worldwide and chosen  as Vimeo Staff Pick Premiere of the week. Curious why he got flicker while filming Two Dollars (Deux Dollars)? Tenenbaum talked to us about tight deadlines and production challenges in this user story!

Those are just a few examples of how artificial lights flickering couldn’t be avoided. Our tech support team often receives footage from music video clips, marketing commercials, and sports footage, and seeing Flicker Free remove very annoying, sometimes difficult, flicker in the post has been awesome. We posted some other user story examples on our website so check them out! And If you have some awful flickering footage that Flicker Free helped fix we’d love to see it and give you a shout out on our Social Media channels. Email press@nulldigitalanarchy.com with a link to your video clip! 


Interview: The importance of transcripts in documentary filmmaking

Green Screen shoot for the interview with the sons of Bakersfield Sound Legend, Bill Woods. L to R: Tammie Barbee, Glenda Rankin (Producer), Jim Woods, Bill Woods, Jr., Dianne Sharman. Hidden by microphone, unknown.


The struggle of making documentary films nowadays is real. Competition is high, and budget limitations can stretch a 6-year deadline to a 10 year-long production. To make a movie you need money. To get the money you need decent, and sometimes edited, footage material to show to funding organizations and production companies. And decent footage, well-recorded audio, as well as edited pieces cost money to produce. I’ve been facing this problem myself and discovered through my work at Digital Anarchy that finding an automated tool to transcribe footage can be instrumental in making small and low budget documentary films happen.

In this interview, I talked to filmmaker Chuck Barbee to learn how Transcriptive is helping him to edit faster and discussed some tips on how to get started with the plugin. Barbee has been in the Film and TV business for over 50 years. In 2005, after an impressive career in the commercial side of the Film and TV business, he moved to California’s Southern Sierras and began producing a series of personal “passion” documentary films. His projects are very heavy on interviews, and the transcribing process he used all throughout his career was no longer effective to manage his productions. 

Barbee has been using Transcriptive for a month, but already consider the plugin a game-changer. Read on to learn how he is using the plugin to make a long-form documentary about the people who created what is known as “The Bakersfield Sound” in country music. 

Chuck Barbee in his editing suite. A scene from his documentary project , "Wild West Country is on the large screen.
Chuck Barbee in his editing suite. A scene from his documentary project, “Wild West Country is on the large screen.


DA: You have worked in a wide variety of productions throughout your career. Besides co-producing, directing, and editing prime-time network specials and series for the Lee Mendelson Productions, you also worked as Director of Photography for several independent feature films. In your opinion. How important is the use of transcripts in the editing process? 

CB: Transcripts are essential to edit long-form productions because they allow producers, editors, and directors to go through the footage, get familiarized with the content, and choose the best bits of footage as a team. Although interview oriented pieces are more dependent on transcribed content, I truly believe transcripts are helpful no matter what type of motion picture productions you are making. 

On most of my projects, we always made cassette tape copies of the interviews, then had someone manually transcribe them and print hard copies.  With film projects, there was never any way to have a time reference in the transcripts, unless you wanted to do that manually. Then in the video, it was easier to make time-coded transcripts, but both of these methods were time-consuming and relatively expensive labor wise. This is the method I’ve used since the late ’60s,  but the sheer volume of interviews on my current projects and the awareness that something better probably exists with today’s technology prompted me to start looking for automated transcription solutions. That’s when I found Transcriptive. 

DA: And what changed now that you are using Artificial Intelligence to transcribe your filmed interviews in Premiere Pro?

CB: I think Transcriptive is a wonderful piece of software.  Of course, it is only as good as the diction of the speaker and the clarity of the recording, but the way the whole system works is perfect.  I place an interview on the editing timeline, click transcribe and in about 1/3 of the time of the interview I have a digital file of the transcription, with time code references.  We can then go through it, highlighting sections we want, or print a hard copy and do the same thing. Then we can open the digital version of the file in Premiere, scroll to the sections that have been highlighted, either in the digital file or the hard copy, click on a word or phrase and then immediately be at that place in the interview.  It is a huge time saver and a game-changer.

The workflow has been simplified quite a bit, the transcription costs are down, and the editing process has sped up because we can search and highlight content inside of Premiere or use the transcripts to make paper copies. Our producers prefer to work from a paper copy of the interviews, so we use that TXT or RTF file to make a hard copy. However, Transcriptive can also help to reduce the number of printed materials if a team wants to do all the work digitally, which can be very effective. 

Transcriptive panel open in Premier, showing the transcript of an interview with Tommy Hays, one of the original musicians who helped to create the Bakersfield Sound. Now in his 80's, Tommy Continues to perform regularly in the Bakersfield area, including venues such as Buck Owens' "Crystal Palace".
Transcriptive panel opens in Premiere, showing the transcript of an interview with Tommy Hays, one of the original musicians who helped to create the Bakersfield Sound. Now in his 80’s, Tommy Continues to perform regularly in the Bakersfield area, including venues such as Buck Owens’ “Crystal Palace”.


DA: What makes you choose between highlighting content in the panel and using printed transcripts? Are there situations where one option works better than the other?

CB: It really depends on producer/editor choices.  Some producers might want to have a hard copy because they would prefer that to work on a computer.  It really doesn’t matter much from an editor’s point of view because it is no problem to scroll through the text in Transcriptive to find the spots that have been highlighted on the hard copy.  All you have to do is look at the timecode next to the highlighted parts of a hard copy and then scroll to that spot in Transcriptive. Highlighting in Transcriptive means you are tying up a workstation, with Premiere, to do that.  If you only have one editing workstation running Premiere, then it makes more sense to have someone do the highlighting with a printed hard copy or on a laptop or any other computer which isn’t running Premiere.

DA: You mentioned the AI transcription is not perfect, but you would still prefer that than paying for human transcripts or transcribing the interviews yourself. Why do you think the automated transcripts are a better solution for your projects?

CB: Transcriptive is amazing accurate, but it is also quite “literal” and will transcribe what it hears.  For example, if someone named “Artie” pronounces his name “RD”, that’s what you’ll get. Also, many of our subjects have moderate to heavy accents and that does affect accuracy.  Another thing I have noticed is that, when there is a clear difference between the sound of the subject and the interviewer, Transcriptive separates them quite nicely.  However, when they sound alike, it can confuse them. When multiple voices speak simultaneously, Transcriptive also has trouble, but so would a human. 

My team needs very accurate transcripts because we want to be able to search through 70 or more transcripts, looking for keywords that are important. Still, we don’t find the transcription mistakes to be a problem. Even if you have to go through the interview when it comes back to make corrections, It is far simpler and faster than the manual method and cheaper than the human option.  Here’s what we do: right after the transcripts are processed, we go through each transcript with the interviews playing along in sync, making corrections to spelling or phrasing or whatever, especially with keywords such as names of people, places, themes, etc. It doesn’t take too much time and my tip is that you do it right after the transcripts are back, while you are watching the footage to become familiar with the content. 

Chuck Barbee shooting interview with Tommy Hays at the Kern County Museum.

 DA: Many companies are afraid of incorporating Transcriptive into an on-going project workflow. How was the process of using our transcription plugin in a long-form documentary film right away?

CB:  We have about 70 interviews of anywhere from 30 minutes to one hour each.  It is a low budget project, being done by a non-profit called “Citizens Preserving History“. The producers were originally going to try to use time-code-window DVD copies of the interviews to make notes about which parts of the interviews to use because of budget limitations. They thought the cost of doing manually typed transcriptions was too much.  But as they got into the process they began to see that typed transcripts were going to be the only way to go. Once we learned about Transcriptive and installed it, it only took a couple of days to do all 70 interviews and the cost, at 12 cents per minute is small, compared to manual methods.

Transcriptive is very easy to use and It honestly took almost no time for me to figure out the workflow.  The downloading and installation process was simple and direct and the tech support at Digital Anarchy is awesome.  I’ve had several technical questions and my phone calls and emails have been answered promptly, by cheerful, knowledgeable people who speak my language clearly and really know what they are doing. They can certainly help quickly if people feel lost or something goes wrong so I would say do yourself a favor and use Transcriptive in your project!

Here’s a short version of the opening tease for “The Town That Wouldn’t Die”, Episode III of Barbee’s documentary series:

https://www.youtube.com/embed/Py19MFCBvk0

More about Chuck Barbee’s work: https://www.barbeefilm.com

To learn more about Transcriptive and download a Free Trial license visit  https://digitalanarchy.com/transcribe-video/transcriptive.html. Questions? Get in touch with carla@nulldigitalanarchy.com.


Using After Effects to create burned-in subtitles from SRTs

Recently, an increasing number of Transcriptive users have been requesting a way of using After Effects to create burned-in subtitles using SRTs from Transcriptive. This made us anarchists get excited about making a  Free After Effects SRT Importer for Subtitling And Captions.

Captioning videos is more important now than ever before. With the growth of mobile and Social Media streaming, YouTube and Facebook videos are often watched without sound and subtitles are essential to retain your audience and make them watchable. In addition to that, the Federal Communications Commission (FCC) has implemented rules for online video that require subtitles so people with disabilities can fully access media content and actively participate in the lives of their communities. 

As a consequence, a lot of companies have style guides for their burned-in subtitles and/or want to do something more creative with the subtitles than what you get with standard 608/708 captions. I mean, how boring is white, monospaced text on a black background? After Effects users can do better.

While Premiere Pro does allow some customization of subtitles, creators can get greater customization via After Effects. Many companies have style guides or other requirements that specify how their subtitles should look. After Effects can be an easier place to create these types of graphics. However, it doesn’t import SRT files natively so the SRT Importer will be very useful if you don’t like Premiere’s Caption Panel or need subtitles that are more ‘designed’ than what you can get with normal captions. The script makes it easy to customize subtitles and bring them into Premiere Pro. Here’s how it works:

  1. Go to the registration page our registration page.
  1. Download the .jsxbin file. 
  1. Put it here: 
  • Windows: C:\Program Files\Adobe\Adobe After Effects CC 2019\Support Files\Scripts\ScriptUI Panels
  • Mac:  Applications\Adobe After Effects CC 2019\Scripts\ScriptUI Panels

3. folder location

4. Restart AE. It’ll show up in After Effects under the Window\Transcriptive_Caption

3.select panel

5. Create a new AE project with nothing in it. Open the panel and set the parameters to match your footage (frame rate, resolution, etc). When you click Apply, it’ll ask for an SRT file. It’ll then create a Comp with the captions in it.

5. import SRT

  1. Select the text layer and open the Character panel to set the font, font size, etc. Feel free to add a drop shadow, bug or other graphics.

6.character style

7. Save that project and import the Comp into Premiere (Import the AE project and select the Comp). If you have a bunch of videos, you can run the script on each SRT file you have and you’ll end up with an AE project with a bunch of comps named to match the SRTs (currently it only supports SRT). Each comp will be named: ‘Captions: MySRT File’. Import all those comps into Premiere.

7. import comp

8. Drop each imported comp into the respective Premiere sequence. Double-check the captions line up with the audio (same as you would for importing an SRT into Premiere). Queue the different sequences up in AME and render away once they’re all queued up. (and keep in mind it’s beta and doesn’t create the black backgrounds yet).

Although especially beneficial to Transcriptive users, this free After Effects SRT Importer for Subtitling And Captions will work with any SRT from any program and it’s definitely easier than all the steps above make it sound and it is available for all and sundry on our website. Give it a try and let us know what you think! Contact: sales@nulldigitalanarchy.com

Your transcripts are out of order! This whole timeline’s out of order!

When cutting together a documentary (or pretty much anything, to be honest), you don’t usually have just a single clip. Usually there are different clips, and different portions of those clips, here, there and everywhere.

Our transcription plugin, Transcriptive, is pretty smart about handling all this. So in this blog post we’ll explain what happens if you have total chaos on your timeline with cuts and clips scattered about willy nilly.

If you have something like this:

Premiere Pro Timeline with multiple clips
Transcriptive will only transcribe the portions of the clips necessary. Even if the clips are out of order. For example, the ‘Drinks1920’ clip at the beginning might be a cut from the end of the actual clip (let’s say 1:30:00 to 1:50:00) and the  Drinks cut at the end might be from the beginning (e.g. 00:10:00 to 00:25:00).

If you transcribe the above timeline, only 10:00-25:00 and 1:30:00-1:50:00 of Drinks1920.mov will be transcribed.

If you Export>Speech Analysis, select the Drinks clip, and then look in the Metadata panel, you’ll see the Speech Analysis for the Drinks clip will have the transcript for those portions of the clip. If you drop those segments of the Drinks clip into any other project, the transcript comes along with it!

The downside to _only_ transcribing the portion of the clip on the timeline is, of course, the entire clip doesn’t get transcribed. Not a problem for this project and this timeline, but if you want to use the Drinks clip in a different project, the segment you choose to use (say 00:30:00 to 00:50:00) may not be previously transcribed.

If you want the entire clip transcribed, we recommend using Batch Transcribe.

However, if you drop the clip into another sequence, transcribe a time span that wasn’t previously transcribed and then Export>Speech Analysis, that new transcription will be added to the clips metadata. It wasn’t always this way, so make sure you’re using Transcriptive v1.5.2.  If you’re in a previous version of Transcriptive and you Export>Speech Analysis to a clip that already has part of a transcript in SA, it’ll overwrite any transcripts already there.

So feel free to order your clips any way you want. Transcriptive will make sure all the transcript data gets put into the right places. AND… make sure to Export>Speech Analysis. This will ensure that the metadata is saved with the clip, not just your project.

Shooting 4K to Create Vertical Videos for Social Media

Female hand holding smart phone and taking photo of sunset

Vertical Video is here to stay.  It still makes me cringe a bit when I see people filming portrait. Since my early video journalism classes back in Brazil, shooting landscape ratio was a set rule that has always felt natural. However, nowadays the reality is that, sooner or later, a client will ask you to shoot and edit high-quality videos for their Social Media pages. And Social Media channels are mainly accessed through smartphones and tablets, which means posting portrait videos will be essential to engage and build a strong audience. 

Shooting vertical is easy when you just want to post some footage of your weekend fun, but requires a change of perspective when the goal is to produce, shoot and edit professional videos instead. In that case, it’s important to produce a video that has a vertical aspect ratio in mind from the beginning of the process. But what happens when your production is meant to screen across different platforms and needs to fit vertical aspect ratio requirements? In this case, shooting 4K is gives you a lot of flexibility in post.

Most social video is posted at HD resolution, so why 4K? Cropping horizontal video to fit vertical screen usually leads to very pixelated and low-quality footage. When your frames need to be taller than they are wide, your standard 16:9 frame will need to be dramatically resized to fit the 9:16 smartphone screen and your regular HD resolution won’t allow for the image to stay sharp and clean. Shooting 4K will give you extra pixels to work with and make it easy to reposition the frame in post as you wish.

In addition to having more room for reframing, if your original footage has a quadrupled resolution then you can zoom in cleanly since you have a much better source video to work with. This is a huge advantage because Vertical Video is all about showing detail so you can make a deeper connection with your audience. 4K will give you the flexibility to efficiently adjust to vertical and square formats, and still preserve the option to watch a broader image of your subject on our beloved 16:9 standard film and television format.

Of course, you can always just upload a horizontal video on Instagram or Snachap, but don’t expect your audience to take the time to turn their phones around just to watch your video. Chances are they will keep holding their phone with one hand and careless watch your footage in a small window across the screen. It’s obvious that adjusting to 9:16 aspect ratio requires a change of perspective and demands us to rethink the way we produce, shoot and edit video. But isn’t it what film school is always trying to teach us?

Formats are changing, vertical streaming is a very strong distribution method, and mobile filmmaking is growing every day. It’s up to us, video makers, to reflect on the changes and find a balance between adjusting to our audiences and not losing image quality. I don’t believe vertical video will ever replace landscape aspect ratios, but I do think it is a solid format for short internet videos so let’s take advantage of it and get ready for the next challenge.

The Role of Concept Art in Film And Games

Recently attended E3, the industry conference for all things games, and while the games, booths and general spectacle are always cool, one of my favorite parts of the show is a quiet, out-of-the-way corner with the Into The Pixel gallery of game concept art.

I’ve always thought concept artists don’t get the recognition they deserve, both in film and especially in games. They play an important role in defining the look and feel of the final film or game. And much of the art is truly beautiful. It’s much faster/cheaper to do a series of sketches and then paintings to create the look, than to build a set (even a virtual one) and make endless changes to that.

We always talk about developers and 3D artists, but often forget that the beginning of the creation process often starts with pen, ink, and digital paint. Here’s a few images (top to bottom: God of War, Jose Cabrera; Control, Oliver Odmark; APOC, Krist Miha) from Into The Pixel (click the link to see more):

God-WarE3-2E3-3

My first exposure to concept art was back when I was about 10 and a complete Star Wars nut. Star Wars had just came out and one of the things I purchased (ok, my parents purchased) was a portfolio of reproductions of Ralph McQuarrie’s concept art. It was fascinating to see what the initial ideas were, what changed, what remained the same. It’s truly one of the best pieces of Star Wars memorabilia that I own. And, even now, the art is still fabulous.

As George Lucas himself said of Ralph, “Ralph was the first person I hired to help me envision Star Wars. His genial contribution, in the form of unequaled production paintings, propelled and inspired all of the cast and crew of the original Star Wars trilogy. It’s really a testament to how important he was that there’s such a connection between a lot of those iconic images and the movie scenes. The way he illustrated them were an influence on those characters and how they acted. When words could not convey my ideas, I could always point to one of Ralph’s illustrations and say ‘Do it like this.’”

I think my favorite ones are still from A New Hope. Many of these were done prior to Lucas pitching Fox on the movie, so show what some of the ideas were when there was only a rough script. They were needed to convey what his vision for the Star Wars universe was to people that had _no idea_ what he was going on about. And they turned out to be critical in Fox’s decision to green light the film.

All in all, a pretty big testament to the importance of concept artists.

Some of his images are below, so check them out.  More can be found on starwars.com and elsewhere on the interwebs. If you know of a concept artist that does great work, please feel free to put their name and website in the comments below.

Ralph McQuarrie's Star Wars Art SW-3 SW-4

Women in tech still body shame themselves in silence. Why?

IMG_0087

Recently our CEO Jim Tierney invited me to start a Podcast for Digital Anarchy. I have a journalism background and at first, the idea did not sound too bad: it would actually be awesome to take the time to chat with industry folks in a regular basis and be paid for it. The challenge began when he said I would do a video podcast, interviewing all these awesome people on camera.

It may sound silly to some people, but the idea of watching myself on camera terrifies me. Believe it or not, to this day I have not watched a video interview I gave at NAB last April. I have only listened to it, and noticing my accent in each answer was enough to make me skip the image part.  Since that day Jim invited me to start the “videocast”, I have been trying to understand my fear of being on camera and my relationship with my own image. As a media professional, why can’t I look at myself on the screen? Digging into that question brought unexpected answers and the need to talk about a problem every woman faces at least once in their lives, if not all the time: beauty standards.

Being skinny has always been a prerequisite to be beautiful in my culture. It is difficult, painful, and traumatizing to grow up in Brazil as a not-so-skinny girl. If you are overweight it means you are also sedentary, unhealthy and unattractive by proxy. And believe me, you do not need to have much fat to be considered overweight in Brazil. My curly hair also did not help. Although I am from Salvador, which has the biggest African descendance in Brazil, curly hair was not a thing until very recently. I grew up straightening my hair with chemicals and only stopped doing that 4 years ago. It is hard to admit and think back, but looking at my graduation pictures from 10 years ago, looking at the popular girls at school,  I realized I was just trying to belong.

CarlaGraduation

I always knew most of my insecurities came from the dissatisfaction with the way a look, but I also learned very early on that not feeling pretty does not mean I am not pretty. What it means is that society sets unachievable beauty standards for women and that I must fight that daily if I want to be productive and help to minimize the harm our industry has caused to women. This was enough to deal with my own insecurity and keep me going. What I didn’t realize is that it wasn’t enough to solve the problem.

Every day the media reminds you of what it means to be beautiful to society: tall, skinny, and mostly white. Blacks, Latinas, middle-eastern are now accepted. They just need to be skinny. It’s an old and well-known problem, and although a lot of women are freeing themselves from it, most of us still compare ourselves to this woman we see on TV  sometimes. In my case, I started to notice that those intangible standards can impact not only my eating and exercising habits; what I wear and how I wear the clothes I buy; but it can influence my behavior and stop me from growing professionally if I don’t face it.

What can we can do to minimize the harm our industry has already caused to women is clear to me: we must stand up and fight for inclusion, equal rights, full access to every job position available in the industry. We must include all body types in commercials, magazines, TV shows. We must have women featuring not only as personal assistant AI voices, but also coding and training the AI technology. However,  for those who are already aware of this or working on solving the big picture, I ask: what can we do to do not only free other women but truly free ourselves and stop shaming our own images silently? I don’t fully know the answer, but I will start with producing, editing and hosting the Digital Anarchy podcast. It will be incredibly difficult, but I can’t wait to discuss media-making with you all. Stay tuned! More info coming up soon. 

Carla Prates, Transcriptive/Digital Anarchy carla@nulldigitalanarchy.com

In Memory of Norman Hollyn

First time I really had a conversation with Norm Hollyn, we were sitting down during ‘Casino Night’ at the Editors Retreat talking about depression. While it might seem kind of depressing to be having a deep conversation about depression while everyone else is having fun losing fake money, it was far from it.

I had originally met him the day before as both of us were on a panel discussing the future of editing. I was sort of representing A.I., there were a few people from other companies representing other technologies and I think Norm was on the panel as the token flesh and blood editor. It was a great discussion and Norm had a very grounded and very positive view of how technology shapes filmmaking. I think he probably had to be that way. He had to prepare his USC students (he was Professor of Cinematic Arts at USC) not only how to create compelling films but also how to deal with any technology changes that were coming. Technology may come and it may go, but you still need to know how to tell a good story.

As some of you know, I wrote a blog post about my depression and my struggles with it. I’ve had many people email me about it, both those who struggle with depression and those that it helped them wrap their head around the disease. It seems to have had a very positive impact. Norm had a lot to do with how that post came to be.

I’m pretty open about my depression and am generally happy to talk about it (unless I’m in the middle of it). I don’t feel remaining silent about it helps anyone and had been mulling over the idea of a blog post for a while. However it’s one thing to discuss it with friends and acquaintances in person and another to put it out for the whole world to see in a blog post.

I initially sat down with Norm talking about some of the topics of the prior day’s panel discussion, but somehow got onto the topic of depression. Being open about it, I started talking about my experience with it. He asked a lot of questions about it and, I think, got more detailed answers and a better understanding of the disease than he had previously. The end result of the conversation was an invitation to speak to his USC classes about what it’s like being creative and dealing with depression or other mental health issues. Encouraging me to speak to other creatives about something that was clearly not an uncommon problem.

So in the Fall of last year I went down to USC and talked to both his graduate and undergraduate students. Both talks went really well, especially with the grad students. Perhaps because it was a smaller class, it ended up with a lot of back and forth conversation. Almost a group therapy session, as most of the students related their own struggles with depression or anxiety or whatever. It went well enough that after he returned from sabbatical this Spring, we planned on doing it once every semester.

Unfortunately, as you may know, on March 19th he unexpectedly passed away in Japan, spending some time there as a guest lecturer.

Every once a while you come across someone and you’re like ‘I’ve got to get to know this person better’. I was truly looking forward to spending more time with him, getting to know him better, and further fleshing out how to talk to creative students about depression and mental health. The blog post was a direct result of my conversation with him and my talk with his students. I had been on the fence about being so public, but his encouragement gave me some confidence that it was the right thing to do. And speaking to his classes really confirmed it was the right thing to do.

He will be missed. He was a guiding light to many students and other filmmakers. In talking to other people in the industry since his death, I’ve come to realize how many lives he touched in a positive way. I think most of us can only aspire to that.

And I have no doubt that I share something with many people who knew him. His unabashed encouragement to tell my story. For that I am eternally grateful.

For those interested, here’s a link to the post on creatives and depression.

VFX: L.A. band invests on visual effects to create a parallel universe in music videos

Releasing new products is awesome, but to me, the best part of working for a video/photo plugin company is to see how our clients are using our products day-to-day. From transcription to flicker removal and skin retouching, content creators all over the world are using plugins to create better content and images. There are so many talented content creators making cool stuff out there! 

This week we talked to Margarita Monet, lead singer of Edge of Paradise. The band — Dave Bates-guitars, David Ruiz – guitars, Vanya Kapetanovic – bass, and Jimmy Lee – drums — has been taking advantage of visual effects to enrich their music and create unique videos. In this interview, Margarita discusses how visual effects are helping to shape Edge of Paradise’s identity and explains how she has been using Beauty Box Video to improve the image quality of her videos.

EOP7

Digital Anarchy:  How would you describe the Edge of Paradise music and style?

Monet: Our music has evolved over the years. I would say we started with traditional hard rock and heavy metal, influenced by the classic bands like Black Sabbath and Iron Maiden. But our music evolved into something more of a cinematic hard rock with an industrial edge. I incorporated the piano and keyboard which gave some songs a symphonic feel to them. Our music is very dynamic, with blood pumping drums, epic choruses all moved by heavy guitar riffs. But we also have very melodic and dynamic piano ballads. The upcoming album Universe really showcases what Edge Of Paradise is all about, and we are so excited to share this unique sound we created!

Digital Anarchy: Since the very beginning, your music videos have been full of visual effects. Where do all the VFX ideas come from? Are they mostly done in post-production?

Monet: Most of the visual effects we actually tried to capture on camera and enhance it in post. Except for one of the Lyric Videos ( Dust To Dust ) that was all done in After Effects.

Dust to Dust, 2017:

Usually, ideas came from me, and whoever we were working with helped us bring them to life. We’ve had to get very creative playing with light, with props, building the settings.  And as the band grows our videos get more and more elaborate and we all get more creative. We recently released a music video we shot in Iceland (Face of Fear), that one was directed by Val Rassi and edited by Robyn August. No visual effects there, just all scenery captured by an amazing drone pilot Darren LaFreniere!

Face of Fear, 2019:

Digital Anarchy: How long does it usually take to produce your videos? Is the whole band always involved in each stage of production?

Monet: Depends on the video. Some take about a month, where I come up with an idea and location/setting and we shoot it. Some videos take longer with a lot of planning and it’s a group effort. And there is always something we have to do in between, whether it’s playing shows or touring. Filming usually is a 1-2 day shoot, and we allow about 1-2 months for editing to be done.

We plan as much as possible and try to create beautiful shots for each take. However, things don’t always go as planned or we can’t achieve the perfect look we want. That’s when visual effects come handy. Recently we shot a live video of an acoustic version of one of our songs. It was shot in a recording studio and we had some limitation with lighting. I was searching for something I could do to polish up the look and came across Digital Anarchy. When using 4K cameras, it creates a very high-quality image, and all the details are visible, so we decided to try Beauty Box video. It is such a great tool to polish up the look! Extremely effective and time efficient.

Digital Anarchy: How is Beauty Box helping you to achieve the look you want on your music videos?

Monet: We put so much effort into creating the settings and the “world” of the video that it’s only expected to have everything look polished and coherent. Sometimes we might have this great shot, but one of our faces looks shiny, or the light is not completely flattering. Beauty Box can fix those issues and allow us to use the shot we want!

Digital Anarchy: What was your first music video as a band and what do you think has changed so far?

Monet: Our first video was Mask, it sounds and looks like a completely different band. We had to start somewhere. It’s a well-done video, we’ve had probably the largest crew working on that to date, over 10 people, and we learned a lot from it! It was also a different lineup, so the band was still evolving. But it does not even come close to what we look and sound like now!

Mask, 2012:

Digital Anarchy: Would you say the visual effects applied to photos and videos nowadays are part of the band’s identity?

Monet: Yes, we want to transport people to another world, and we want to do that in our live show as well. That is why we are building our stage show to reflect the imagery of the band when we start touring in support of the upcoming album Universe. Our vision from the beginning was always larger than life so I would say it’s a part of our identity.

I want our content to make a big impact visually. We put so much time and effort into our songs to make sure all our music, from songwriting to production, is the best it can be. We have to do the same with video! And now we can put more time and effort into creating videos that tell great stories; that are visually stunning and are of the highest quality. That is essential to keeping the band growing.

I think the fact that we do have quite a few videos, not just music videos, but promo videos as well, helped us keep building momentum. Especially today, people expect that from you. Being a newer band, especially in the beginning, it was a big challenge and I didn’t know much about video creation, so I had to learn very fast.

Digital Anarchy: Every member of the band is somehow connected to other art forms besides music. How do you think this impacts the aesthetics of the band now?

Monet: I think these days, being in a band is not just about making music, we must create a world that people will want to be a part of. And I love that, I love the visual aspect of it, I love creating a stage show, creating music videos. I make a lot of graphics and art for the band as well, and in a way that helps me with the songwriting, because I can really visualize the world I’m creating. We have a great collection of people, all their skills and ideas come into play when we evolve our world!

Digital Anarchy: After producing and editing so many music videos, what is your favorite visual effect?

Monet: The last video we worked on with Nick Peterson, he created a really cool effect where he filmed us at different playback speeds/frame rates that gave certain parts of the video more of a static/robotic feel, some parts are smooth, slow motion. It created a really cool effect and gave the video the right dynamics and motion that flows right with the song. Some other effects in the past that I liked was playing with light flares and earthquake effect is also great for music videos!

Dave, I, and the rest of the band members are very hands-on nowadays.  We have a smaller 2-5 people crew, which helps everything run smoother and more efficient. Most of the time we have 1 or 2 days to shoot and as the videos get more elaborate, we must work fast and get very creative. The last video we shot with Nick Peterson (Universe) we captured so much in 1 day. It’s great to work with people who understand how to maximize the time to capture what we need to achieve the vision!

The trainer for Universe is not yet ready, but here is a sneak peek!

With a solid line-up, Edge of Paradise is working on new music videos and getting ready to release their new Album, Universe. Check their website to learn more!

Are you a content creator using Digital Anarchy plugins to produce video materials? Get in touch! We would love to learn more about your work and spread the word.

Someone Tell The NCAA about Flicker Free

Unless you’ve been living under a rock, you know it’s March Madness… time for the NCAA Basketball Tournament. This is actually my favorite two weekends of sports a year. I’m not a huge sports guy, but watching all the single elimination games, rooting for underdogs, the drama, players putting everything they have into these single games… it’s really a blast. All the good things about sport.

It’s also the time of year that flicker drives me a little crazy. One of the downside of developing Flicker Free is that I start to see flicker everywhere it happens. And it happens a lot during the NCAA tournament. Especially slow motion shots . Now, I understand that those are during live games and playing it back immediately is more important than removing some flicker. Totally get it.

However, for human interest stories recorded days or weeks before the tournament? Slow motion shots used two days after they happened? C’mon! Spend 5 minutes to re-render it with Flicker Free. Seriously.

Here’s a portion of a story about Gonzaga star Rui Hachimura:

Most of the shots have the camera/light sync problem that Flicker Free is famous for fixing. The original has the rolling band flicker that’s the symptom of this problem, the fixed version took all of three minutes to fix. I applied Flicker Free, selected the Rolling Bands 4 preset (this is always the best preset to start with) and rendered it. It looks much better.

So if you know anyone at the NCAA in post production, let them know they can take the flicker out of March Madness!

Artificial Intelligence Gone Bad

There are plenty of horrible things A.I. might be able to do in the future. And this MIT article lists six potential problem areas in the very near future, which are legit to varying degrees. (Although, this is more a list of humans behaving badly than A.I. per se)

However, most people don’t realize exactly how rudimentary (i.e. dumb) A.I. is in it’s current state. This is part of the problem with the MIT list.  The technology is prone to biases, many false positives, difficulty with simple situations, etc., etc.  The problem is more humans trying to make use of and/or make critical decisions based on immature technology.

For those of us that work with it regularly, we see all the limitations on a daily basis, so the idea of A.I. taking over the world is a bit laughable. In fact,  you can see it daily yourself on your phone.

Take the auto-suggest feature on the iPhone. You would think the Natural Language Processing could take a phrase like ‘Glad you’re feeling b…’ and suggest things like better, beautiful or whatever. Not so hard, right?

Er, no.

When artificial intelligence can't handle basic things

How often does ‘glad’, ‘feeling’ and ‘bad’ appear in the same sentence? And you want to let A.I. drive your car?

We’ve got a ways to go.

Unless, of course, it’s a human problem again and there are a bunch of asshats out there that are glad you’re feeling bad. Oh, wait… it’s the internet. Right.

Depression, Suicide and Being A Creative

While there’s less stigma attached to depression than there used to be, it’s still not always accepted or people have a hard time understanding it.

Many creatives, probably more than you think, struggle with depression.

In the last six months I’ve talked to a lot of people that don’t understand what chronic depression is like. This includes giving a talk at the USC film school to graduate and undergraduate students about being a creative and dealing with depression (Thanks Norman Hollyn!). I attended a funeral for a friend who committed suicide about six months ago and last week an uncle of a co-worker killed himself. Even at my friend’s funeral, someone giving a speech saying, ‘he was bi-polar, but it wasn’t like he was depressed and down-and-out’. As if being depressed and acting like a derelict were the same thing.


This blog post is:

1) an attempt to give folks that don’t deal with chronic depression a better understanding of it, how it manifests and, maybe, what to do about it (both as a sufferer and someone that cares about someone suffering).

2)  I know that many people who identify as ‘creative’ struggle with similar issues and I want you to know you are not alone. It’s a lonely disease, we isolate ourselves and feel isolated by it. Nevertheless, you are not alone.

And 3)  I want to start the discussion both for those suffering and those trying to understand and help those suffering. It doesn’t help anyone to not talk about it. Let’s de-stigmatize it.


My Struggle

I’ve struggled with depression and suicidal thoughts for almost 40 years, since my early teens.  Please realize this post is talking from my own experience, what I’ve learned from therapists and what’s worked for me. I’m not a therapist. If you suffer from depression it’s usually very beneficial to see a therapist or psychologist. It’s really important you have help. I also encourage those of you who are therapists, or if you have struggled with depression to talk about your experiences and what’s been helpful (or not) for you. Please post in the comments!

Let’s start off by attempting to talk about what it’s like to be depressed. Or at least how it manifests for me. Everyone is different but my experience can give you some insight into the disease.

On a daily basis, as I have had for almost as long as I can remember, I have a voice inside me telling me I’m worthless, unloveable and that life is not worth living. All the time. Most of the time, that voice is just barely audible background noise, easily dismissed. But on some days it’s the sound and fury of a hurricane. On those days suicide becomes a tangible thing. I’ll talk more about that in a moment.

The rest of the time, dismissing the voice takes time and energy. It can suck the joy out of successes and it magnifies failures. It is a weight that I constantly struggle against. This is despite the fact that I have what most people would consider a pretty good life.

I’m fully aware I’m blessed… I run a successful company that I started, I have much love and support around me, a good partner. And yet…

The awareness that I have so much to be grateful for often makes it harder. On top of the depression, guilt and shame are piled on for knowing that I have all these good things yet I’m still depressed. The depression becomes like teflon. Rationally I’m aware of the love and support around me. I know such things exist. But they roll off the darkness like beads of water, unable to be absorbed to the depths where they would help. The feelings can’t be internalized.

I know I SHOULD be grateful but I can’t manifest it. Which just increases the frustration and pain.

I realize all this sounds pretty bleak. Probably bleaker than it actually is a lot of the time.  Remember that often the thoughts are mostly background noise. They definitely have a bit of a dampening effect but I can still feel happy or joyful or neutral or whatever. I don’t usually have a problem moving through the world like everyone else. That said, on the bad days, the above description doesn’t come close to capturing the depths of the darknesses. How dark the thoughts have to be to make suicide a viable option. But it can get there.


So what should you do?

If you want to help someone that’s deeply depressed, perhaps even suicidal, you have to meet the person where they’re at, NOT where you want them to be. Even if they say they’re suicidal. Accept that depression is an illness and hear them out. LISTEN to them. Acknowledge what they are feeling. Make them feel heard. Make them feel loved… by listening, by asking gentle questions (how did that make you feel? Why do you think it affected you like that? Is there anything that would make it better?, etc.), by making time for them, by being non-judgemental. Let them tell their story. But also be part of the conversation. Don’t just ruminate with them. Try to move the conversation forward.

However, it may be hard to get them to engage. Realize that there’s a lot of non-verbal things happening… Depression is more, and perhaps much more, something you feel in your body than something that’s in your head. So hugs without words are sometimes the best things. Offer to go out and get them their favorite food or bring them soup. Of course, you can just ask them what they need.

You’re not going to solve it. All you can do is support them in solving it for themselves.

If they are suicidal, you need to accept the fact that suicide is a viable option. Just because you don’t want it to happen doesn’t mean it can’t or won’t happen. If someone believes suicide is an option and you tell them that it’s not, you’re making it more likely. You’re invalidating their opinion, invalidating what they’re feeling. By doing so you’re confirming that they mean nothing. And, again, be careful about how you tell them what they have to live for.  They are probably very well aware of the things that they _should_ feel grateful for.

In truth, if you suspect someone is depressed you should consult a therapist. I am not a therapist. I’m just relating my own struggle with chronic depression, and every person’s struggle is different. Everyone’s reasons for being depressed are different… in many cases, it’s not chronic but event driven (a divorce, death, getting fired, etc.). Listening is always a good strategy but a therapist will be able to offer better advice for the exact situation.

The other thing to know is that often those of us that have dealt with depression for a long time are good at putting a brave face on it. It may not be obvious we’re depressed. Which is why suicide often comes as a shock. Just because outwardly someone is successful and seems to have it together doesn’t mean they aren’t suffering and struggling underneath it all. In a lot of case, it’s up to the depressed person to realize they are not alone and that they can get help.

If YOU struggle with depression…

This is a lonely and difficult struggle. Particularly when you’re younger and you’re still learning what it is and what might help but it’s difficult at any age. You have to find the strength of will to pull yourself out of it enough to either help yourself or reach out and take the hands of those offering to help.

As mentioned, see a therapist or psychologist. It really does help to talk things out. Often a therapist can help you see things and patterns you can’t see for yourself.

One of the important things is to get out of the house. If you can at least find the strength to go be depressed in a park, a makerspace, gym, mall, whatever… you’ll find it helps. Go somewhere and do something you enjoy. Especially if you can connect with a friend, but I’ve found just being in a place where there are other people helps. If lack of people works better at least try to not just stay in bed or on the couch. Take a walk in a secluded park or something.

Connect with people. Even though it seems like no one cares, you’ll find if you reach out, you have friends who do care and will help.

There are other things that can help as well. They tend to be somewhat different for each person but it’s important to find what those things are. For some people it’s art or music or just sitting in the sun. Meditation can also be a form of therapy, especially with a good teacher.

I think many creatives forget why they started doing art in the first place. Make sure you’re creating art outside of your job. Doing art you love just for the sake of the art. It can be a huge outlet and expression of what you’re feeling. It really is important to make time for it.

For myself, exercise, particularly yoga these days, has always been the best anti-depressant. However, as I’ve gotten older and injuries more frequent, I’ve come to rely on anti-depressant medications a bit more. Getting injured is a double whammy… I get depressed about not being able to do something I love doing and, at the same time, my main coping mechanism for dealing with depression is taken away.

Medications are a mixed bag. Not all of them work and some can actually make things worse. So it’s important to monitor your state of mind when you initially start taking them. If it makes you feel worse stop immediately and consult your Psychiatrist. You may have to try a few different ones to find what works for you. However, after much resistance, I was finally convinced to start taking Cymbalta regularly (next generation Prozac-like drug). It’s actually been quite helpful. Who knew?


There is no easy answer.

What I’ve said here is meant to help and guide folks. However, it’s mostly based off of my personal experience. It is not the be all, end all. If you have other insights, please share them in the comments. I would love to hear other things that have worked for other people. We’re all different, men sometimes have different challenges than women, as do different age groups, etc., etc. There is not one solution.

Whatever the solution is, it requires work.

But it can’t hurt to talk about it and realize we’re not alone. To know that it’s ok to be depressed. It happens. It’s an illness and needs to be treated as such. If it’s chronic, then it comes and goes. Sometimes stronger, sometimes less so. By exploring meditation, seeing a therapist, taking medication or whatever works for you, hopefully we learn how to deal with it better over time. But even after almost 40 years and all the above things I’ve talked about… I still have incredibly dark days. I still have a voice that says I’m worthless and wants to drag me down. For myself and many people, this doesn’t just disappear.

As one of my therapists said… it’s like driving a bus. Those parts of you, those passengers, are on the bus whether you like it or not. At some point you have to accept the passengers. Once you accept them, you realize they are part of you, but they AREN’T you. They don’t define you. (it’s not easy to get to that realization and some days, you’re still going to believe that voice. It happens.)

So let’s talk. Be open about our experiences, what’s helpful, what’s not. Hopefully we can further de-stigmatizing depression and make everyone realize that sometimes asking for help is the most courageous thing you’ll ever do.


Downloading The Captions Facebook or YouTube Creates

So you’ve uploaded your video to Facebook or YouTube and you’d like to import the captions they automatically generate with Artificial Intelligence into Transcriptive. This can be a good, FREE way of getting a transcript.

Transcriptive imports SRT files, so… all you need is an SRT file from those services. That’s easy peasy with YouTube, you just go to the Captions section and download>SRT.

Screenshot of where to download an SRT file of YouTube CaptionsDownload the SRT and you’re done. Import the SRT into Transcriptive with ‘Combine Lines into Paragraphs’ turned on… Easy, free transcription.

With Facebook it’s more difficult as they don’t let you just download an SRT file. Or any file for that matter. So you need to get tricky.

Open Facebook in Firefox and go to the Web Developer>Network. This will open the inspector at the bottom of you browser window.

Firefox's web developer tool, the Network tabWhich will give you something that looks like this:

Using the Network tab to get a Facebook caption fileGo to the Facebook video you want to get the caption file for.

Once the video starts playing, type SRT into the Filter field (as shown above)

This _should_ show an XHR file. (we’ve seen instances where it doesn’t, not sure why. So this might not work for every video)

Right Click on it, select Copy>Copy URL (as shown above)

Open a new Tab and paste in the URL.

You should now be asked to download a file. Save this as an SRT file (e.g. MyVideo.srt).

Import the SRT into Transcriptive with ‘Combine Lines into Paragraphs’ turned on… Easy, free transcription.

So that’s it. This worked as of this writing. It’s entirely possible Facebook will make a change at some point preventing this, but for now, it’s a good way of getting free transcriptions.

You can also do this in other browsers, I’m just using Firefox as an example.

Helping Those Affected by The California Wildfires (Camp and Woolsey)

This weekend I figured it’d be better to make an appeal for those that have lost so much in the Camp and Woolsey wildfires here in California.  Digital Anarchy is based in San Francisco, that has sat under a cloud of smoke from the Camp Fire for most of the last two weeks, and I grew up in the Simi Valley/Thousand Oaks area of Southern California that was the epicenter for the Woolsey fire. I have friends and family that were affected by these fires in small and large ways.

We all have a lot to be thankful this weekend for but this is a reminder that we can lose everything, including our lives. Giving some perspective to the true meaning of Thanksgiving, beyond the Black Friday sales, discounts, and fighting for things we don’t need at Walmart. Digital Anarchy is not immune to this, we’ve always done sales around now and, yeah, we’ll have a sale Monday. But I thought it more important today to acknowledge the devastation some communities have faced and promote ways to give to those communities.

This might be eye roll inducing. I get it. It’s difficult to turn something we usually use for marketing into some sort of feel good appeal for charity. But here it is. We actually give a damn about the communities we live/work in and sell to. Both Northern and Southern California are significant in all those ways. If you’ve been in media and entertainment for any length of time you probably have friends that either were affected or live perilously close to the affected areas.

So below are ways you can give to those affected. Take a moment to give thanks for the things you have and maybe consider donating money instead of buying that smart toaster, squishy toy or dancing, AI-enabled robot. You can help people rebuild and get back on their feet. If you’ve ever been in that position you understand how much that means and how much gratitude comes from it.

Financial donations are what’s needed most right now. Most of the below organizations have lots of food and clothing. Financial donations make sure they can get what they really need.

Donations for The Woolsey Fire in Southern California

Ventura County Community Foundation:
United Way of Ventura County or text “UWVC” to 41444
Humane Society of Ventura County (for animals)
American Red Cross: 1-800-733-27677 or text REDCROSS to 90999

Donations for The Camp Fire in Northern California

North Valley Community Foundation: 530-366-0397
Caring Choices: 530-899-3873
American Red Cross: 1-800-733-27677 or text REDCROSS to 90999
United Way of Northern California: To donate, text BUTTEFIRE to 91999
Go Fund Me: Click here to donate
North Valley Animal Disaster Group: donate here


Transcriptive: Beyond automated video transcriptions

I decided to try Transcriptive way before I became part of the Digital Anarchy family. Just like any other aspiring documentary filmmaker, I knew relying on a crew to get my editing started was not an option. Without funding you can’t pay a crew; without a crew you can’t get funding. I had no money, an idea in my head, some footage shot with the help of friends, and a lot of work to do. Especially when working on your very first feature film.

Besides being an independent  Filmmaker and Social Media strategist for DA, I am also an Assistive Technology Trainer for a private company called Adaptive Technology Services. I teach blind and low vision individuals how to take advantage of technology to use their phones and computers to rejoin the workforce after their vision loss. Since the beginning of my journey as an AT Trainer – I started as a volunteer  6 years ago – I have been using my work to research the subject and prepare for this film.

IMG_5515

My movie is about the relationship between the sighted and non-sighted communities. It seeks to establish a dialog between people with and without visual disabilities so we can come together to demystify disabilities to those without them.  I know it is an important subject, but right from the beginning of this project I learned how hard it is to gather funds for any disability-related initiative. I had to carefully budget the shoots and define priorities. Paying a post-production crew was not (and still is not) possible. I have to write and cut samples on my own for now. Transcriptive was a way for me to get things moving by myself  so I can apply for grants in the near future and start paying producers, editors, camera operators, sound designers, and get the project going for real. The journey started with transcribing the interviews. Transcriptive did a pretty good job with transcribe the audio from the camera as you can see below. Accuracy got even better when transcribing audio from the mic.

The idea of getting accurate automated transcripts brought a smile to my face. But could Artificial Intelligence really get the job done for me? I never believed so, and I was right. The accuracy for English interviews was pretty impressive. I barely had to do any editing on those. The situation changed as soon as I tried transcribing audio in my native language, Brazilian Portuguese. The AI transcription didn’t just get a bit flaky; it was completely unusable so I decided to do not waste more time and start doing my manual transcriptions.

I have been using Speechmatics for most of my projects because the accuracy is considerably higher than Watson  with English. However, after trying to transcribe in Portuguese for the first time, it occurred to me Speechmatics actually offers Portuguese from Portugal while Watson transcribes Portuguese from Brazil. I decided to give Watson a try, but the transcription was not much better than the one I got from Speechmatics.

It is true the Brazilian Portuguese footage I was transcribing was b-roll clips recorded with a Rhode mic; placed on top of my DSLR.  They were not well mic’d sit down interviews. The clips do have decent audio, but also involve some background noise that does not help foreign language speech-to-text conversion. At the time I had a deadline to match and was not able to record better audio and compare Speechmatics and Watson Portuguese transcripts. Will be interesting to give it another try, with more time to further compare and evaluate if there are advantages on using Watson for my next batch of footage.

Sample1Timeline

Days after my failed attempt to transcribe Brazilian Portuguese with Speechmatics, I went back to the Transcriptive panel for Premiere, found an option to import my human transcripts, gave it a try, and realized I could still use Transcriptive to speed up my video production workflow. I could still save time by letting Transcriptive assign timecode to the words I transcribed, which would be nearly impossible for me to do on my own. The plugin allowed me to quickly find where things were said in 8 hours of interviews. Having the timecode assigned to each word allowed me to easily search the transcript and jump to that point in my video where I wanted to have a cut, marker, b-roll or transition effect applied.

My movie is still in pre-production and my Premiere project is honestly not that organized yet so the search capability was also a huge advantage. I have been working on samples to apply for grants, which means I have tons of different sequences, multicam sequences, markers that now live in folders inside of folders. Before I started working for DA I was looking for a solution to minimize the mess without having to fully organize it or spend too much money and Power Search came to the rescue.  Also, being able to edit my transcripts inside of Premiere made my life a lot easier.

Last month, talking to a few film clients and friends, I found out most filmmakers still clean up human transcripts. In my case,  I go through the transcripts to add punctuation marks and other things that will remind me how eloquent speakers were in that phrase. Ellipses, question marks and exclamation points remind me of the tone they spoke allowing me to get paper cuts done faster.  I am not sure ASR technology will start entering punctuation in the future, but it would be very handy to me. While this is not a possibility, I am grateful Transcriptive now offers a text edit interface, so I can edit my transcripts without leaving Premiere.

For the movie I am making now I was lucky enough to have a friend willing to help me getting this tedious and time-consuming part of the work done so I am now exporting all my transcripts to Transcriptive.com.  The app will allow us to collaborate on the transcript. She will be helping me all the way from LA, editing all the Transcripts without having to download a whole Premiere project to get the work done.

Curious to see if Transcriptive can speed up your video production workflow? Get a Free trial of Transcriptive and PowerSearch Windows or Mac  and test it yourself!

Re-discovering Fractals with Frax

My first software job was with MetaTools doing Quality Assurance (Where I was KPTJim if you were online in those days). They made Kai’s Power Tools Photoshop plugins  (KPT), Bryce, Final Effects After Effects Plugins, Goo, and many other cool graphics software.  Texture Anarchy, a Photoshop plugin we give away for free these days, was directly inspired by a KPT plugin called Texture Explorer. Also, part of KPT was something called Fractal Explorer.

I was a huge fan of KPT (which was part of the reason I applied for, and got, the job) and particularly Fractal Explorer. I’d spend a lot of time just fiddling with it, exploring how to make amazing graphics with mathematics. Then finding something I liked, let my Mac Quadra 650 spend all night rendering it.

Screenshot of the Original KPT Fractal ExplorereThe original KPT Fractal Explorer circa 1993

My love of creating graphics algorithmically shows up in a lot of early Digital Anarchy plugins for After Effects and Photoshop. Not so much these days since we’re more focused on video editing than graphics creation. Perhaps because of what we’re focused on now, I almost forgot how much I love playing with graphics and fractals in particular.

I rediscovered that when I accidentally came across Frax. This is an iPad app created by Kai (of KPT fame) and Ben Weiss, who was one of the lead engineers at MetaTools and responsible for a lot of the code behind KPT.

OMG. It’s f’ing fun (at least for someone that likes to geek out on fractals).  Amazingly fast and the pro version (all of $9) has a ton of control. Really a fantastic app. I still have no idea how you could use the below images in the real world. But it’s fun and the images are beautiful.

You can’t edit the gradients being the only thing I wish they’d let you do. There’s like 250 of them but fractals can be very sensitive to where colors show up and being able to change the gradient would be really helpful. But minor complaint. Otherwise I highly recommend shelling out the $9 and losing yourself in a fractal exploration. Some of my own explorations are below…

More images created by Jim Tierney with FraxCool fractals created by Fract.alCool fractals created by Fract.alCool fractals created by Fract.al Cool fractals created by Fract.al Cool fractals created by Fract.al More images created by Jim Tierney with Frax More images created by Jim Tierney with Frax More images created by Jim Tierney with Frax

Using A.I. to Create Music with Ampermusic and Jukedeck

For the last 14 years I’ve created the Audio Art Tour for Burning Man. It’s kind of a docent led audio guide to the major art installations out there, similar to an audio guide you might get at a museum.

Burning Man always has a different ‘theme’ and this year it was ‘I, Robot’. I generally try and find background music related to the theme. EDM is big at Burning Man, land of 10,000 DJs, so I could’ve just grabbed some electronic tracks that sounded robotic. Easy enough to do. However I  decided to let Artificial Intelligence algorithms create the music! (You can listen to the tour and hear the different tracks)

This turned out to be not so easy, so I’ll break down what I had to do to get seven unique sounding, usable tracks. I had a bit more success with AmperMusic, which is also currently free (unlike Jukedeck), so I’ll discuss that first.

Getting the Tracks

The problem with both services was getting unique sound tracks. The A.I. has a tendency of creating very similar sounding music. Even if you select different styles and instruments you often end up with oddly similar music. This problem is compounded by Amper’s inability to render more than about 30 seconds of music.

Using Artificial Intelligence and machine learning to create music

What I found I had to do was let it generate 30 seconds randomly or with me selecting the instruments. I did this repeatedly until I got a 30 second sample I liked. At which point I extended it out to about 3 or 4 minutes and turned off all the instruments but two or three. Amper was usually able to render that out. Then I’d turn off those instruments and turn back on another three. Then render that. Rinse, repeat until you’ve rendered all the instruments.

Now you’ve got a bunch of individual tracks that you can combine to get your final music track. Combine them in Audition or even Premiere Pro (or FCP or whatever NLE) and you’re good to go. I used that technique to get five of the tracks.

Jukedeck didn’t have the rendering problem but it REALLY suffered from the ‘sameness’ problem. It was tough getting something that really sounded unique. However, I did get a couple good tracks out of it.

Problems Using Artificial Intelligence

This is another example of A.I. and Machine Learning that works… sort of. I could have found seven stock music tracks that I like much faster (this is what I usually do for the Audio Art Tour).  The amount of time it took me messing around with these services was significant. Also, if Jukedeck is any indication, a music track from one of these services will cost as much as a stock music track. Just go to Pond5 to see what you can get for the same price. With a much, much wider variety. I don’t think living, breathing musicians have much to worry about. At least for now.

That said, I did manage to get seven unique, cool sounding tracks out of them. It took some work, but it did happen.

As with most A.I./ML, it’s difficult to see what the future looks like. There has certainly been a ton of advances, but I think in a lot of cases, it’s some of the low hanging fruit. We’re seeing that with Speech-to-text algorithms in Transcriptive where they’re starting to plateau and cluster around the same accuracy levels. The fruit (accuracy) is now pretty high up and improvement are tough. It’ll be interesting to see what it takes to break through that. More data? Faster servers? A new approach?

I think music may be similar. It seems like it’s a natural thing for A.I. but it’s deceptively difficult to do in a way that mimics the range and diversity of styles and sounds that many human musicians have. Particularly a human armed with a synth that can reproduce an entire orchestra. We’ll see what it takes to get A.I. music out of the Valley of Sameness.


Photographing Lightning during The Day or Night with a DSLR

Capturing lightning using a neutral density filter and long exposure

As many of you know, I’m an avid time lapse videographer, and the original purpose of our Flicker Free filter was time lapse. I needed a way to deflicker all those night to day and day to night time lapses. I also love shooting long exposure photos.

As it turns out, this was pretty good experience to have when it came to capturing a VERY rare lightning storm that came through San Francisco late last year.

Living in San Francisco, you’re lucky if you see more than a 3 or 4 lightning bolts a year. Very different from the lightning storms I saw in Florida when I lived there for a year. However, we were treated to a definitely Florida-esqe lightning storm last September. Something like 800 lightning strikes over a few hours. It was a real treat and gave me a chance to try and capture lightning! (in a camera)

The easiest way to capture lightning is just flip your phone’s camera into video mode and point in the direction you hope the lightning is going to be at. Get the video and then pull out a good frame. This works… but video frames are usually heavily compressed and much lower resolution than a photo.

I wanted to use my 30mp Canon 5DmarkIV to get photos, not the iPhone’s mediocre video camera.

Problems, Problems, Problems

To get the 5D to capture lightning, I needed at the very least: 1) a tripod and 2) an intervalometer.

Lightning happens fast. Like, speed of light fast. Until you try and take a picture of it, you don’t realize exactly how fast. If you’re shooting video (30fps), the bolt will happen over 2, maybe 3 frames. if you’ve got a fancy 4K (or 8K!) camera that will shoot 60 or 120fps, that’s not a bad place to start.

However, if you’re trying to take advantage of your 5D’s 6720 × 4480 sensor… you’re not going to get the shot handholding it and manually pressing the shutter. Not going to happen. Cloudy with a chance of boring-ass photos.

So set the camera up on a tripod and plugin in your intervalometer. You can use the built-in, but the external one gives you more options. You want the intervalometer firing as fast as possible but that means only once every second. During the day, that’s not going to work.

Lightning And Daylight

The storm started probably about an hour before sunset. It was cloudy, but there was still a fair amount of light.

At first I thought, “once every second should be good enough”. I was wrong. Basically, the lightning had to happen the exact moment the camera took the picture. Possible, but the odds are against you getting the shot.

As mentioned, I like shooting long exposures. Sometimes at night but often during the day. To achieve this, I have several neutral density filters which I stack on top of each other. They worked great for this. I stacked a couple .9 ND filters on the lens, bringing it down 6 stops. This was enough to let me have a 1/2 sec. shutter speed.

1/2 sec. shutter speed and 1 sec. intervals… I’ve now got a 50/50 chance of getting the shot… assuming the camera is pointed in the direction of the lightning. Luckily it was striking so often, that I could make a good guess as to the area it was going to be in.  As you can see from the above shot, I got some great shots out of it.

Night Lightning

Photographing lightning at night with a Canon 5D

To the naked eye, it was basically night. So with a 2 second exposure and a 2 second interval… as long as the lightning happened where the camera was pointed, I was good to go. (it wasn’t quite night, so with the long exposure you got the last bits of light from sunset) I did not need the neutral density filters as it was pretty dark.

By this point the storm had moved. The lightning was less consistent and a bit further away. So I had to zoom in a bit, reducing the odds of getting the shot. But luck was still with me and I got a few good shots in this direction as well.

I love trying to capture stuff you can’t really see with the naked eye, whether it’s using time lapse to see how clouds move or long exposure to see water flow patterns. Experimenting with capturing lightning was a blast. Just wish we saw more of it here in SF!

So hopefully this gave you some ideas about how to capture lightning, or anything else that moves fast, next time you have a chance!

Artificial Intelligence is The New VR

Couple things stood out to me at NAB.

1) Practically every company exhibiting was talking about A.I.-something.

2) VR seemed to have disappeared from vendor booths.

The last couple years at NAB, VR was everywhere. The Dell booth had a VR simulator, Intel had a VR simulator, booths had Oculuses galore and you could walk away with an armful of cardboard glasses… this year, not so much. Was it there? Sure, but it was hardly to be seen in booths. It felt like the year 3D died. There was a pavilion, there were sessions, but nobody on the show floor was making a big deal about it.

In contrast, it seemed like every vendor was trying to attach A.I. to their name, whether they had an A.I. product or not. Not to mention, Google, Amazon, Microsoft, IBM, Speechmatics and every other big vendor of A.I. cloud services having large booths touting how their A.I. was going to change video production forever.

I’ve talked before about the limitations of A.I. and I think a lot of what was talked about at NAB was really over promising what A.I. can do. We spent most of the six months after releasing Transcriptive 1.0 developing non-A.I. features to help make the A.I. portion of the product more useful. The release were announcing today and the next release coming later this month will focus on getting around A.I. transcripts completely by importing human transcripts.

There’s a lot of value in A.I. It’s an important part of Transcriptive and for a lot use cases it’s awesome. There are just also a lot of limitations.  It’s pretty common that you run into the A.I. equivalent of the Uncanny Valley (a CG character that looks *almost* human but ends up looking unnatural and creepy), where A.I. gets you 95% of the way there but it’s more work than it’s worth to get the final 5%. It’s better to just not use it.

You just have to understand when that 95% makes your life dramatically easier and when it’s like running into a brick wall. Part of my goal, both as a product designer and just talking about it, is to help folks understand where that line in the A.I. sand is.

I also don’t buy into this idea that A.I. is on an exponential curve and it’s just going to get endlessly better, obeying Moore’s law like the speed of processors.

When we first launched Transcriptive, we felt it would replace transcriptionists. We’ve been disabused of that notion. ;-) The reality is that A.I. is making transcriptionists more efficient. Just as we’ve found Transcriptive to be making video editors more efficient. We had a lot of folks coming up to us at NAB this year telling us exactly that. (It was really nice to hear. :-)

However, much of the effectiveness of Transcriptive comes more from the tools that we’ve built around the A.I. portion of the product. Those tools can work with transcripts and metadata regardless of whether they’re A.I. or human generated. So while we’re going to continue to improve what you can do with A.I., we’re also supporting other workflows.

Over the next couple months you’re going to see a lot of announcements about Transcriptive. Our goal is to leverage the parts of A.I. that really work for video production by building tools and features that amplify those strengths, like PowerSearch our new panel for searching all the metadata in your Premiere project, and build bridges to other technology that works better in other areas, such as importing human created transcripts.

Should be a fun couple months, stay tuned! btw… if you’re interested in joining the PowerSearch beta, just email us at cs@nulldigitalanarchy.com.

Addendum: Just to be clear, in one way A.I. is definitely NOT VR. It’s actually useful. A.I. has a lot of potential to really change video production, it’s just a bit over-hyped right now. We, like some other companies, are trying to find the best way to incorporate it into our products because once that is figured out, it’s likely to make editors much more efficient and eliminate some tasks that are total drudgery. OTOH, VR is a parlor trick that, other than some very niche uses, is going to go the way of 3D TV and won’t change anything.

Jim Tierney
Chief Executive Anarchist
Digital Anarchy

Just Say No to A.I. Chatbots

For all the developments in artificial intelligence, one of the consistently worst uses of it is with chatbots. Those little ‘Chat With Us’ side bars on many websites. Since we’re doing a lot with artificial intelligence (A.I.) in Transcriptive and in other areas, I’ve gotten very familiar with how it works and what the limitations are. It starts to be easy to spot where it’s being used, especially when it’s used badly.

So A.I. chatbots, which really doesn’t work well, have become a bit of a pet peeve of mine. If you’re thinking about using them for your website, you owe it to yourself to  click around the web and see how often ‘chatting’ gets you a usable answer. It’s usually just frustrating. You go a few rounds with a cheery chatbot before getting to what you were going to do in the first place… send a message that will be replied to by a human. Total waste of time and doesn’t answer the questions.

Artificial intelligence isn't great for chatbotsDo you trust cheery, know-nothing chatbots with your customers?

The main problem is that chatbots don’t know when to quit. I get it that some business receive the same question over and over… where are you located? what are your hours? Ok, fine, have a chatbot act as a FAQ. But the chatbot needs to quickly hand off the conversation to a real person if the questions go beyond what you could have in an FAQ. And frankly, an FAQ would be better than trying to fake-out people with your A.I. chatbot. (honesty and authenticity matter, even on the web)

A.I. is just not great at reading comprehension. It can get the jist of things usually, which I think is useful for analytics and business intelligence. But this doesn’t allow it to respond with any degree of accuracy or intelligence. For responding to customer queries it produces answers that are sort of close… but mostly unusable. So, the result is frustrated customers.

Take a recent experience with Audi. I’m looking at buying a new car and am interested in one of their SUVs. I went onto an Audi dealer site to inquire about a used one they had. I wanted to know 1) was it actually in stock and 2) how much of the original warranty was left since it was a 2017? There was a button to send a message which I was originally going to use but decided to try the chat button that was bouncing up and down getting my attention.

So, I asked those questions in the chat. If it had been a real person, they definitely could have answered #1 and probably #2, even if they were just an assistant. But no, I ended in the same place I would’ve been if I’d just clicked ‘send a message’ in the first place. But first, I had to get through a bunch of generic answers that didn’t answer any of my questions and just dragged me around in circles. This is not a good way to deal with customers if you’re trying to sell them a $40,000 car.

And don’t get me started on Amazon’s chatbots. (and emailbots for that matter)

It’s also funny to notice how the chatbots try and make you think it’s human, with misspelled words and faux emotions. I’ve had a chatbot admonish me with ‘I’m a real person…’ when I called it a chatbot. It then followed that with another generic answer that didn’t address my question. The Pinocchio chatbot… You’re not a real boy, not a real person and you don’t get to pass Go and collect $200. (The real salesperson I eventually talked to confirmed it was a chatbot.)

I also had one threaten to end the chat if I didn’t watch my language, which was not aimed at the chatbot. I just said, “I just want this to f’ing work”. A little generic frustration. However, after it told me to watch my language, I went from frustrated to kind of pissed. So much for artificial intelligence having emotional intelligence. Getting faux-insulted over something almost any real human would recognize as low grade frustration, is not going to make customers happier.

I think A.I. has some amazing uses, Transcriptive makes great use of A.I. but it also has a LOT of shortcomings. All of those shortcomings are glaringly apparent when you look at chatbots. There are, of course, many companies trying to create conversational A.I. but so far the results have been pretty poor.

Based on what I’ve seen developing products with A.I., I think it’s likely it’ll be quite a while before conversational A.I. is a good experience on a regular basis. You should think very hard about entrusting your customers to it. A web form or FAQ is going to be better than a frustrating experience with a ‘sales person’.

Not sure what this has to do with video editing. Perhaps just another example of why A.I. is going to have a hard time editing anything that requires comprehending the content. Furthering my belief that A.I. isn’t going to replace most video editors any time soon.

Artificial Intelligence vs. Video Editors

With Transcriptive, our new tool for doing automated transcriptions, we’ve dove into the world of A.I. headfirst. So I’m pretty familiar with where the state of industry is right now. We’ve been neck deep in it for the last year.

A.I. is definitely changing how editors get transcripts and search video for content. Transcriptive demonstrates that pretty clearly with text.  Searching via object recognition is something that also is already happening. But what about actual video editing?

One of the problems A.I. has is finishing. Going the last 10% if you will. For example, speech-to-text engines, at best, have an accuracy rate of about 95% or so. This is about on par with the average human transcriptionist. For general purpose recordings, human transcriptionists SHOULD be worried.

But for video editing, there are some differences, which are good news. First, and most importantly, errors tend to be cumulative. So if a computer is going to edit a video, at the very least, it needs to do the transcription and it needs to recognize the imagery. (we’ll ignore other considerations like style, emotion, story for the moment) Speech recognition is at best 95%, object recognition is worse. The more layers of AI you have, usually those errors will multiply (in some cases there might be improvement though) . While it’s possible automation will be able to produce a decent rough cut, these errors make it difficult to see automation replacing most of the types of videos that pro editors are typically employed for.

Secondly, if the videos are being done for humans, frequently the humans don’t know what they want. Or at least they’re not going to be able to communicate it in such a way that a computer will understand and be able to make changes. If you’ve used Alexa or Echo, you can see how well A.I. understands humans. Lots of situations, especially literal ones (find me the best restaurant), it works fine, lots of other situations, not so much.

Many times as an editor, the direction you get from clients is subtle or you have to read between the lines and figure out what they want. It’s going to be difficult to get A.I.s to take the way humans usually describe what they want, figure out what they actually want and make those changes.

Third… then you get into the whole issue of emotion and storytelling, which I don’t think A.I. will do well anytime soon. The Economist recently had an amusing article where it let an A.I. write the article. The result is here. Very good at mimicking the style of the Economist but when it comes to putting together a coherent narrative… ouch.

It’s Not All Good News

There are already phone apps that do basic automatic editing. These are more for consumers that want something quick and dirty. For most of the type of stuff professional editors get paid for, it’s unlikely what I’ve seen from the apps will replace humans any time soon. Although, I can see how the tech could be used to create rough cuts and the like.

Also, for some types of videos, wedding or music videos perhaps, you can make a pretty solid case that A.I. will be able to put something together soon that looks reasonably professional.

You need training material for neural networks to learn how to edit videos. Thanks to YouTube, Vimeo and the like, there is an abundance of training material. Do a search for ‘wedding video’ on YouTube. You get 52,000,000 results. 2.3 million people get married in the US every year. Most of the videos from those weddings are online. I don’t think finding a few hundred thousand of those that were done by a professional will be difficult. It’s probably trivial actually.

Same with music videos. There IS enough training material for the A.I.s to learn how to do generic editing for many types of videos.

For people that want to pay $49.95 to get their wedding video edited, that option will be there. Probably within a couple years. Have your guests shoot video, upload it and you’re off and running. You’ll get what you pay for, but for some people it’ll be acceptable. Remember, A.I. is very good at mimicking. So the end result will be a very cookie cutter wedding video. However, since many wedding videos are pretty cookie cutter anyways… at the low end of the market, an A.I. edited video may be all ‘Bridezilla on A Budget’ needs. And besides, who watches these things anyways?

Let The A.I Do The Grunt Work, Not The Editing

The losers in the short term may be assistant editors. Many of the tasks A.I. is good for… transcribing, searching for footage, etc.. is now typically given to assistants. However, it may simply change the types of tasks assistant editors are given. There’s a LOT of metadata that needs to be entered and wrangled.

While A.I. is already showing up in many aspects of video production, it feels like having it actually do the editing is quite a ways off.  I can see creating A.I. tools that help with editing: Rough cut creation, recommending color corrections or B roll selection, suggesting changes to timing, etc. But there’ll still need to be a person doing the edit.


Speeding Up De-flickering of Time Lapse Sequences in Premiere

Time lapse is always challenging… you’ve got a high resolution image sequence that can seriously tax your system. Add Flicker Free on top of that… where we’re analyzing up to 21 of those high resolution images… and you can really slow a system down. So I’m going to go over a few tips for speeding things up in Premiere or other video editor.

First off, turn off Render Maximum Depth and Maximum Quality. Maximum Depth is not going to improve the render quality unless your image sequence is HDR and the format you’re saving it to supports 32-bit images. If it’s just a normal RAW or JPEG sequence, it  won’t make much of a difference. Render Maximum Quality may make a bit of difference but it will likely be lost in whatever compression you use. Do a test or two to see if you can tell the difference (it does improve scaling) but I rarely can.

RAW: If at all possible you should shoot your time lapses in RAW. There are some serious benefits which I go over in detailed in this video: Shooting RAW for Time Lapse. The main benefit is that Adobe Camera RAW automatically removes dead pixels. It’s a big f’ing deal and it’s awesome. HOWEVER… once you’ve processed them in Adobe Camera RAW, you should convert the image sequence to a movie or JPEG sequence (using very little compression). It will make processing the time lapse sequence (color correction, effects, deflickering, etc.) much, much faster. RAW is awesome for the first pass, after that it’ll just bog your system down.

Nest, Pre-comp, Compound… whatever your video editing app calls it, use it. Don’t apply Flicker Free or other de-flickering software to the original, super-high resolution image sequence. Apply it to whatever your final render size is… HD, 4K, etc.

Why? Say you have a 6000×4000 image sequence and you need to deliver an HD clip. If you apply effects to the 6000×4000 sequence, Premiere will have to process TWELVE times the amount of pixels it would have to process if you applied it to HD resolution footage. 24 million pixels vs. 2 million pixels. This can result in a HUGE speed difference when it comes time to render.

How do you Nest?

This is Premiere-centric, but the concept applies to After Effects (pre-compose) or FCP (compound) as well. (The rest of this blog post will be explaining how to Nest. If you already understand everything I’ve said, you’re good to go!)

First, take your original image sequence (for example, 6000×4000 pixels) and put it into an HD sequence. Scale the original footage down to fit the HD sequence.

Hi-Res images inside an HD sequenceThe reason for this is that we want to control how Premiere applies Flicker Free. If we apply it to the 6000×4000 images, Premiere will apply FF and then scale the image sequence. That’s the order of operations. It doesn’t matter if Scale is set to 2%. Flicker Free (and any effect) will be applied to the full 6000×4000 image.

So… we put the big, original images into an HD sequence and do any transformations (scaling, adjusting the position and rotating) here. This usually includes stabilization… although if you’re using Warp Stabilizer you can make a case for doing that to the HD sequence. That’s beyond the scope of this tutorial, but here’s a great tutorial on Warp Stabilizer and Time Lapse Sequences.

Next, we take our HD time lapse sequence and put that inside a different HD sequence. You can do this manually or use the Nest command.

Apply Flicker Free to the HD sequence, not the 6000x4000 imagesNow we apply Flicker Free to our HD time lapse sequence. That way FF will only have to process the 1920×1080 frames. The original 6000×4000 images are hidden in the HD sequence. To Flicker Free it just looks like HD footage.

Voila! Faster rendering times!

So, to recap:

  • Turn off Render Maximum Depth
  • Shoot RAW, but apply Flicker Free to a JPEG sequence/Movie
  • Apply Flicker Free to the final output resolution, not the original resolution

Those should all help your rendering times. Flicker Free still takes some time to render, none of the above will make it real time. However, it should speed things up and make the render times more manageable if you’re finding them to be really excessive.

Flicker Free is available for Premiere Pro, After Effects, Final Cut Pro, Avid, Resolve, and Assimilate Scratch. It costs $149. You can download a free trial of Flicker Free here.

Getting transcripts for Premiere Multicam Sequences

Using Transcriptive with multicam sequences is not a smooth process and doesn’t really work. It’s something we’re working on coming up with a solution for but it’s tricky due to Premiere’s limitations.

However, while we sort that out, here’s a workaround that is pretty easy to implement. Here are the steps:

1- Take the clip with the best audio and drop it into it’s own sequence.
Using A.I. to transcribe Premiere Multicam Sequences
2- Transcribe that sequence with Transcriptive.
3- Now replace that clip with the multicam clip.
Transcribing multicam in Adobe premiere pro

4- Voila! You have a multicam sequence with a transcript. Edit the transcript and clip as you normally would.

This is not a permanent solution and we hope to make it much more automatic to deal with Premiere’s multicam clips. In the meantime, this technique will let you get transcripts for multicam clips.

Thanks to Todd Drezner at Cohn Creative for suggesting this workaround.

How Doc Filmmakers Are using A.I. to Create Captions and Search Footage in Premiere Pro

Artificial Intelligence (A.I.) and machine learning are changing how video editors deal with some common problems. 1) how do you get accurate transcriptions for captions or subtitles? And 2) how do you find something in hours of footage if you don’t know exactly where it is?

Getting out of the Transcription Dungeon

Kelley Slagle, director, producer and editor for Cavegirl Productions, has been working on Eye of the Beholder, a documentary on the artists that created the illustrations for the Dungeons and Dragon game. With over 40 hours of interview footage to comb through searching through it all has been made much easier by Transcriptive, a new A.I. plugin for Adobe Premiere Pro.


eye-beholder 

Why Transcribe?

Imagine having Google for your video project. Turning all the dialog into text makes everything easily searchable (and it supports 28 languages). Not too mention making it easy to create captions and subtitles.

The Dragon of Time And Money

Using a traditional transcription service for 40 hours of footage, you’re looking at a minimum of $2400 and a few days to turn it all around. Not exactly cost or time effective. Especially if you’re on a doc budget. However, it’s a problem for all of us.

Transcriptive helps solve the transcription problem, and the problems of searching video and captions/subtitles. It uses A.I. and machine learning to automatically generate transcripts with up to 95% accuracy and bring them into Premiere Pro. And the cost? About $4/hour (or much less depending on the options you choose) So, 40 hours is $160 vs $2400. And you’ll get all of it back in a few hours.

Yeah, it’s hard to believe.

Read what these three filmmakers have to say and try the Transcriptive demo out on your own footage. It’ll make it much easier to believe.


“We are using Transcriptive to transcribe all of our interviews for EYE OF THE BEHOLDER. The idea of paying a premium for that much manual transcription was daunting. I am in the editing phase now and we are collaborating with a co-producer in New York. We need to share our ideas for edits and content with him, so he is reviewing transcripts generated by Transcriptive and sending us his feedback and vice versa. The ability to get a mostly accurate transcription is fine for us, as we did not expect the engine to know proper names of characters and places in Dungeons & Dragons.” – Kelley Slagle, Cavegirl Productions

Google Your Video Clips and Premiere Project?


Since everything lives right within Premiere, all the dialog is fully searchable. It’s basically a word processor designed for transcripts, where every word has time code. Yep, every word of dialog has time code. Click on the word and jump to that point on the timeline. This means you don’t have to scrub through footage to find something. Search and jump right to it. It’s an amazing way for an editor to find any quote or quip.

As Kelley says, “We are able to find what we need by searching the text or searching the metadata thanks to the feature of saving the markers in our timelines. As an editor, I am now able to find an exact quote that one of my co-producers refers to, or find something by subject matter, and this speeds up the editing process greatly.”

Joy E. Reed of Oh My! Productions, who’s directing the documentary, ‘Ren and Luca’ adds, “We use sequence markers to mark up our interviews, so when we’re searching for specific words/phrases, we can find them and access them nearly instantly. Our workflow is much smoother once we’ve incorporated the Transcriptive markers into our project. We now keep the Markers window open and can hop to our desired areas without having to flip back and forth between our transcript in a text document and Premiere.”

Workflow, Captions, and Subtitles

ren-luca-L

Captions and subtitles are one of the key uses of Transcriptive. You can use it with the Premiere’s captioning tool or export many different file formats (SRT, SMPTE, SCC, MCC, VTT, etc) for use in any captioning application.

“We’re using Transcriptive to transcribe both sit down and on-the-fly interviews with our subjects. We also use it to get transcripts of finished projects to create closed captions/subtitles.”, says Joy. “We can’t even begin to say how useful it has been on Ren and Luca and how much time it saves us. The turnaround time to receive the transcripts is SO much faster than when we sent it out to a service. We’ve had the best luck with Speechmatics. The transcripts are only as accurate as our speakers – we have a teenage boy who tends to mumble, and his stuff has needed more tweaking than some of our other subjects, but it has been great for very clearly recorded material. The time it saves vs the time you need to tweak for errors is significant.”

captions

Transcriptive is fully integrated into Premiere Pro, you never have to leave the application or pass metadata and files around. This makes creating captions much easier, allowing you to easily edit each line while playing back the footage. There are also tools and keyboard shortcuts to make the editing much faster than a normal text editor. You then export everything to Premiere’s caption tool and use that to put on the finishing touches and deliver them with your media.

Another company doing documentary work is Windy Films. They are focused on telling stories of social impact and innovation, and like most doc makers are usually on tight budgets and deadlines. Transcriptive has been critical in helping them tell real stories with real people (with lots of real dialog that needs transcribing).

They recently completed a project for Planned Parenthood. The deadline was incredibly tight. Harvey Burrell, filmmaker at Windy, says, “We were trying to beat the senate vote on the healthcare repeal bill. We were editing while driving back from Iowa to Boston. The fact that we could get transcripts back in a matter of hours instead of a matter of days allowed us to get it done on time. We use Transcriptive for everything. The integration into premiere has been incredible. We’ve been getting transcripts done for a long time. The workflow was always a clunky; particularly to have transcripts in a word document off to one side. Having the ability to click on a word and just have Transcriptive take you there in the timeline is one of our favorite features.”

Getting Accurate Transcripts using A.I.


Audio quality matters. So the better the recording and the more the talent enunciates correctly, the better the transcript. You can get excellent results, around 95% accuracy, with very well recorded audio. That means your talent is well mic’d, there’s not a lot of background noise and they speak clearly. Even if you don’t have that, you’ll still usually get very good results as long as the talent is mic’d. Even accents are ok as long as they speak clearly. Talent that’s off mic or if there’s crosstalk will cause it to be less accurate.

6-Full-Screen

Transcriptive lets you sign up with the speech services directly, allowing you to get the best pricing. Most transcription products hide the service they’re using (they’re all using one of the big A.I. services), marking up the cost per minute to as much as .50/min. When you sign up directly, you get Speechmatics for $0.07/min. And Watson gives you the first 1000 minutes free. (Speechmatics is much more accurate but Watson can be useful).

Transcriptive itself costs $299 when you check out of the Digital Anarchy store. A web version is coming soon as well. To try transcribing with Transcriptive you can download the trial version here. (remember, Speechmatics is the more accurate service and the only service available in the demo) Reach out to sales@nulldigitalanarchy.com if you have questions or want an extended trial.

Transcriptive is a plugin that many didn’t know they were waiting for. It is changing the workflow of many editors in the industry. See for yourself how we’re transforming the art of transcription.

What Exactly is Adobe TypeKit?

So let’s talk about something that’s near and dear to my heart: Fonts.

I recently discovered Adobe TypeKit. I know…some of you are like… ‘You just discovered that?’.

Yeah, yeah… well, in case there are other folks that are clueless about this bit of the Creative Cloud that’s included with your subscription: It’s a massive font library that can be installed on your Creative Cloud machine… much of which is free (well, included in the cost of CC).

Up until a week ago I just figured it was a way for Adobe to sell fonts. I was mistaken. You find the font you like and, more often than not, you click the SYNC button and, boom… font is installed on your machine for use in Photoshop or After Effects or whatever.

Super cool feature of Creative Cloud that if you’re as clued in as I am about everything CC includes… you might not know about. Now you do. :-) Here’s a bit more info from Adobe.

I realize this probably comes off as a bit of an ad for TypeKit, but it really is pretty cool. I just designed a logo using a new font I found there. And since it’s Adobe, the fonts are of really high quality, not like what you find on free font sites (which is what I’ve relied on for many uses).

F’ing GPUs

One of the fun challenges of developing graphics software is dealing with the many, varied video cards and GPUs out there. (actually, it’s a total pain in the ass. Hey, just being honest :-)

There are a lot of different video cards out there and they all have their quirks. Which are complicated by the different operating systems and host applications… for example, Apple decides they’re going to more or less drop OpenCL in favor of Metal, which means we have to re-write quite a bit of code, Adobe After Effects and Adobe Premiere Pro handle GPUs differently even though it’s the same API, etc. etc. From the end user side of things you might not realize how much development goes into GPU Acceleration. It’s a lot.

The latest release of Beauty Box Video for Skin Retouching (v4.1) contains a bunch of fixes for video cards that use OpenCL (AMD, Intel). So if you’re using those cards it’s a worthwhile download. If you’re using Resolve and Nvidia cards, you also want to download it as there’s a bug with CUDA and Resolve and you’ll want to use Beauty Box in OpenCL mode until we fix the CUDA bug. (Probably a few weeks away) Fun times in GPU-land.

4.1 is a free update for users of the 4.0 plugin. Download the demo and it should automatically remove the older version and recognize your serial number.

Just wanted to give you all some insight on how we spend our days around here and what your hard earned cash goes into when you buy a plugin. You know, just in case you’re under the impression all software developers do is ‘work’ at the beach and drive Ferraris around. We do have fun, but usually it involves nailing the video card of the month to the wall and shooting paintballs at it. ;-)

Creating the Grinch on Video Footage with The Free Ugly Box Plugin

We here at Digital Anarchy want to make sure you have a wonderful Christmas and there’s no better way to do that than to take videos of family and colleagues and turn them into the Grinch. They’ll love it! Clients, too… although they may not appreciate it as much even if they are the most deserving. So just play it at the office Christmas party as therapy for the staff that has to deal with them.

Our free plugin Ugly Box will make it easy to do! Apply it to the footage, click Make Ugly, and then make them green! This short tutorial shows you how:

You can download the free Ugly Box plugin for After Effects, Premiere Pro, Final Cut Pro, and Avid here:

https://digitalanarchy.com/register/register_ugly.php

Of course, if you want to make people look BETTER, there’s always Beauty Box to help you apply a bit of digital makeup. It makes retouching video easy, get more info on it here:

https://digitalanarchy.com/beautyVID/main.html

De-flickering Bix Pix’s Stop Motion Animation Show ‘Tumble Leaf’ with Flicker Free

Like Digital Anarchy On FacebookLike us on Facebook!

One of the challenges with stop motion animation is flicker. Lighting varies slightly for any number of reasons causing the exposure of every frame to be slightly different. We were pretty excited when Bix Pix Entertainment bought a bunch of Flicker Free licenses (our deflicker plugin) for Adobe After Effects. They do an amazing kids show for Amazon called Tumble Leaf that’s all stop motion animation. It’s won multiple awards, including an Emmy for best animated preschool show.

Many of us, if not most of us, that do VFX software are wannabe (or just flat out failed ;-) animators. We’re just better at the tech than the art. (exception to the rule: Bob Powell, one of our programmers, who was a TD at Laika and worked on Box Trolls among other things)

So we love stop motion animation. And Bix Pix does an absolutely stellar job with Tumble Leaf. The animation, the detailed set design, the characters… are all off the charts. I’ll let them tell it in their own words (below). But check out the 30 second deflicker example below (view at full screen as the Vimeo compression makes the flicker hard to see). I’ve also embedded their ‘Behind The Scenes’ video at the end of the article. If you like stop motion, you’ll really love the ‘Behind the Scenes’.

From the Bix Pix folks themselves… breaking down how they use Flicker Free  in their Adobe After Effects workflow:

——————————————————————-

Using Digital Anarchy’s Flicker Free at Bix Pix

Bix Pix Entertainment is an animation studio that specializes in the art of stop-motion animation, and is known for their award-winning show Tumble Leaf on Amazon Prime.

It is not uncommon for an animator to labor for days sometimes weeks on a single stop motion shot, working frame by frame. With this process, it is natural to have some light variations between each exposure, commonly referred to as ‘flicker’ – There are many factors that can cause the shift in lighting. For instance, a studio light or lights may blow out or solar flare. Voltage and/ power surges can brighten or dim lights over a long shot. Certain types of lights, poor lighting equipment, camera malfunctions or incorrect camera settings. Sometimes an animator might wear a white t-shirt unintentionally adding fill to the shot or accidentally standing in front of a light casting a shadow from his or her body.

The variables are endless. Luckily these days compositors and VFX artists have fantastic tools to help remove these unwanted light shifts. Removing unwanted light shifts and flicker is a very important and necessary first step when working with stop-motion footage. Unless by chance it’s an artistic decision to leave that tell-tale flicker in there. But that is a rare decision that does not come about often.

Here at Bix Pix we use Adobe After Effects for all of our compositing and clean-up work. Having used 4 different flicker removal plugins over the years, we have to say Digital Anarchy’s flicker Free is the fastest, easiest and most effective flicker removal software we have come across. And also quite affordable.

During a season of Tumble Leaf we will process between 1600 and 2000 shots averaging between 3 seconds and up to a couple minutes in length. That is an average of about 5 hours of footage per season, almost three times the length of a feature film. With a tight schedule of less than a year and a small team of ten or so VFX artists and compositors. Nearly every shot has an instance of flicker free applied to it as an effect. The plugin is so fast, simple to use and reliable. De-flickering can be done in almost real time.

Digital Anarchy’s Flicker free has saved us thousands of hours of work and reduced overtime and crunch time delays. This not only saves money but frees up artists to do more elaborate effects that we could not do before due to time constraints, allowing them to focus on making their work stand out even more.

If you are shooting stop-motion animation and require flicker free footage, this is the plugin to use.

———————————————–

For a breakdown of how they do Tumble Leaf, you should definitely check out the Behind the Scenes video!

I even got to meet the lead character, Fig! My niece and nephew (4 and 6) were very impressed. :-)

Hanging out with Fig at BixPix Entertainment

Cheers,
Jim Tierney
Chief Executive Anarchist
Digital Anarchy

Sharpening Video Footage

Like Digital Anarchy On Facebook


Sharpening video can be a bit trickier than sharpening photos. The process is the same of course… increasing the contrast around edges which creates the perception of sharpness.

However, because you’re dealing with 30fps instead of a single image some additional challenges are introduced:

1- Noise is more of a problem.
2- Video is frequently compressed more heavily than photos, so compression artifacts can be a serious problem.
3- Oversharpening is a problem with stills or video but can create motion artifacts when the video is played back that can be visually distracting.
4- It’s more difficult to mask out areas like skin that you don’t want sharpened.

These are problems you’ll run into regardless of the sharpening method. However, probably unsurprising, in addition to discussing the solutions using regular tools, we do talk about how our Samurai Sharpen plugin can help with them.

Noise in Video Footage

Noise is always a problem regardless of whether you’re shooting stills or videos. However, with video the noise changes from frame to frame making it a distraction to the viewer if there’s too much or it’s too pronounced.

Noise tends to be much more obvious in dark areas, as you can see below where it’s most apparent in the dark, hollow part of the guitar:

You can use Samurai Sharpen to avoid sharpening noise in video footage

Using a mask to protect the darker areas makes it possible to increase the sharpening for the rest of the video frame. Samurai Sharpen has masks built-in, so it’s easy in that plugin, but you can do this manually in any video editor or compositing program by using keying tools, building a mask and compositing effects.

Compression Artifacts

Many consumer video cameras, including GoPros and some drone cameras heavily compress footage. Especially when shooting 4K.

It can be difficult to sharpen video that's been heavily compressed

It’s difficult, and sometimes impossible to sharpen footage like this. The  compression artifacts become very pronounced, since they tend to have edges like normal features. Unlike noise, the artifacts are visible in most areas of the footage, although they tend to be more obvious in areas with lots of detail.

In Samurai you can increase the Edge Mask Strength to lessen the impact of sharpening on the artifact (often they’re in low contrast) but depending on how compressed the footage is you may not want to sharpen it.

Oversharpening

Sharpening is a local contrast adjustment. It’s just looking at significant edges and sharpening those areas. Oversharpening occurs when there’s too much contrast around the edges, resulting in visible halos.

Too much sharpening of video can result in visible halos
Especially if you look at the guitar strings and frets, you’ll see a dark halo on the outside of the strings and the strings themselves are almost white with little detail. Way too much contrast/sharpening. The usual solution is to reduce the sharpening amount.

In Samurai Sharpen you can also adjust the strength of the halos independently. So if the sharpening results in only the dark or light side being oversharpened, you can dial back just that side.

Sharpening Skin

The last thing you usually want to do is sharpen someone’s skin. You don’t want your talent’s skin looking like a dried-up lizard. (well, unless your talent is a lizard. Not uncommon these days with all the ridiculous 3D company mascots)

Sharpening video can result in skin being looking rough

Especially with 4K and HD, video is already showing more skin detail than most people want (hence the reason for our Beauty Box Video plugin for digital makeup). If you’re using UnSharp Mask you can use the Threshold parameter, or in Samurai the Edge Mask Strength parameter is a more powerful version of that. Both are good ways of protecting the skin from sharpening. The skin area tends to be fairly flat contrast-wise and the Edge Mask generally does a good job of masking the skin areas out.

Either way, you want to keep an eye on the skin areas, unless you want a lizard. (and if so, you should download are free Ugly Box plugin. ;-)

Wrap Up

You can sharpen video and most video footage will benefit from some sharpening. However, there are numerous issues that you run into and hopefully this gives you some idea of what you’re up against whether you’re using Samurai Sharpen for Video or something else.

My Hopes for Open-Hearted, Strong America

I usually don’t mix politics and business. However, I feel this is an extraordinary election. I encourage you to get out and vote.

I am hopeful that tomorrow we will have our first woman president. I am hopeful that America can rise above the hate, fear and pettiness that has defined Donald Trump’s campaign. I am hopeful that we can live up to the words on the Statue of Liberty… “Give me your tired, your poor, your huddled masses yearning to breathe free, the wretched refuse of your teeming shore. Send these, the homeless, tempest-tossed to me, I lift my lamp beside the golden door!”

We are a nation of immigrants. That is one of the things that makes America great. People of all cultures want to come here not to change our culture but to live it! Perhaps add a bit of their culture as a flourish, but they come here because they believe, as I did when I used to say the pledge of allegiance in school, that America represents equality, freedom (including freedom of religion), and opportunity for everyone. Perhaps that’s not as true as it could be but I’ve always felt we at least aspire to that.

I am hopeful that America still wants to aspire to that… and not the racism, xenophobia, and small mindedness that Trump represents.

I am pro-business, but I am also pro-people. Trump is neither. Good businessmen don’t bankrupt companies on a regular basis, screwing employees, investors and partners. Even in Silicon Valley where failure is sometimes a badge of honor, Trump’s record is dismal. This is why Mark Cuban offered Trump $10 million to give details on his policy proposals.

Any entrepreneur that’s run a business knows you aren’t going to succeed without a plan. Trump has no plan.

I want to see America continue to succeed and continue it’s greatness. I think we can do better for those that have not benefitted from an increasingly global world. I think we can integrate immigrants, as we ALWAYS have, giving them opportunities while benefitting from the skills and perspective they bring. I think we can educate all Americans, poor as well as rich, black/brown as well as white, so they can take advantage of the opportunities the world has to offer.

Hillary may not be perfect (none of us are) but she has a plan and knows how the government and the world works. I have far more faith in her to achieve what needs to be done than I do in Trump who will likely bankrupt the country like he has his companies.

I care about America and I care about her people. I think this country is already great. I think we can aspire to be even better. But it requires compassion and acceptance as well as dedication and hard work. It is time for a woman to lead this country, someone who can bring all those qualities to the table.

I sincerely hope that we can be the open-hearted, strong country that we’ve usually been and not succumb to fear and close-mindedness. I believe we can.

Do not use Norton Anti-Virus

Like Digital Anarchy On Facebook


We highly recommend against using Norton Anti-Virus. In an attempt to be smart, they proactively quarantine programs because “fewer than 50 users in the Norton community have them”. This means many of our plugins get quarantined when you try to install them.

Our installers pose no threat and you can safely install them.

Here’s what Norton puts up:

Do not use Norton Anti-virus as it's unreliable

1- It describes the risk as Heur.AdvML.C and labels it a ‘heuristic virus’ which sounds scary and looks like a virus name. It’s not. It’s a Norton code for their ‘artificial intelligence’. If this is how smart AI is, it’s going to be a long time before the bots take over the world.

2- Our major crimes against humanity seem to be that less than 50 users have installed this and it was uploaded over 4 months ago.

That’s it. So Norton’s ‘malware heuristics’ AI has decided were a High threat.

This is misleading and doing a disservice to us and our users. I assume most other plugins from small companies will fall under the same umbrella of stupidity.

As such we recommend you use a different anti-virus software.

Thoughts on The Mac Pro and FCP X

Like Digital Anarchy On Facebook


There’s been some talk of the eminent demise of the Mac Pro. The Trash Can is getting quite old in the tooth… it was overpriced and underpowered to begin  with and is now pretty out of date. Frankly it’d be nice if Apple just killed it and moved on. It’s not where they make their money and it’s clear they’re not that interested in making machines for the high end video production market. At the very least, it would mean we (Digital Anarchy) wouldn’t have to buy Trash Can 2.0 just for testing plugins. I’m all for not buying expensive machines we don’t have any use for.

But if they kill off the Mac Pro, what does that mean for FCP X? Probably nothing. It’s equally clear the FCP team still cares about pro video. There were multiple folks from the FCP team at NAB this year, talking to people and showing off FCP at one of the sub-conferences. They also continue to add pro-level features.

That said, they may care as much (maybe even more) about the social media creators… folks doing YouTube, Facebook, and other types of social media creation. There are a lot of them. A lot more than folks doing higher end video stuff, and these creators are frequently using iPhones to capture and the Mac to edit. They aren’t ‘pro editors’ and I think that demographic makes up a good chunk of FCP users. It’s certainly the folks that Apple, as a whole, is going after in a broader sense.

If you don’t think these folks are a significant focus for Apple overall, just look at how much emphasis they’ve put on the camera in the iPhone 6 & 7… 240fps video, dual lenses, RAW shooting, etc. To say nothing of all the billboards with nothing but a photo ‘taken with the iPhone’. Everyone is a media creator now and ‘Everyone’ is more important to Apple than ‘Pro Editors’.

The iMacs are more than powerful enough for those folks and it wouldn’t surprise me if Apple just focused on them. Perhaps coming out with a couple very powerful iMacs/MacBook Pros as a nod to professionals, but letting the MacPro fade away.

Obviously, as with all things Apple, this is just speculation. However, given the lack of attention professionals have gotten over the last half decade, maybe it’s time for Apple to just admit they have other fish to fry.

Tutorial: Removing Flicker from Edited Video Footage

Like Digital Anarchy On Facebook


One problem that users can run into with our Flicker Free deflicker plugin is that it will look across edits when analyzing frames for the correct luminance. The plugin looks backwards as well as forwards to gather frames and does a sophisticated blend of all those frames. So even if you create an edit, say to remove an unwanted camera shift or person walking in front of the camera, Flicker Free will still see those frames.

This is particularly a problem with Detect Motion turned OFF.

The way around this is to Nest (i.e. Pre-compose (AE), Compound Clip (FCP)) the edit and apply the plugin to the new sequence. The new sequence will start at the first frame of the edit and Flicker Free won’t be able to see the frames before the edit.

This is NOT something you always have to do. It’s only if the frames before the edit are significantly different than the ones after it (i.e. a completely different scene or some crazy camera movement). 99% of the time it’s not a problem.

This tutorial shows how to solve the problem in Premiere Pro. The technique works the same in other applications. Just replacing ‘Nesting’ with whatever your host application does (pre-composing, making a compound clip, etc).

Is The iPhone A Real Camera?

For whatever reason I’ve seen several articles/posts over the last few days about whether you can be a photo/videographer with a camera phone. Usually the argument is that just because the iPhone (or whatever) can take the occasional good video/pictures, it doesn’t make you a good videographer. Of course not. Neither does a 5Dm4 or an Arri Alexa.

Camera phones can be used for professional video.

But what if you have a good eye and are a decent videographer? I think a lot of the hand wringing comes from people that have spent a lot of money on gear and are seeing people get great shots with their phone. It’s not going to change. The cameras in a lot of phones are really good and if you have a bit of skill, it can go a long way. You can check out this blog post comparing the iPhone’s slow motion video capabilities to a Sony FS700. The 10x price difference doesn’t beget a 10x quality difference.

There is obviously a place for long or fast lenses that you need a real camera for. There are definitely shots you won’t get with a phone. However, there are definitely shots you can get with a phone that you can’t get with your big, fancy camera. Partially just because you ALWAYS have your phone and partially because of the size. Sometimes the ability to spontaneously shoot is a huge advantage.

Then you add something like Dave Basaluto’s iOgrapher device and you’ve got a video camera capable of some great stuff, especially for stock or B roll.

There are issues for sure. Especially with these devices trying to shoot 4K, like a GoPro. It doesn’t matter how well lit and framed the shot is because it’s often got massive compression artifacts.

Overall though, the cameras are impressive and if you’ve got the skills, you can consistently get good to great shots.
What’s this got to do with Digital Anarchy? Absolutely nothing. We just like cool cameras no matter what form they take.  :-)

(and, yes, I’m looking forward to getting the new 5D mark4. It was finally time to upgrade the Digital Anarchy DSLR)

VR: Because Porn! (and Siggraph and other stuff)

Over the last few months I’ve been to NAB, E3, and Siggraph and seen a bunch of VR stuff.

VR people with their headsetsMost VR people with their headsets

One panel discussion about VR filmmaking was notable for the amount of time spent talking about all the problems VR has and how once they solve this or that major, non-trivial problem, VR will be awesome! One of these problems is that, as one of the panelist pointed out, anything over 6-8 minutes doesn’t seem to work. I’m supposed to run out and buy VR headsets for a bunch of shorts? Seriously?

E3 is mostly about big game companies and AAA game titles. However, if you go to a dark, back corner of the show floor you’ll find a few rows of small 10×20 booths. It was here that I finally found a VR experience that lived up to expectations! Porn. Yes, there was a booth at E3 showing hardcore VR porn. (I wonder if they told E3 what they were showing?)

One of my favorite statistics ever is that adult, pay-per-view movies in hotel rooms are watched, on average, for about 12 minutes. Finally! A use case for VR that matches up perfectly to its many limitations. You don’t need to worry about the narrative and no one is going to watch it for more than 12 minutes. Perfect. I’m sure the hot, Black Friday special at Walmart will be the Fleshlight/Oculus Rift bundle.

Surely There Are Other Uses Besides Porn?

Ok, sure, there are. I just haven’t found them to be compelling enough to justify all the excitement VR is getting. One booth at Siggraph was showing training on how to fix damaged power lines. This included a pole with sensors on the end of it that gave haptic (vibrations) feedback to the trainee and controlled the virtual pole in the VR environment. There are  niche uses like this that are probably viable.

There are, of course, games, which are VRs best hope for getting into the mainstream. These are MUCH more compelling in the wide open space of a tradeshow than I think they’re going to be in someone’s living room. For the rank and file gamer that doesn’t want to spend $8K on a body suit to run around their living room in… sitting on the couch with a headset is probably going to be less than an awesome experience after the novelty wears off. (and we don’t want to see the average gamer in a body suit. Really. We don’t.)

And then there are VR films. There was a pretty good 5 minute film called Giant being shown at Siggraph. Basically the story of parents and an 8 year old daughter in a basement in a war zone. You sat on a stool that could vibrate, strapped on the headset and you were sitting in a corner of this basement.  It was pretty intense.

However, the vibrating stool that allowed you to feel the bombs being dropped probably added more to the experience than VR. I think it probably would have been more intense as a regular film. The problem with VR is that you can’t do close-ups and multiple cameras. So a regular film would have been able to capture the emotions of the actors better. And it’s VR, so my tendency was to look around the basement rather than to focus on what was happening in the scene. There was very little interesting in the basement besides the actors, so it was just a big distraction.

So if your idea of a good time is watching game cinematics, which is what it felt like, then VR films are for you. And that was a good VR experience. Most VR film stuff I’ve seen are either 1) incredibly bland without a focus point or 2) uses the simulation of an intimate space to shock you. (Giant was guilty of this to some degree) The novelty of this is going to wear off as fast as a 3D axe thrown at the screen.

There are good uses for VR.  It just doesn’t justify the hype and excitement people are projecting onto it. For all the money that’s  pouring into it, it’s disappointing that the demos most companies are still showing (and expecting you to be excited about) are just 360 environments. “But Look! There are balloons falling from the sky! Isn’t it cool?!” Uh… yeah. Got any porn?

Comparing Beauty Box To other Video Plugins for Skin Retouching/Digital Makeup

We get a lot of questions about how Beauty Box compares to other filters out there for digital makeup. There’s a few things to consider when buying any plugin and I’ll go over them here. I’m not going to compare Beauty Box with any filter specifically, but when you download the demo plugin and compare it with the results from other filters this is what you should be looking at:

  • Quality of results
  • Ease of use
  • Speed
  • Support

Support

I’ll start with Support because it’s one thing most people don’t consider. We offer as good of support as anyone in the industry. You can email or call us (415-287-6069). M-F 10am-5pm PST. In addition, we also check email on the weekends and frequently in the evenings on weekdays. Usually you’ll get a response from Tor, our rockstar QA guy, but not infrequently you’ll talk to myself as well. Not often you get tech support from the guy that designed the software. :-)

Quality of Results

The reason you see Beauty Box used for skin retouching on everything from major tentpole feature films to web commercials, is the incredible quality of the digital makeup. Since it’s release in 2009 as the first plugin to specifically address skin retouching beyond just blurring out skin tones, the quality of the results has been critically acclaimed. We won several awards with version 1.0 and we’ve kept improving it since then. You can see many examples here of Beauty Box’s digital makeup, but we recommend you download the demo plugin and try it yourself.

Things to look for as you compare the results of different plugins:

Skin Texture: Does the skin look realistic? Is some of the pore structure maintained or is everything just blurry? It should, usually, look like regular makeup unless you’re going for a stylized effect.
Skin Color: Is there any change in skin tones?
Temporal Consistency: Does it look the same from frame to frame over time? Are there any noticeable seams where the retouching stops.
Masking: How accurate is the mask of the skin tones? Are there any noticeable seams between skin and non-skin areas? How easy is it to adjust the mask?

Ease of Use

One of the things we strive for with all our plugins is to make it as easy as possible to get great results with very little work on your end. Software should make your life easier.

In most cases, you should be able to click on Analyze Frame, make an adjustment to the Skin Smoothing amount to dial in the look you want and be good to go. There are always going to be times when it requires a bit more work but for basic retouching of video, there’s no easier solution than Beauty Box.

When comparing filters, the thing to look for here is how easy is it to setup the effect and get a good mask of the skin tones? How long does it take and how accurate is it?

Speed

If you’ve used Beauty Box for a while, you know that the only complaint we had with it with version 1.0 was that it was slow. No more! It’s now fully GPU optimized and with some of the latest graphics cards you’ll get real time performance, particularly in Premiere Pro. Premiere has added better GPU support and between that the Beauty Box’s use of the GPU, you can get real time playback of HD pretty easily.

And of course we support many different host apps, which gives you a lot of flexibility in where you can use it. Avid, After Effects, Premiere Pro, Final Cut Pro, Davinci Resolve, Assimilate Scratch, Sony Vegas, and NUKE are all supported.

Hopefully that gives you some things to think about as you’re comparing Beauty Box with other plugins that claim to be as good. All of these things factor into why Beauty Box is so highly regarded and considered to be well worth the price.

Back Care for Video Editors Part 3: Posture Exercises: The Good and The Bad

Like Digital Anarchy On Facebook


Posture Exercises: The Good and The Bad

There are a lot of books out there on how to deal with back pain. Most of them are relatively similar and have good things to say. Most of them also have minor problems, but overall, with a little guidance from a good physical therapist, they’re very useful.

Editing Video while sitting on ice is rather unusualYou don’t need to sit on ice to get good posture!

The two of I’ve been using are:

Back RX by Vijay Vad

8 Steps to a Pain Free Back (Gokhale Method)

Both have some deficiencies but overall are good and complement each other. I’ll talk about the good stuff first and get into my problems with them later (mostly minor issues).

There’s also another book, Healing Back Pain, which I’m looking into and says some valuable things. It posits that the main cause of the pain is not actually structural (disc problems, arthritis, etc) but in most cases caused by stress and the muscles tensing. I’ll do a separate post on it as I think the mind plays a significant role and this book has some merit.

BackRX

Back RX is a series of exercise routines designed to strengthen your back. It pulls from Yoga, Pilates, and regular physical therapy for inspiration. If you do them on a regular basis, you’ll start improving the strength in your abs and back muscles which should help relieve pain over the long term.

backRX

As someone that’s done Yoga for quite some time, partially in response to the repetitive stress problems I had from using computers, I found the routines very natural. Even if you haven’t done Yoga, the poses are mostly easy, many of them have you lying on the floor, and are healthy for your back. You won’t find the deep twisting and bending poses you might be encouraged to do at a regular yoga studio.

It also encourages mind/body awareness and focuses a bit on breathing exercises. The book doesn’t do a great job of explaining how to do this. If you’re not already a yoga practitioner or have a meditation practice you’ll need some guidance. The exercises have plenty of value even if you don’t get into that part of it. However, mindfulness is important. Here are a few resources on using meditation for chronic pain:

Full Catastrophe Living
Mindfulness Based Stress Reduction
You Are Not Your Pain

Gokhale Method

The 8 Steps to a Pain Free Back (Gokhale Method) is another good book that takes a different approach. BackRX provides exercise routines you can do in about 20 minutes. The Gokhale Method shows modifications to the things we do all the time… lying, sitting, standing, bending, etc. These are modifications you’re supposed to make throughout the day.

She has something of a backstory about how doctors these days don’t know what a spine should look like  and that people had different shaped spines in the past. In a nutshell, the argument is that because we’ve become so much more sedentary over the last 100 years (working in offices, couch potato-ing, etc) our spines are less straight and doctors now think this excessively curved spine is ‘normal’. I’m very skeptical of this as some of her claims are easily debunked (more on that later). However, it does not take away from the value of the exercises. Whether you buy into her marketing or not, she’s still promoting good posture and that’s the important bit.

Some of her exercises you will find similar to other Posture books. Other Gokhale exercises are novel. They may not all resonate with you, but I’ve found several to be quite useful.

Some good posture advice if you're sitting in front of a computerAll of the exercises focus on lengthening the spine and provide ways to hold that posture above and beyond the usual ‘Sit up straight!’. She sells a small cushion that mounts on the back of your chair. I’ve found this useful, if only in constantly reminding me to not slump in my Steelcase chair (completely offsetting why you spent the money on a fancy chair). It prevents me from leaning back in the chair, which is the first step to slumping. It also does help keep your back a bit more straight. There are some chairs that are not well designed and the cushion does help.

In both books, there’s an emphasis on stretching your spine and strengthening your ab/core muscles and back muscles. BackRX focuses more on the strengthening, Gokhale focuses more on the stretching.

But ultimately they only work if you’re committed to doing them over the long term. You also have to be vigilant about your posture. If you’re in pain, this isn’t hard as your back will remind with pain whenever you’re not doing things correctly. It’s harder if you’re just trying to develop good habits and you’re not in pain already.

Most people don’t think about this at all, which is why 80% of the US population will develop back pain problems at some point. So even if you only read the Gokhale book and just work on bending/sitting/walking better you’ll be ahead of the game.

So what are the problems with the books?

Both the Gokhale Method and BackRX have some issues. (again, these don’t really detract from the exercises in the book… but before you run out and tell your doctor his medical school training is wrong, you might want to consider these points)

Gokhale makes many claims in her book. Most of them involve how indigenous cultures sit/walk/etc and how little back pain is in those cultures. These are not easily testable. However, she makes other claims that can be tested. For one, she shows a drawing of a spine from around 1900 and drawing that she claims was in a recent anatomy book. She put this forth as evidence that spines used to look different and that modern anatomy books don’t show spines they way they’re supposed to look. This means modern doctors are being taught incorrectly and thus don’t know what a spine should look like. The reality is that modern anatomy books show spines that look nothing like her example, which is just a horrible drawing of a spine. In fact, illustrations of ‘abnormal’ spines are closer to what she has in her book.

Also, most of the spine illustrations from old anatomy books are pretty similar to modern illustrations. On average the older illustrations _might_ be slightly straighter than modern illustrations, but mostly they look very similar.

She also shows some pictures of statues to illustrate everyone in ancient times walked around with a straight back. She apparently didn’t take Art History in college and doesn’t realize these statues from 600 BC are highly stylized and were built like that because they lacked the technology to sculpt more lifelike statues. So, No, everyone in ancient Greece did not ‘walk like an Egyptian’.

BackRX has a different issue. Many of the photos they show of proper poses are correct for the Back, BUT not for the rest of the body. A common pose called Tree Pose is shown with the foot against the knee, similar to this photo:

How not to do tree pose - don't put your foot on your opposite knee This risks injury to the knee!  The foot should be against the side of the upper thigh.

Likewise, sitting properly at a desk is shown with good back posture, but with forearms and wrist positioned in such a way to ensure that the person will get carpel tunnel syndrome. These are baffling photos for a book discussing how to take care of your body.

Most of the exercises in this book are done lying down and are fine. For sitting and standing poses I recommend googling the exercise to make sure it’s shown correctly. For example, google ‘tree pose’ and compare the pictures to what’s in the book.

Overall they’re both good books despite the problems. The key thing is to listen to your body.  Everything that is offered may not work for you so you need to experiment a bit. This includes working with your mind, which definitely has an effect on pain and how you deal with it.

Computers and Back Care part 2: Forward Bending

Like Digital Anarchy On Facebook


Go to Part 1 in the Back Care series

Most folks know how to pick up a heavy box. Squat down, keep your back reasonably flat and upright and use your legs to lift.

However, most folks do not know how to plug in a power cord. (as the below photo shows)

How to bend forward if you're plugging in a power cord

Forward bending puts a great deal of stress on your back and we do it hundreds of times a day. Picking up your keys, putting your socks on, plugging in a power cord, and on and on. This is why people frequently throw their backs out sneezing or picking up some insignificant thing off the floor like keys or clothing.

While normally these don’t cause much trouble, the hundreds of bends a day add up. Especially if you sit in a chair all day and are beating up your back with a bad chair or bad posture. Over time all of it weakens your back, degrades discs, and causes back pain.

So what to do?

There are a couple books I can recommend. Both have some minor issues but overall they’re very good. I’ll talk about them in detail in Part 3 of this series.

Back RX by Vijay Vad
8 Steps To a Pain Free Back by Esther Gokhale

Obviously for heavy objects, keep doing what you’re probably already doing: use your legs to lift.

But you also want to use your legs to pick up almost any object. Using the same technique to pick up small objects works as well. That said, all the squatting can be a bit tough on the knees, so lets talk about hip hinging.

Woman hinging from the hips in a way that puts less pressure on your back(the image shows a woman stretching but she’s doing it with a good hip hinge. Since it’s a stretch, it’s, uh, a bit more exaggerated than you’d do picking something up. Not a perfect image for this post, but we’ll roll with it.)

Imagine your hip as a door hinge. Your upright back as the door and your legs as the wall. Keep your back mostly flat and hinge at the hips. Tilting your pelvis instead of bending your back. Then bend your legs to get the rest of the way to the floor. This puts less strain on your back and not as much strain on your knees as going into a full squat. Also, part of it is to engage your abs as you’re hinging. Strong abs help maintain a strong back.

Directions on how to hip hinge, showing a good posture

There’s some disagreement on the best way to do this. Some say bend forward (with your knees slightly bent) until you feel a stretch in your hamstrings, then bend your knees. I usually hinge the back and bend the knees at the same time. This feels better for my body, but everyone is different so try it both ways. There is some truth that the more length you have in your hamstrings, the more you can hinge. However, since most people, especially those that sit a lot, have tight hamstrings, it’s just easier to hinge and bend at the same time.

But the really important bit is to be mindful of when you’re bending, regardless of how you do it. Your back isn’t going to break just from some forward bending, but the more you’re aware of how often you bend and doing it correctly as often as possible, the better off you’ll be.

This also applies to just doing regular work, say fixing a faucet or something where you have to be lower to the ground. If you can squat and keep a flat back instead of bending over to do the work, you’ll also be better off.

If this is totally new to you, then your back may feel a little sore as you use muscles you aren’t used to using. This is normal and should go away. However, it’s always good to check in with your doctor and/or physical therapist when doing anything related to posture.

In Part 3 I’ll discuss the books I mentioned above and some other resources for exercises and programs.

Taking Care of Your Back for Video Editors, Part 1: The Chair

Like Digital Anarchy On Facebook


Software developers, like video editors, sit a lot. I’ve written before about my challenges with Repetitive  Stress Problems and how I dealt with them. (Awesome chair, great ergonomics, and a Wacom tablet). These problems are more about my wrists, shoulders, and neck.

I fully admit to ignoring everyone’s advice about sitting properly and otherwise taking care of my back, so I expect you’ll probably igrnore this (unless you already have back pain). But you shouldn’t. And maybe some of you will listen and get some tips to help you avoid having to take a daily diet of pain meds just to get through a video edit.

Video editors need good posture

I’ve also always had problems with my back. The first time I threw it out I was 28, playing basketball. Then add in being physically active in a variety of other ways… martial arts, snowboarding, yoga, etc… my back has taken some beatings over the years. And then you factor in working at a job for the last 20 years that has me sitting a lot.

And not sitting very well for most of those 20 years. Hunched over a keyboard and slouching in your chair at the same time is a great way of beating the hell out of your back and the rest of your body. But that was me.

So, after a lot of pain and an MRI showing a couple degraded discs, I’m finally taking my back seriously. This is the first of several blog posts detailing some of the things I’ve learned and what I’m doing for my back. I figure it might help some of you all.

I’ll start with the most obvious thing: Your chair. Not only your chair BUT SITTING UPRIGHT IN IT. It doesn’t help you to have a $1000 chair if you’re going to slouch in it. (which I’m known to be guilty of)

A fully adjustable chair can help video editors reduce back pain

The key thing about the chair is that it’s adjustable in as many ways as possible. This way you can set it up perfectly for your body, which is key. Personally, I have a Steelcase chair which I like, but most high end chairs are very configurable and come in different sizes. (I’m not sure the ‘ball chair’ is going to be good for video editing, but some people love them for normal office work) There are also adjustable standing desks, which allow you to alternate between sitting and standing, which is great. Being in any single position for too long is stressful on your body.

The other key thing is your posture. Actually sitting in the chair correctly. There are slightly different opinions  on what is precisely the best sitting posture (see Part 3 for more on this), but generally, the illustration below is a good upright position. Feet on the ground, knees at right angles, butt all the way back with some spine curvature, but not too much, the shoulders slightly back and the head above the shoulders (not forward as we often do, which puts a lot of strain on the neck. If you keep leaning in to see your monitor, get glasses or move the monitor closer!).

It can also help to have your abdominal muscle engaged to prevent to much curvature in the spine. This can be a little bit of work, but if you’re paying attention to your posture, then it should just come naturally as you maintain the upright position.

You want to sit upright in your chair for good back healthThere’s a little bit of disagreement on how much curvature you should have while sitting. Some folks recommend even less than what you see above. We’ll talk more about it in Part 3.

One other important thing is to take breaks, either walk around or stretch. Sitting for long periods really puts a lot of stress on your discs and is somewhat unnatural for your body, as your ancestors probably weren’t doing a lot of chair sitting. Getting up to walk, do a midday yoga class, or just doing a little stretching every 45 minutes or so will make a big difference. This is one of the reasons a standing desk is helpful.

So that’s it for part 1. Get yourself a good chair and learn how to sit in it! It’ll greatly help you keep a healthy, happy back.

In Part 2 we’ll discuss picking up your keys, sneezing, and other dangers to back health lurking in plain sight.

We Live in A Tron Universe: NASA, Long Exposure Photography and the Int’l Space Station

Like Digital Anarchy On Facebook


I’m a big fan of long exposure photography (and time lapse, and slow motion, etc. etc. :-). I’ve done some star trail photography from the top of Haleakala in Maui. 10,000 feet up on a rock in the middle of the Pacific is a good place for it! So I was pretty blown away by some of the images released by NASA that were shot by astronaut Don Pettit.

Long Exposure photos of star trails from spaceI think these have been up for a while, they were shot in 2012, but it’s the first I’ve seen of them. Absolutely beautiful imagery. Although they make the universe look like the TRON universe. These were all shot with 30 second exposures and then combined together, as Don says:

“My star trail images are made by taking a time exposure of about 10 to 15 minutes. However, with modern digital cameras, 30 seconds is about the longest exposure possible, due to electronic detector noise effectively snowing out the image. To achieve the longer exposures I do what many amateur astronomers do. I take multiple 30-second exposures, then ‘stack’ them using imaging software, thus producing the longer exposure.”

You can see the entire 36 photo set on Flickr.

Having done long exposures myself that were 10 or 15 minutes, the images are noisy but not that bad. I wonder if being in space causes the camera sensors to pick up more noise. If anyone knows, feel free to leave a comment.

If you’re stuck doing star photography from good ol’ planet Earth, then noise reduction software helps. You also want to shoot RAW as most RAW software will automatically remove dead pixels. These are particularly annoying with astro photography.

But the space station photos are really amazing, so head over to Flickr and check them out! These are not totally public domain, they can’t be used commercially, but you can download the high res versions of the photos and print or share them as you see fit. Here’s a few more to wet your appetite:

The shots were created in Photoshop by combining multiple 30 second exposure photosAmazing TRON like photos taken from the space station

The Problem of Slow Motion Flicker during Big Sporting Events: NCAA Tournament

Like Digital Anarchy On Facebook


Shooting slow motion footage, especially very high speed shots like 240fps or 480fps, results in flicker if you don’t have high quality lights. Stadiums often have low quality industrial lighting, LEDs, or both. Resulting in flicker during slow motion shots even on nationally broadcast, high profile sporting events.

I was particularly struck by this watching the NCAA Basketball Tournament this weekend. Seemed like I was seeing flicker on  half of the slow motion shots. You can see a few in this video (along with Flicker Free plugin de-flickered versions of the same footage):

To see how to get rid of the flicker you can check out our tutorial on removing flicker from slow motion sports.

The LED lights are most often the problem. They circle the arena and depending on how bright they are, for example if it’s turned solid white, they can cast enough light on the players to cause flicker when played back in slow motion. Even if they don’t cast light on the players they’re visible in the background flickering. Here’s a photo of the lights I’m talking about in Oracle arena (white band of light going around the stadium):

Deflickering stadium lights can be done with Flicker Free

While Flicker Free won’t work for live production, it works great for de-flickering this type of flicker if you can render it in a video editing app, as you can see in the original example.

It’s a common problem even for pro sports or high profile sporting events (once you start looking for it, you see it a lot). So if you run into with your footage, check out the Flicker Free plugin for most video editing applications!

Tips on Photographing Sports – Sneaking a Lens In and Other Stories

Like Digital Anarchy On Facebook


I love photographing sports. It’s a lot like shooting wildlife/Humpback Whales in many ways. It requires a lot of patience and quick shooting skills.

Unfortunately, I’m usually limited to shooting from the stands. So this makes the process a little harder but if you can get good seats you can make it work. As it happens, I recently got third row seats to the Golden State Warriors game against the Lakers. So here are a few tips for getting great shots if you can’t actually get a press pass.

Depth of field is always important when photographing sports

The first thing you need to check is how long of a lens you’re allowed to bring in. In this case it was a 3″ or less. So that’s what needs to be attached to the camera. (see the end of the article for some ‘other’ suggestions)

I ended up using a 100mm f2 lens for these shots, which is exactly 3″. You want as fast of a lens as possible. You’re not going to be able to use a flash, so you’re reliant on the stadium lighting which isn’t particularly bright. f2.8 is really a minimum and even then you’ll have the ISO higher than you’d like. Like wildlife, the action moves fast, so the wider the aperture, the faster the shutter speed you’ll have, and the sharper the shots will be.

The minimum shutter speed is probably about 1/500 and you’d like 1/2000 or higher. Hence the need for a f2 or f2.8 lens. Otherwise, the action shots, where you really want it to be sharp, will be a bit blurry.

Seat placement matters. Obviously you want to be as close as possible, but you also want to be at the ends of the court/field. That’s where most of the action happens. Center court seats may be great for watching the game, but behind the goal seats get you up close and personal for half of the action. Much better for photography and hence one of the reasons the press photogs are on the baseline.

Photographing basketball is best from the baseline

What if you’re not happy with a 3″ lens? Well, you COULD give a friend a larger lens and let them try and smuggle it in. Since it’s not attached to the camera, most of the security people don’t recognize it as a camera lens. Just say it’s, you know, a binocular or something (monocular? ;-). Usually it works, worst thing that happens is you have to go back to the car and store it. You’re not trying to break the rules, you’re, uh, helping train the security staff.

If you do manage to get a larger lens in, don’t expect to be able to use it much. One of the ushers will eventually spot it (especially if it’s a big, white, L Canon lens) and call you on it. You’ll have to swap it for the other lens (or risk getting kicked out). Wait until the game is well underway before trying to use it.

Of course, the basic tips apply… Shoot RAW, make sure you have a large, empty memory card(s), a fully charged battery, don’t spill beer on the camera, etc., etc. But the critical component is getting close to  the end of the court and having a very fast shutter speed (which usually means a very wide aperture).

Shooting RAW is soooo critical. It’ll give you some flexibility to adjust the exposure and do some sharpening. Since you’ll probably have a relatively high ISO, the noise reduction capabilities are important as well. Always shoot RAW.

If you’re a photographer that loves sports, it is definitely fun to get good seats and work on your sports shooting skills. Can be a bit expensive to do on a regular basis though!

Fast Shutter Speed and very wide aperture is critical for shooting sports


Tips on Photographing Whales – Underwater and Above

Like Digital Anarchy On Facebook


I’ve spent the last 7 years going out to Maui during the winter to photograph whales. Hawaii is the migration destination of the North Pacific Humpback Whales. Over the course of four months, it’s estimated that about 12,000 whales migrate from Alaska to Hawaii. During the peak months Jan 15 – March 15th or so, there’s probably about 6000+ whales around Hawaii. This creates a really awesome opportunity to photograph them as they are EVERYWHERE.

Many of the boats that go out are small, zodiac type boats. This allows you to hang over the side if you’ve got an underwater camera. Very cool if they come up to the boat, as this picture shows! (you can’t dive with them as it’s a national sanctuary for the whales)

A photographer can hang over the side of a boat to get underwater photos of the humpback whales.

The result is shots like this below the water:

Photographing whales underwater is usually done hanging over the side of a boat.

Or above the water:

A beautiful shot of a whale breaching in Maui

So ya wanna be whale paparazzi? Here are a few tips on getting great photographs of whales:

1- Patience: Most of the time the whales are below the water surface and out of range of an underwater camera. There’s a lot of ‘whale waiting’ going on. It may take quite a few trips before a whale gets close enough to shoot underwater. To capture the above the water activity you really need to pay attention. Frequently it happens very quickly and is over before you can even get your camera up if you’re distracted by talking or looking at photos on your camera. Stay present and focused.

2- Aperture Priority mode: Both above and below the water I set the camera to Aperture Priority and set the lowest aperture I can, getting it as wide open as possible. You want as fast of a shutter speed as possible (for 50 ton animals they can move FAST!) and setting it to the widest aperture will do that. You also want that nice depth of field a low fstop will give you.

3- AutoFocus: You have to have autofocus turned on. The action happens to fast to manually focus. Also, use AF points that are calculated in both the horizontal and vertical axes. Not all AF points are created the same.

4- Lenses: For above the water, the 100mm-400mm is a good lens for the distance the boats usually tend to stay from the whales. It’s not great if the whales come right up to the boat… but that’ s when you bust out your underwater camera with a very wide angle or fisheye lens. With underwater photography, at least in Maui, you can only photograph the whales if they come close to the boat.  You’re not going to be able to operate a zoom lens hanging over the side of a boat. So set a pretty wide focal length when you put it into the housing. I’ve got a 12-17mm Tokina fisheye and usually set it to about 14mm. This means the whale has to be within about 10 feet of the boat to get a good shot. But due to underwater visibility, that’s pretty much the case no matter what lens you have on the camera.

5- Burst Shooting: Make sure you set the camera to burst mode. The more photos the camera can take when you press and hold the shutter button the better.

6- Luck: You need a lot of luck. But part of luck is being prepared to take advantage of the opportunities that come up. So if you get a whale that’s breaching over and over, stay focused with your camera ready because you don’t know where he’s going to come up. Or if a whale comes up to the boat make sure that underwater camera is ready with a fully charged battery, big, empty flash card and you know how to use the controls on the housing. (trust me… most of these tips were learned the hard way)

Many whale watches will mostly be comprised of ‘whale waiting’. But if you stay present and your gear is set up correctly, you’ll be in great shape to capture those moments when you’re almost touched by a whale!

Whale photographed that was just out of arms reach. The whale is just about touching the camera.

Avoiding Prop Flicker when Shooting Drone Video Footage

Like Digital Anarchy On Facebook


We released a new tutorial showing how to remove prop flicker, so if you have flicker problems on drone footage, check that out. (It’s also at the bottom of this post)

But what if you want to avoid prop flicker altogether? Here’s a few tips:

But first, let’s take a look at what it is. Here’s an example video:

1- Don’t shoot in such a way that the propellers are between the sun and the camera. The reason prop flicker happens is the props are casting shadows onto the lens. If the sun is above and in front of the lens, that’s where you’ll get the shadows and the flicker. (shooting sunrise or sunset is fine because the sun is below the props)

1b- Turning the camera just slightly from the angle generating the flicker will often get rid of the flicker. You can see this in the tutorial below on removing the flicker.

2- Keep the camera pointed down slightly. It’s more likely to catch the shadows if it’s pointing straight out from the drone at 90 degrees (parallel to the props). Tilt it down a bit, 10 or 20 degrees, and that helps a lot.

3- I’ve seen lens hoods for the cameras. Sounds like they help, but I haven’t personally tried one.

Unfortunately sometimes you have to shoot something in such a way that you can’t avoid the prop flicker. In which cases using a plugin like Flicker Free allows you to eliminate or reduce the flicker problem. You can see how to deflicker videos with prop flicker in the below tutorial.

Removing Flicker from Drone Video Footage caused by Prop Flicker

Like Digital Anarchy On Facebook


Drones are all the rage at the moment, deservedly so as some of the images and footage  being shot with them are amazing.

However, one problem that occurs is that if the drone is shooting with the camera at the right angle to the sun, shadows from the props cause flickering in the video footage. This can be a huge problem, making the video unusable. It turns out that our Flicker Free plugin is able to do a good job of removing or significantly reducing this problem. (of course, this forced us to go out and get one. Research, nothing but research!)

Here’s an example video showing exactly what prop flicker is and why it happens:

There are ways around getting the flicker in the first place: Don’t shoot into the sun, have the camera pointing down, etc. However, sometimes you’re not able to shoot with ideal conditions and you end up with flicker.

Our latest tutorial goes over how to solve the prop flicker issue with our Flicker Free plugin. The technique works in After Effects, Final Cut Pro, Avid, Resolve, etc. However the tutorial shows Flicker Free being used in Premiere Pro.

The full tutorial is below. You can even download the original flickering drone video footage and AE/Premiere project files by clicking here.