Tag Archives: wildlife

The Rule of Thirds in Practice

Most of us have heard of the rule of thirds. And probably for most readers of this blog it’s second nature by now. But for those somewhat new to photo/videography or if you just want to see how someone else uses/breaks the rules, I figured a serendipitous photoshoot recently would be a good example.

What is the Rule of Thirds? It’s splitting an image into three parts vertically and horizontally. This can help you create a more pleasing image composition. And like all rules, it’s meant to be bent and broken. Let’s talk about how to use it.

Sometimes you use the rule of thirds while you’re shooting. If you’re doing a portrait, you can pose your model, frame her in camera and take the shot.

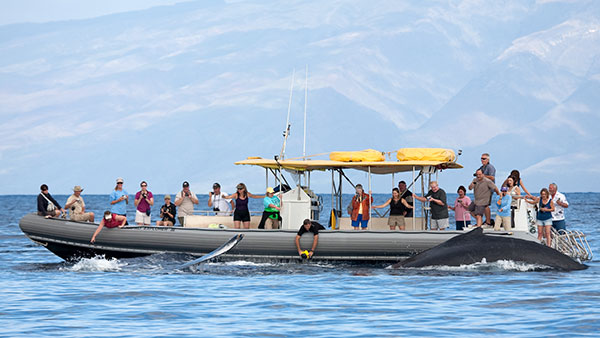
Personally, I tend to be more of a wildlife photographer. Birds and whales don’t usually pose for you… you’re just trying to take the shot as fast as f’ing possible while you have the chance! You can crop the photo later to make it fit the rule of thirds (or not).

Recently I was sitting on the balcony of my house and a hawk decided to perch himself right in front of me on a neighbors house. So, grabbed the camera for an impromptu photoshoot:

Those are the cropped ‘rule of third’ shots. Here are the original shots (which are cool in their own way by showing more of the environment):

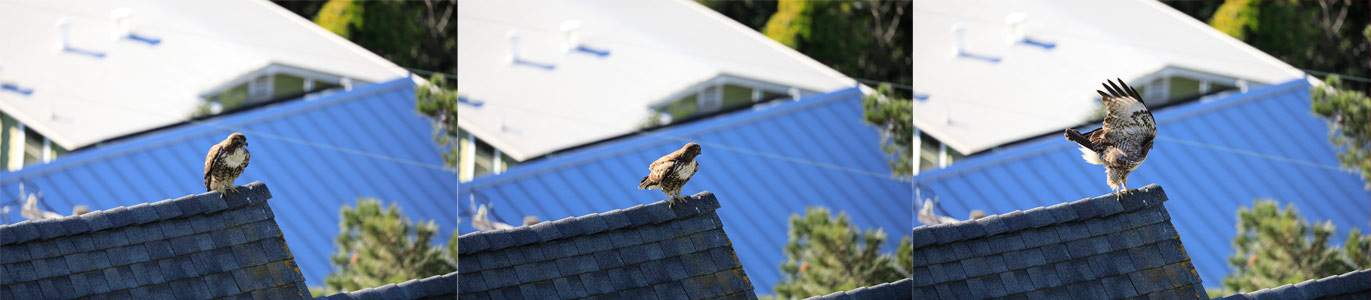
Let’s talk about why I cropped them the way I did. First off, look at the cropped images. Did you notice that I’m trying to tell a small story with how they’re cropped? (or, at least, framing things so there’s some context to the sequence of images)

Let’s take a look at the first image. One of the things that makes the Rule of Third compelling is that asymmetrical compositions generally look better. But not always! Here we have the ‘hero’ shot of our hawk. I’m introducing him and, as such, he’s pretty much in the center of the frame.

In the next picture, he turns his head to look at something. Now he’s off center and edging towards left and down. We’re creating space off to the right side of the image. Where is he looking? What is he looking at? I want the viewer to be as curious about that as the hawk is. So I want to add space in the image so you can follow his gaze. 

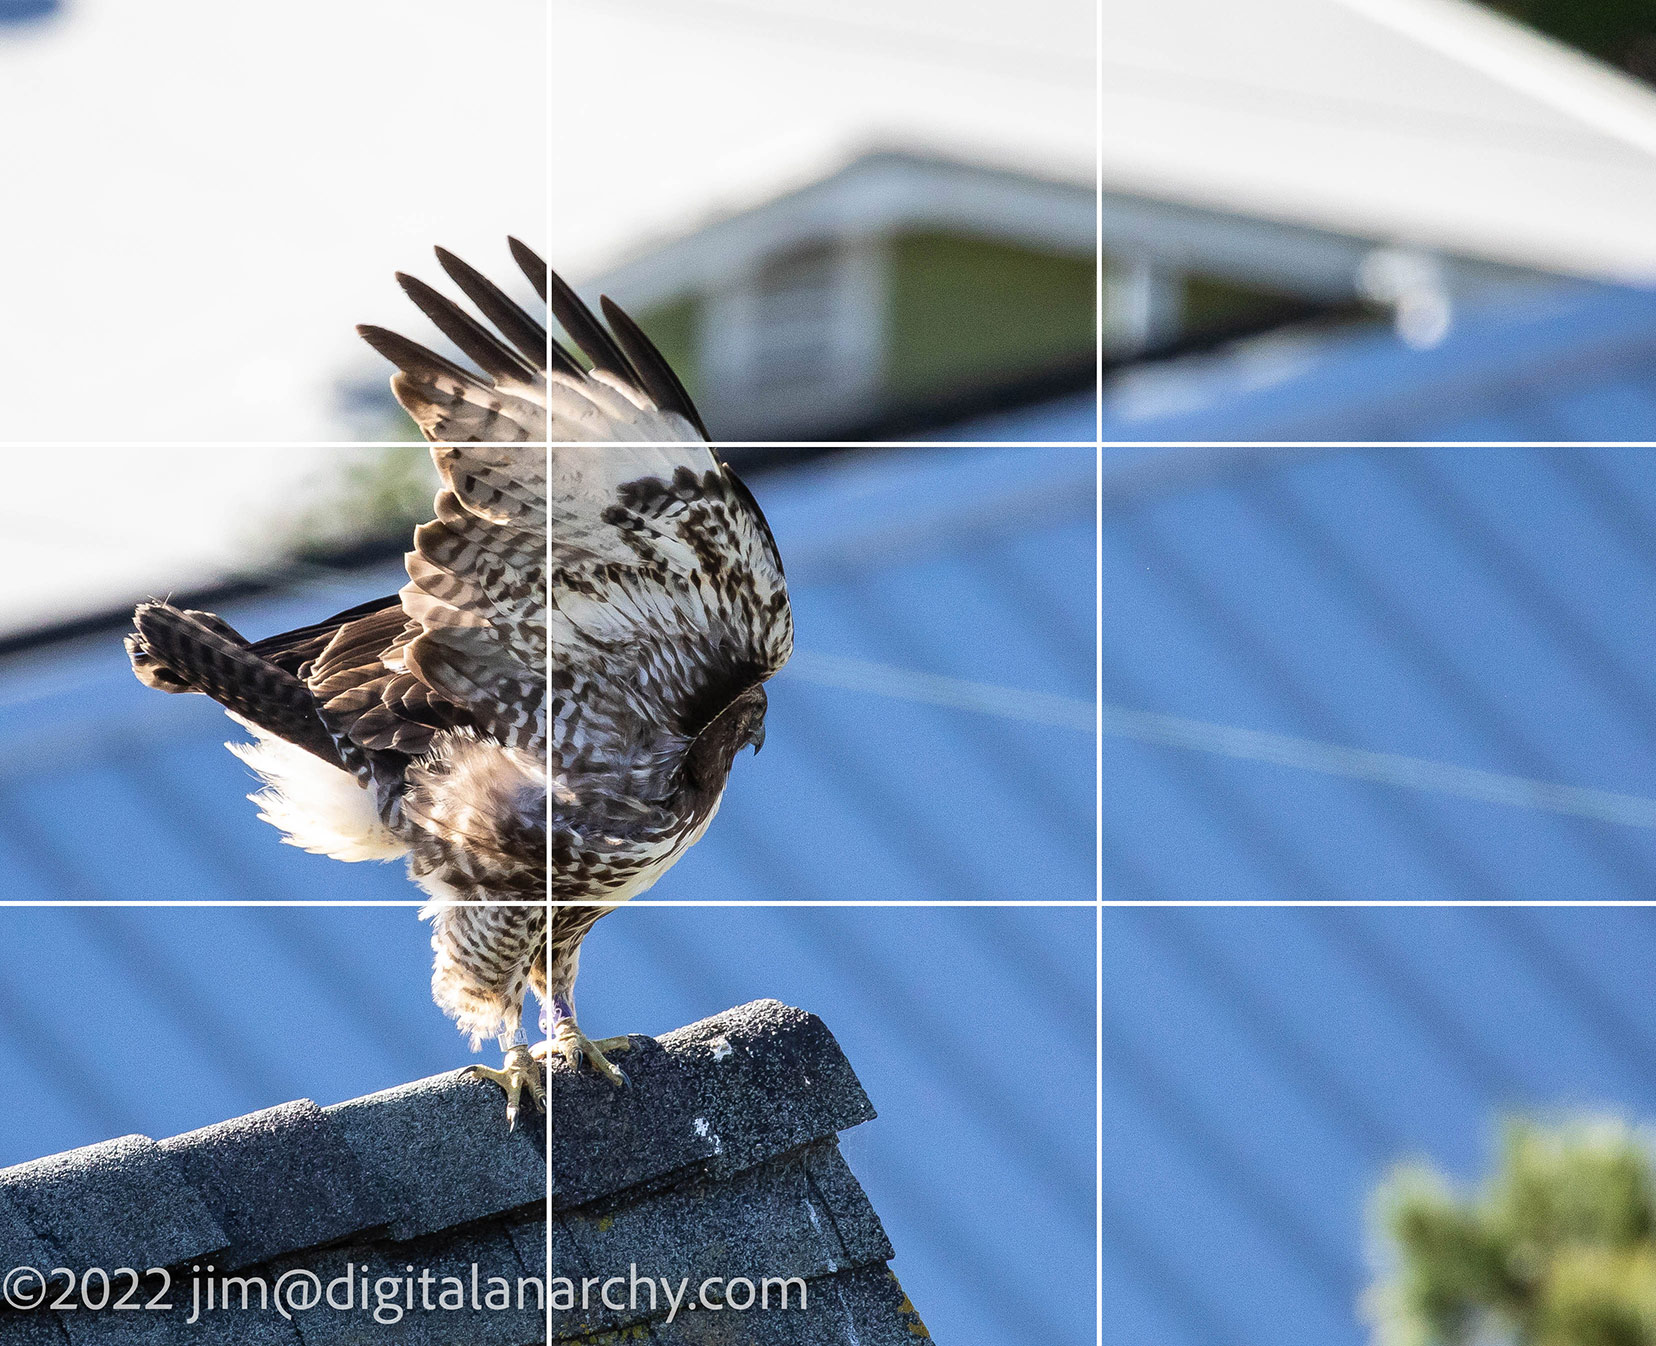
Now he’s preparing to take off! His wings are up and he’s getting ready to fly. I want to add even more space to the right and above him. So I crop the image so he’s split down the middle by the first third line. Because his wings are raised, he’s centered vertically, but he’s still weighted towards the lower third. Hopefully your eye is drawn to where he might be going.

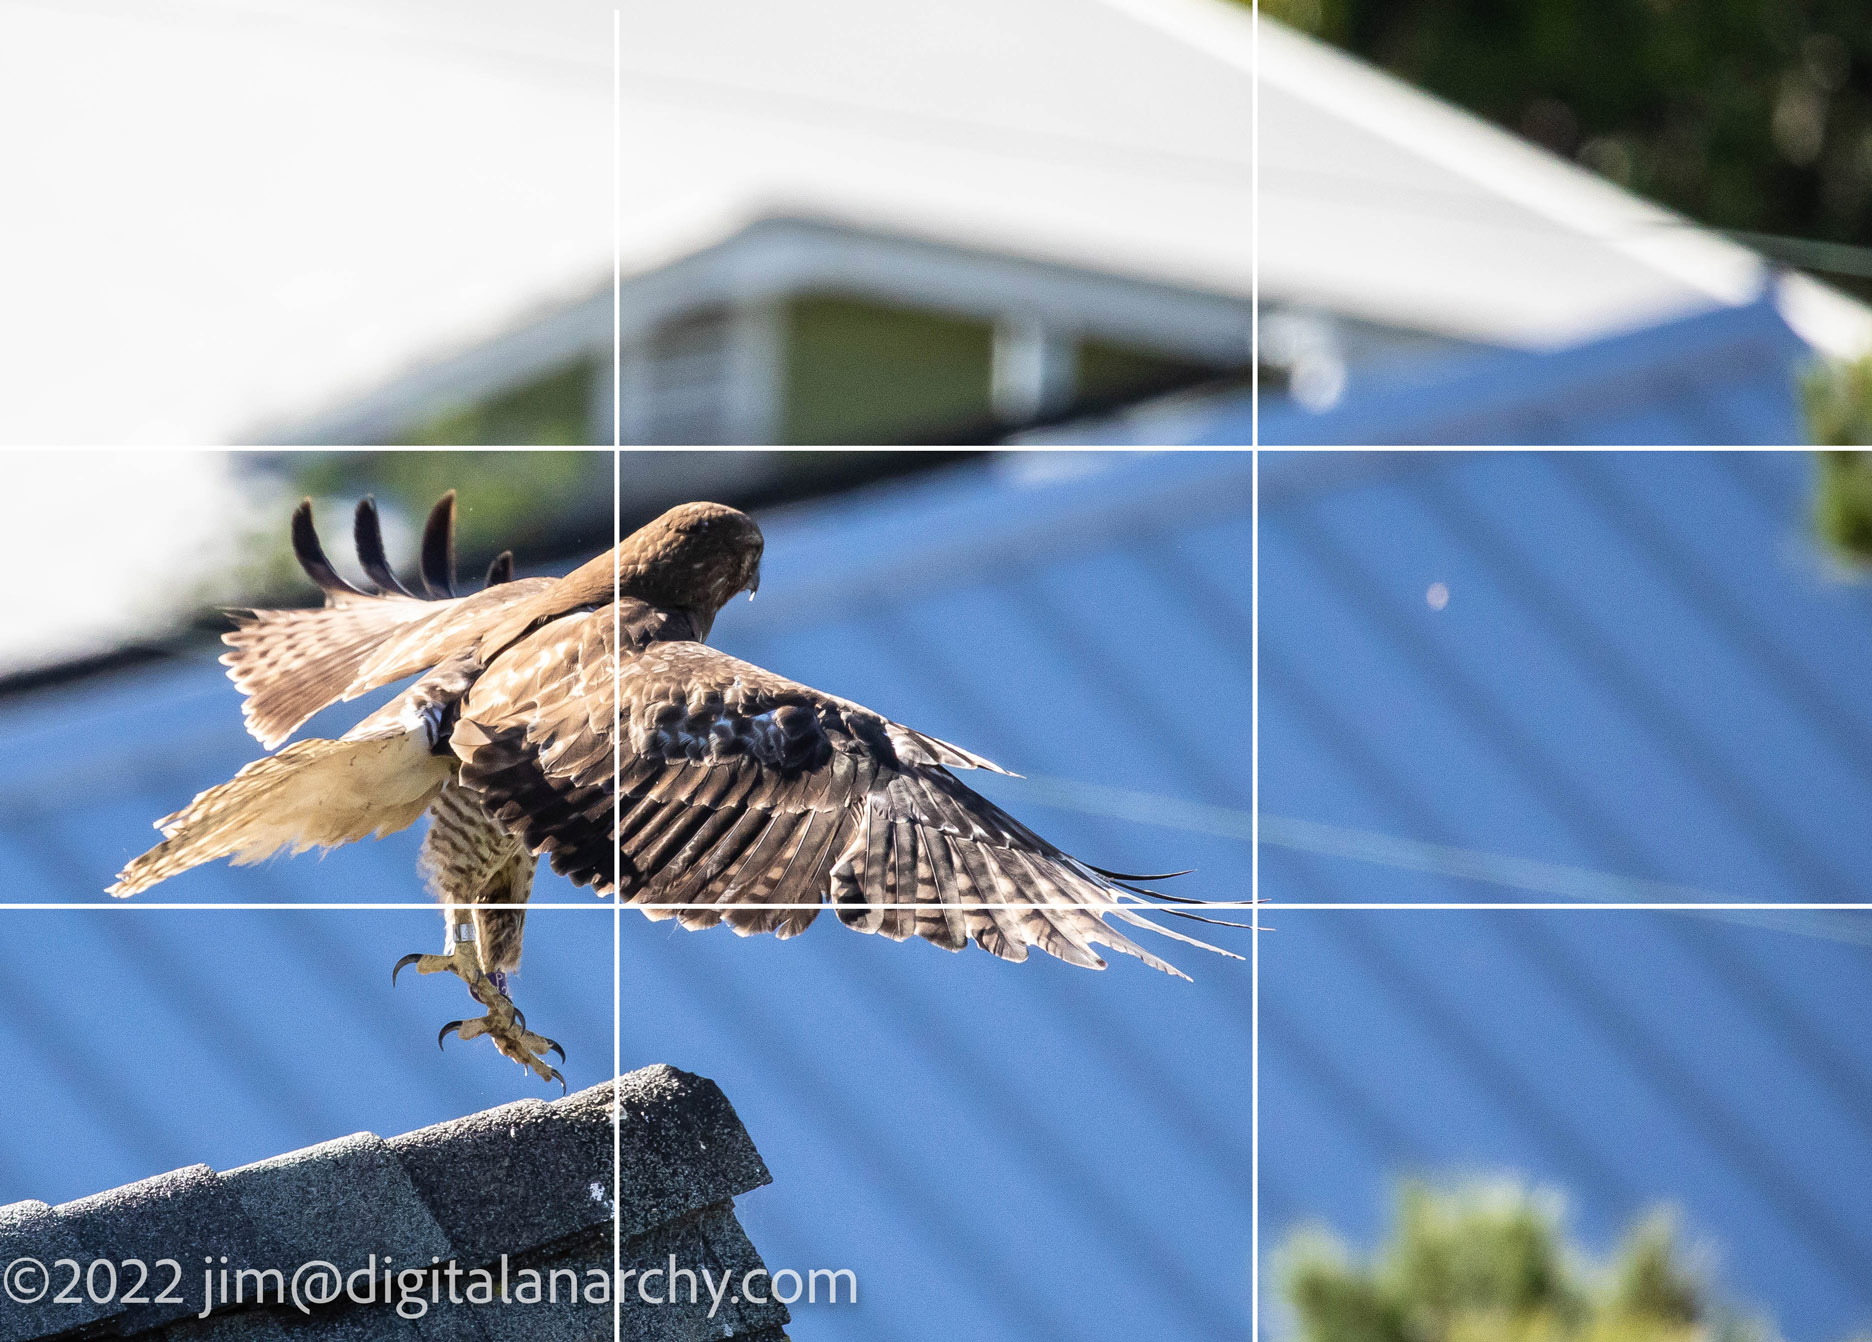
Lift Off! His wings come down and he levitates in preparation to fly. Again, I want the greenery in the shot, so he’s a little lower in the frame than is ideal, but it works. He’s about to take off so having a lot of space up and in the direction he’s going to be flying is all good. (I love this shot… birds of prey are just so amazing) However, usually you don’t want your subject quite so close to the edge. I think it’s a great shot, but you could definitely make the case there’s too much space in the rest of the image. If the trees were closer, I would’ve cropped it differently, but to get them in the image, I had to stretch it a bit towards the upper, right corner. With wildlife you don’t always get to pick your shot!

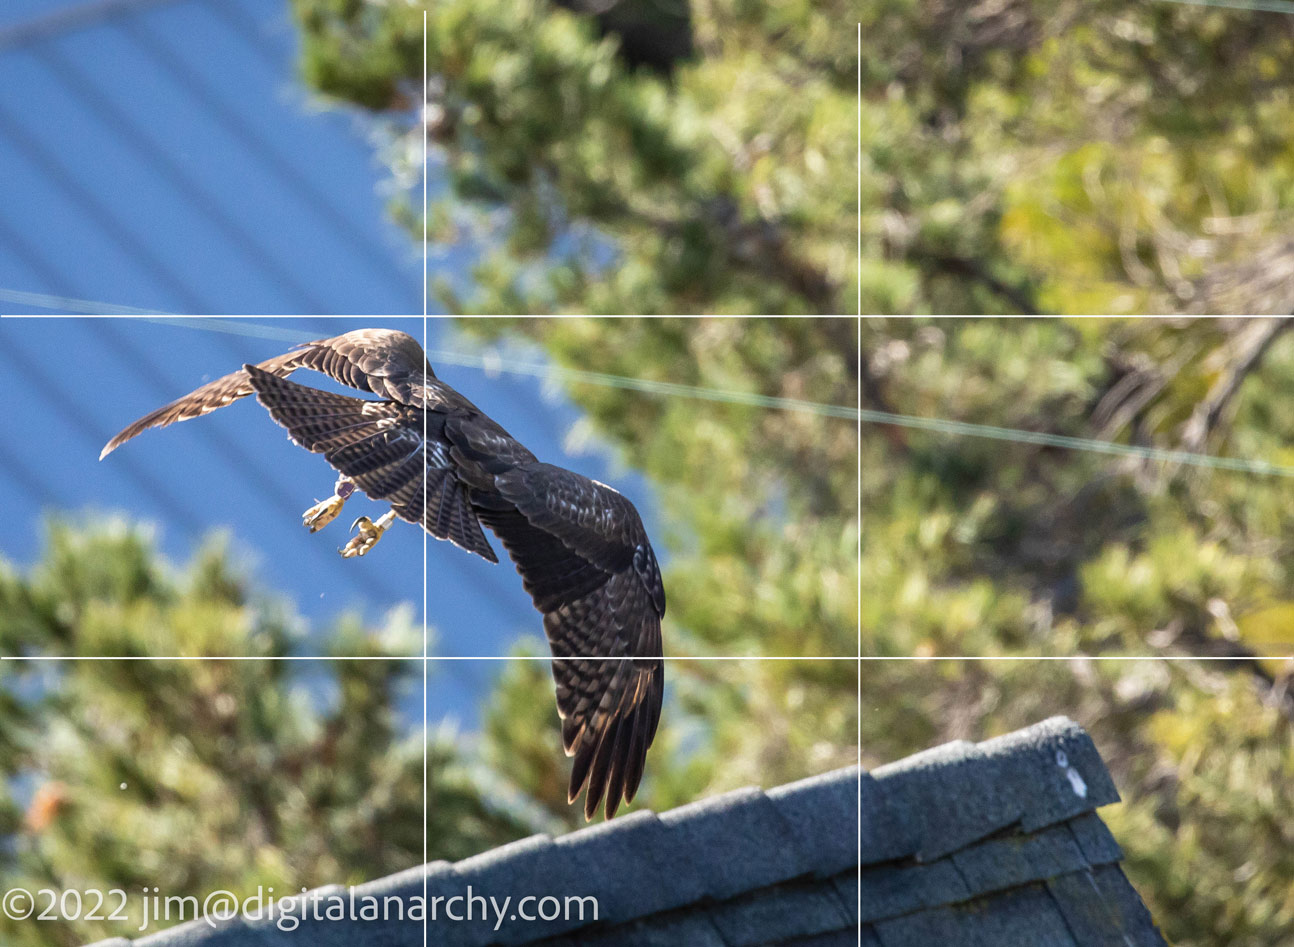
And he’s off! And… so is this image. Why is this not a great composition? The hawk really should be centered more vertically. He’s a little low in the frame. To correct it, I’d at least move where the wing bends into the upper third.

Bonus tip: the glaring issue with all these photos… well, you can see it hopefully. It’s something easily fixed with Photoshop’s Content Aware Fill. And if you can’t see the problem, perhaps it’s absence will give you a clue:

So hopefully that’s a good intro on how to use the rule of thirds. It’s really about drawing the eye in the direction the subject is looking or heading towards. And, of course, it’s not a hard and fast ‘rule’. Just one way to think about composing your images.

Tips on Photographing Whales – Underwater and Above

Like Digital Anarchy On Facebook


I’ve spent the last 7 years going out to Maui during the winter to photograph whales. Hawaii is the migration destination of the North Pacific Humpback Whales. Over the course of four months, it’s estimated that about 12,000 whales migrate from Alaska to Hawaii. During the peak months Jan 15 – March 15th or so, there’s probably about 6000+ whales around Hawaii. This creates a really awesome opportunity to photograph them as they are EVERYWHERE.

Many of the boats that go out are small, zodiac type boats. This allows you to hang over the side if you’ve got an underwater camera. Very cool if they come up to the boat, as this picture shows! (you can’t dive with them as it’s a national sanctuary for the whales)

A photographer can hang over the side of a boat to get underwater photos of the humpback whales.

The result is shots like this below the water:

Photographing whales underwater is usually done hanging over the side of a boat.

Or above the water:

A beautiful shot of a whale breaching in Maui

So ya wanna be whale paparazzi? Here are a few tips on getting great photographs of whales:

1- Patience: Most of the time the whales are below the water surface and out of range of an underwater camera. There’s a lot of ‘whale waiting’ going on. It may take quite a few trips before a whale gets close enough to shoot underwater. To capture the above the water activity you really need to pay attention. Frequently it happens very quickly and is over before you can even get your camera up if you’re distracted by talking or looking at photos on your camera. Stay present and focused.

2- Aperture Priority mode: Both above and below the water I set the camera to Aperture Priority and set the lowest aperture I can, getting it as wide open as possible. You want as fast of a shutter speed as possible (for 50 ton animals they can move FAST!) and setting it to the widest aperture will do that. You also want that nice depth of field a low fstop will give you.

3- AutoFocus: You have to have autofocus turned on. The action happens to fast to manually focus. Also, use AF points that are calculated in both the horizontal and vertical axes. Not all AF points are created the same.

4- Lenses: For above the water, the 100mm-400mm is a good lens for the distance the boats usually tend to stay from the whales. It’s not great if the whales come right up to the boat… but that’ s when you bust out your underwater camera with a very wide angle or fisheye lens. With underwater photography, at least in Maui, you can only photograph the whales if they come close to the boat.  You’re not going to be able to operate a zoom lens hanging over the side of a boat. So set a pretty wide focal length when you put it into the housing. I’ve got a 12-17mm Tokina fisheye and usually set it to about 14mm. This means the whale has to be within about 10 feet of the boat to get a good shot. But due to underwater visibility, that’s pretty much the case no matter what lens you have on the camera.

5- Burst Shooting: Make sure you set the camera to burst mode. The more photos the camera can take when you press and hold the shutter button the better.

6- Luck: You need a lot of luck. But part of luck is being prepared to take advantage of the opportunities that come up. So if you get a whale that’s breaching over and over, stay focused with your camera ready because you don’t know where he’s going to come up. Or if a whale comes up to the boat make sure that underwater camera is ready with a fully charged battery, big, empty flash card and you know how to use the controls on the housing. (trust me… most of these tips were learned the hard way)

Many whale watches will mostly be comprised of ‘whale waiting’. But if you stay present and your gear is set up correctly, you’ll be in great shape to capture those moments when you’re almost touched by a whale!

Whale photographed that was just out of arms reach. The whale is just about touching the camera.